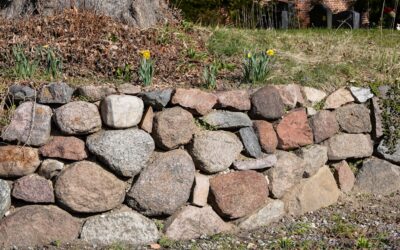
The wall that fails within a few years almost always fails for the same reason: someone skipped the base and the drainage to save a weekend. Learning how to build a retaining wall with blocks the correct way is less about muscle and more about the parts you cannot see once the project is done. Get the gravel base, the leveling, and the backfill drainage right, and interlocking concrete blocks will hold back soil for 30 years or more with zero maintenance. This guide walks through the entire process so your wall stays straight, sheds water, and never bows outward.
- Plan the Wall and Check the Rules First
- Gather Your Materials and Tools
- Excavate and Build the Base Trench
- Set the First Course Dead Level
- Stack Courses With a Running Bond
- Install Drainage Behind the Wall
- Backfill, Compact, and Cap the Wall
- Estimating Materials and Cost
- Building Curves and Corners
- Final Checks and Maintenance
Plan the Wall and Check the Rules First
Before buying a single block, sketch the wall’s length, height, and curve. Height is the critical number. Most municipalities require an engineered design and a permit for any retaining wall over 4 feet tall, measured from the bottom of the buried base to the top. Walls taller than that also usually need geogrid reinforcement anchored back into the hillside. If your project is under 4 feet on stable ground, you can typically build it yourself, but always call your local building department to confirm.
Also call 811 to have underground utilities marked before you dig. It is free, it is the law in most states, and hitting a gas or electrical line turns a weekend project into an emergency.
Gather Your Materials and Tools
Having everything on hand keeps the job moving. You will need:
- Interlocking concrete retaining wall blocks and matching cap blocks
- Crushed gravel or Class II road base for the foundation
- 3/4-inch clean drainage gravel for behind the wall
- Perforated drain pipe (4-inch) and landscape fabric
- Coarse sand for the leveling layer, if your block system calls for it
- A plate compactor, a 4-foot level, a rubber mallet, a shovel, and a hand tamper
- A masonry saw or splitter for cutting blocks on curves and corners
Order about 5 to 10 percent extra block to cover cuts and breakage. Running short mid-project and waiting on a second delivery is a common frustration.
Excavate and Build the Base Trench
The foundation is where the wall lives or dies. Dig a trench along the wall line wide enough for the block plus 6 to 8 inches behind it for drainage gravel. For depth, plan to bury the first course. A good rule is to bury one-tenth of the wall’s total height, plus 6 inches for the gravel base. So a 3-foot wall wants a trench roughly 10 to 12 inches deep.
Once excavated, add 6 inches of crushed gravel base and rake it level. Then compact it thoroughly with a plate compactor, passing over it several times. This compacted base is what prevents settling and frost heave, so do not rush it. The surface should be firm enough that your boot barely leaves a print.
Set the First Course Dead Level
No step matters more than laying the first row of blocks perfectly level. Every course above simply follows this one, so an error here multiplies up the wall. Place your first block, set a level across it in both directions, and tap it down with a rubber mallet until it sits true. Add sand or remove gravel in tiny amounts as needed to fine-tune.
Work block by block along the entire first course, checking level side to side and front to back on each one, and checking that the tops align with a string line stretched along the wall. Take your time here. An hour of patience on the base course saves a lifetime of looking at a wall that leans. Once the row is set, sweep off any grit so the next course seats cleanly.
Stack Courses With a Running Bond
Build upward by staggering the vertical joints, just like brickwork. Each block should straddle the seam between the two blocks below it, a pattern called a running bond that ties the wall together and spreads load. Most retaining blocks have a built-in lip or pin system on the back that automatically creates a slight backward lean, called batter, as you stack. That backward tilt is intentional; it lets the wall lean into the hillside and resist the soil’s forward push.
Check level frequently as you go, roughly every course, and use a masonry saw to cut blocks for corners, curves, and the ends. Brush debris off each course before setting the next so nothing throws off your level.
Install Drainage Behind the Wall
Water pressure, not weight, topples most retaining walls. Behind every course you must build a drainage zone. Lay a perforated drain pipe along the base of the wall, sloped slightly, about 1 inch per 8 feet, toward a daylight outlet or drain where water can escape. Wrap the pipe or line the trench with landscape fabric to keep soil from clogging it.
Backfill the space directly behind the blocks with clean 3/4-inch drainage gravel as you build each course, at least 6 to 12 inches thick. This gravel gives water a fast path down to the pipe instead of building hydrostatic pressure against the block faces. Never backfill directly against the wall with the excavated clay soil. Cap the gravel column with fabric before the final topsoil to keep dirt from washing down into it.
Backfill, Compact, and Cap the Wall
With drainage gravel in place behind the blocks, backfill the remaining space with native soil in 6-inch lifts, compacting each layer with a hand tamper before adding the next. Loose backfill settles later and leaves a sinking trench along the top of your wall.
Finish with cap blocks. Run a bead of masonry adhesive along the top course, then set the caps to create a clean, finished edge that also locks the top row in place and keeps water from seeping into the block cores. Grade the soil behind the wall so it slopes gently away, directing surface runoff over the top and away rather than into the backfill.
Estimating Materials and Cost
Before you start, calculate how much block you need so you can price the job and avoid mid-project shortfalls. First, find the wall’s face area by multiplying its length by its height in feet. Then divide by the face area of a single block, which the manufacturer lists on the product page, to get the block count. Add 5 to 10 percent for cuts, breakage, and curves. For the base and backfill gravel, a rough rule is about one cubic yard of gravel for every 8 to 10 linear feet of a standard wall, though taller walls with deeper drainage zones need more.
On cost, a DIY block retaining wall typically runs $15 to $30 per face square foot in materials, depending on the block style you choose. Premium tumbled or large-format blocks sit at the higher end, while basic gray units are cheapest. Hiring a contractor generally doubles or triples that figure once labor is included, which is why many homeowners tackle shorter walls themselves and reserve professional help for anything over 4 feet or on unstable ground.
Building Curves and Corners
Straight walls are the simplest, but curves and corners give a wall its finished, professional look. Most modern retaining blocks are designed with a slightly tapered shape that lets them fan into gentle curves without cutting. For an outside curve, the blocks spread apart slightly at the back; for a tighter inside curve, you may need to trim the rear lip of some blocks so they nest closer together. Lay out your curve with a garden hose or spray paint before excavating so you can see the line and adjust it.
Corners require cutting blocks to interlock cleanly, alternating the direction of the cut blocks course by course so the corner ties together rather than forming a weak vertical seam. A masonry saw with a diamond blade gives the cleanest cuts, and dry-fitting each corner block before setting it saves frustration. Take your time at corners, since they carry concentrated load and are the most visible part of the finished wall.
Final Checks and Maintenance
Step back and sight down the wall to confirm it is straight and consistently battered. Verify the drain pipe outlet is open and flowing after the first heavy rain. Long term, keep the drainage outlet clear and watch for any bulging, which signals trapped water or a failing base.
Now that you understand how to build a retaining wall with blocks, the takeaway is simple: spend your effort below and behind the wall, not on the visible face. A compacted gravel base, a dead-level first course, and a real drainage system are what carry the load for decades. Skip them and no amount of heavy block will save the wall from the water and settling that bring it down.