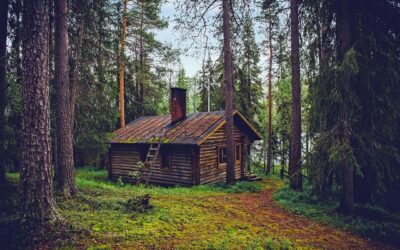
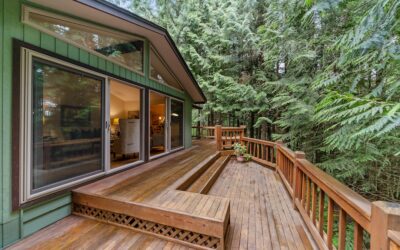
Most owner-builders who stall out on a cabin project do not run into trouble with carpentry. They run into trouble because they did things out of order: framing before the permit cleared, pouring piers before checking frost depth, or closing walls before rough-in inspections. If you want to build a wooden cabin that lasts, the sequence matters as much as the skill.
The short version is this: secure permits and confirm setbacks, build a foundation sized for your soil and frost line, frame a level floor platform, raise framed or log walls, set the roof structure, dry the shell in with sheathing, wrap, roofing, windows and doors, then bring in licensed trades for electrical and plumbing before insulation and interior finishes. A small cabin of 200 to 400 square feet can be shelled in by two capable people over several weekends, though the full project often stretches across a season or two.
- Plan Before You Build a Wooden Cabin
- Tools and Materials
- Step 1: Lay Out the Site and Build the Foundation
- Step 2: Frame the Floor Platform
- Step 3: Raise the Walls
- Step 4: Build the Roof Safely
- Step 5: Dry-In, Utilities and Inspections
- Troubleshooting Common Cabin Building Problems
- Cost Ranges for a Small Cabin
- When to Call a Licensed Professional
- Frequently Asked Questions
We walk through each phase in order, with the tools you will need, common mistakes, general cost ranges and the points where a professional should take over.
Plan Before You Build a Wooden Cabin
Anyone planning to build a wooden cabin should start at the county or town building department, not the lumberyard. Many jurisdictions exempt very small accessory structures from permits, often in the range of 120 to 200 square feet, but the exemption usually disappears the moment you add plumbing, electrical, sleeping space or a loft. A cabin meant for occupancy is almost always treated as a dwelling with full code requirements.
Ask about these items before you buy a single board:
- Zoning and setbacks: minimum distances from property lines, roads, wells, septic fields and water bodies.
- Design loads: local snow load, wind speed and frost depth, which drive foundation and roof framing sizes.
- Septic or sewer: a perc test may be required before any bathroom is approved.
- Access: a delivery truck needs a firm drive to drop lumber near the site.
- HOA or deed restrictions: some rural subdivisions restrict outbuildings or require minimum sizes.
Building your own cabin from stock plans saves money, but have the plans checked against local loads. Many building departments want stamped drawings for anything habitable, and an engineer’s review is cheap insurance compared with tearing out an undersized roof.
Tools and Materials
- Circular saw, miter saw and reciprocating saw
- Framing nailer and compressor (a big time saver over hand nailing), plus a framing hammer
- Drill/driver and impact driver with structural screws
- 4-foot and 8-foot levels, a laser or water level, framing square, chalk line, string lines
- Post hole auger or excavator rental for piers
- Pressure-treated lumber rated for ground contact for sills and anything near soil
- Galvanized or stainless joist hangers, hurricane ties and anchor bolts
- Sheathing, house wrap, roofing underlayment, drip edge and roofing
- Extension ladders, a sturdy stepladder, scaffolding or rental staging
- Safety glasses, hearing protection, gloves and a hard hat during wall and roof work
Step 1: Lay Out the Site and Build the Foundation
Call 811 at least a few business days before digging so buried utility lines get marked. Then clear the site, strip topsoil and set batter boards with string lines to mark the cabin footprint. Measure both diagonals; when they match, the layout is square.
Most small cabins sit on one of three foundation types:
- Concrete piers: holes dug below the frost line, formed with tube forms, poured and fitted with post bases. Economical on sloped sites and gentle on the land.
- Slab on grade: a poured concrete slab with thickened edges. Good on flat ground, but plumbing must be roughed in before the pour.
- Crawlspace or perimeter wall: concrete or block walls on footings. More cost, more access for utilities, better for full-time use in cold climates.
Footings must bear on undisturbed soil below local frost depth, which ranges from a few inches in the Deep South to several feet in the northern states. Skipping this step is the most common cause of a cabin that racks and cracks after a few freeze cycles. Anchor bolts or post bases set in wet concrete tie the structure to the foundation so wind cannot lift or slide it.
Step 2: Frame the Floor Platform
Set pressure-treated beams or sill plates on the piers or foundation wall, with a sill gasket or capillary break between concrete and wood. Lay out floor joists, typically 16 inches on center, sized from a span table for your lumber species and grade. Use joist hangers at beam connections and add blocking at midspan for stiffness.
Check the platform for level and square before sheathing. Glue and screw or nail tongue-and-groove subfloor panels, staggering the seams. A flat, square platform makes every step after it easier; small errors here multiply when walls and rafters go up.
On raised pier foundations, plan for insulation under the floor and a rodent barrier such as hardware cloth or rigid board, since the underside is exposed to wind and critters.
Step 3: Raise the Walls
Conventional stick framing is the fastest route for most owner-builders. Build each wall flat on the deck with top and bottom plates, studs at 16 or 24 inches on center, headers over windows and doors, and let-in or sheathing bracing. Tip the wall up with at least two or three helpers, plumb it, brace it to the deck and nail it off.
Building your own log cabin is a different craft. Logs must be dried or allowed to settle, and each course is notched and stacked, often with splines or through-bolts. Logs shrink in height as they dry, sometimes several inches over a full wall, so window and door openings need slip joints or settling space above the frames. Pre-cut log kits shorten the learning curve considerably.
Whichever system you choose, add a second top plate to framed walls, tie corners together and keep everything braced until the roof and sheathing lock the box in place. Unbraced walls are vulnerable to wind gusts during construction.
Step 4: Build the Roof Safely
Roof framing is where fall risk peaks. Common options for small cabins are site-cut rafters with a ridge board, a structural ridge beam for a cathedral ceiling, or prefabricated engineered trusses delivered to the site. Trusses go up fast, but they must be installed and braced exactly per the manufacturer’s bracing diagram; unbraced trusses can fall like dominoes.
Work from scaffolding or rental staging whenever you can rather than ladders. When you do use an extension ladder, set it on firm, level ground at a 4-to-1 angle (one foot out for every four feet up), extend it at least 3 feet past the landing edge, keep three points of contact and never carry heavy material up with one hand. Use a fall-arrest harness and roof anchors on any pitched roof. If the cabin reaches two stories or a steep roof pitch, hire a roofing or framing crew for that phase.
Secure rafters or trusses to walls with hurricane ties, then sheath the roof, install drip edge, underlayment and roofing. Metal roofing is a popular cabin choice for its snow-shedding ability and long service life.
Step 5: Dry-In, Utilities and Inspections
Dry-in means the shell keeps out weather: wall sheathing, house wrap lapped shingle style, flashed windows and doors, and finished roofing. Once dry, the interior can sit through rain without damage.
Next come rough-ins. Electrical wiring, panels and service connections should be handled by a licensed electrician, and plumbing supply, drains, vents and water heaters by a licensed plumber, both under permit. Propane or natural gas lines are a licensed-pro job only. Schedule framing and rough-in inspections before any insulation goes in, because inspectors need to see the work.
After inspections pass, insulate, install a vapor control layer appropriate for your climate, hang interior paneling or drywall and lay flooring.
Troubleshooting Common Cabin Building Problems
- Floor is out of level: shim at pier caps or beams before sheathing; never try to fix it in the walls.
- Walls will not square up: check diagonal measurements and pull them in with a come-along before sheathing locks the frame.
- Doors bind in a log cabin: settling space above the frame is too tight; trim the gap and use slip-joint frames.
- Condensation under metal roofing: add a proper underlayment or a vented roof assembly.
- Inspection failure: usually missing hold-downs, nailing patterns or fire blocking. Fix and reschedule rather than covering it up.
Cost Ranges for a Small Cabin
Costs swing widely with region, lumber prices and finish level. Very roughly, a basic shell built by the owner might cost roughly $50 to well over $100 per square foot in materials, while a finished cabin with licensed utility work and interior finishes runs considerably higher. Foundation, roofing and utility hookups (well, septic, power line extension) are the line items that most often surprise first-time builders. Log kits typically cost more up front than stick framing but can reduce interior finishing work.
When to Call a Licensed Professional
Permits and inspections come first, and stamped plans are often required for habitable cabins. Bring in a licensed electrician for all wiring and service connections, a licensed plumber for water and drain lines, and a licensed gas fitter for propane or natural gas. Hire an engineer for unusual soils, steep slopes, heavy snow areas or long spans, and a professional crew for any roof work above one story. If you feel unsure on a ladder or roof, that is reason enough to hire out that phase. Owner-builders who plan to build a wooden cabin on a remote site should also price a septic designer and a well driller early, since those trades often book months out.
Frequently Asked Questions
Do I need a permit to build a small cabin?
Often yes. Some areas exempt tiny accessory buildings, but plumbing, electrical, sleeping space or occupancy usually triggers a full permit. Check with your local building department before you start.
What is the best foundation for a wooden cabin?
Concrete piers below the frost line suit sloped or remote sites and cost less. Slabs work on flat ground, and perimeter walls with a crawlspace give better utility access for full-time living.
How long does it take to build a cabin yourself?
Two capable people can shell in a small cabin over several weekends. With inspections, utilities and finishes, plan on a season or more for a fully usable building.
Is a log cabin harder to build than a framed cabin?
Generally yes. Logs are heavy, need careful notching and shrink as they dry, so openings must allow for settling. Framed walls go up faster and are easier to insulate and wire.
Can I do my own electrical and plumbing in a cabin?
Rules vary, and many areas require licensed trades for permitted work. Hiring a licensed electrician and plumber is the safer path and usually smooths inspections.