Lint buildup is the leading cause of dryer fires in the US, responsible for roughly 2,900 house fires each year according to the National Fire Protection Association. Knowing how to clean a dryer thoroughly — not just emptying the lint screen — takes about 30 minutes and should happen at least twice a year. Here is exactly how to do it, from the lint trap to the exhaust vent.
Supplies You Need
Gather these before you start so the whole process goes quickly:
- Vacuum with a crevice attachment or a dryer vent brush kit ($10-$20)
- Microfiber cloths
- Rubbing alcohol or white vinegar
- Dish soap
- Old toothbrush
- Screwdriver (Phillips or 1/4-inch nut driver, depending on your model)
Clean the Lint Trap and Housing
Pull the lint screen out and remove visible lint by hand. That is the step most people do after every load — and it is important — but it only captures about 75% of lint. The remaining 25% passes through the screen mesh or accumulates inside the lint trap housing.
Wash the screen with warm water and dish soap every month. Dryer sheets leave an invisible film on the mesh that reduces airflow over time. Scrub gently with the toothbrush, rinse, and let it dry completely before reinserting. While the screen is out, use the vacuum crevice attachment to reach down into the lint trap housing. You will likely pull out a surprising amount of packed lint.
Clean the Dryer Drum
Stains inside the drum come from melted crayons, ink pens, dyes from clothing, and fabric softener buildup. Wipe the entire drum interior with a microfiber cloth dampened with rubbing alcohol. For stubborn stains — especially ink or crayon — apply rubbing alcohol directly, let it sit for 5 minutes, then scrub with a non-abrasive cloth.
Never use harsh abrasive cleaners or steel wool inside a dryer drum. They can scratch the surface and damage clothing in future loads. After cleaning, run the dryer empty on air-dry (no heat) for 10 minutes to evaporate any remaining cleaning solution.
Clean the Exterior and Door Seal
Wipe down the outside of the dryer with a damp microfiber cloth and mild all-purpose cleaner. Pay extra attention to the door seal gasket, where lint, hair, and moisture collect in the rubber folds. Pull the gasket back gently and wipe the hidden channel clean. A buildup here can prevent the door from sealing properly, which lets warm air escape and increases drying time.
How to Clean the Dryer Vent Duct
This is the most critical cleaning task and the one most homeowners skip. The vent duct connects the back of your dryer to the outside exhaust hood, typically running 4-15 feet through a wall or crawl space.
- Unplug the dryer (electric) or turn off the gas valve (gas dryer)
- Pull the dryer away from the wall to access the back
- Disconnect the vent duct from the dryer exhaust port — it is usually held by a clamp or foil tape
- Insert a dryer vent brush into the duct and push it through to the exterior opening, rotating as you go
- Vacuum out loosened lint from both ends of the duct
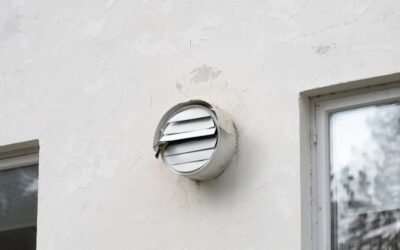
- Go outside and clean the exhaust hood flap, removing any lint blocking the opening
- Reconnect the duct, push the dryer back, and plug it in
A dryer vent brush kit with flexible rods ($15-$20 at any hardware store) reaches up to 12 feet. For longer runs or ducts with multiple bends, consider hiring a professional vent cleaning service ($100-$170 for most homes).
Signs Your Dryer Vent Needs Cleaning
Do not wait for a calendar reminder if you notice these warning signs:
- Clothes take more than one cycle to dry
- The dryer exterior feels unusually hot during operation
- A burning or musty smell when the dryer runs
- The exhaust hood flap does not open when the dryer is on
- Visible lint around the dryer vent connection behind the machine
Any of these symptoms means restricted airflow, which forces the dryer to work harder, increases energy costs by 30% or more, and creates a genuine fire hazard.
Maintenance Schedule
Staying on top of dryer maintenance prevents problems and extends the machine’s lifespan by several years. Follow this schedule for a how to clean a dryer routine that covers everything:
- After every load — empty the lint screen
- Monthly — wash the lint screen with soap and water; wipe the door seal
- Every 3 months — vacuum the lint trap housing; clean the drum interior
- Every 6-12 months — clean the full vent duct from dryer to exterior
Common Mistakes to Avoid
Foil flex duct — the shiny, accordion-style vent hose — is the most common dryer vent material in homes, but it is also the worst. Its ridged interior traps lint and restricts airflow. Replace it with rigid or semi-rigid aluminum duct for better performance and safety. Building codes in most states now require rigid metal duct for new dryer installations.
Another frequent mistake is venting a dryer into a garage, attic, or crawl space instead of to the exterior. Indoor venting pumps moisture and lint into enclosed spaces, creating mold risk and air quality problems. Always vent to the outside, and make sure the exterior hood has a functional flap that opens during operation and closes when the dryer is off to block pests and cold air.