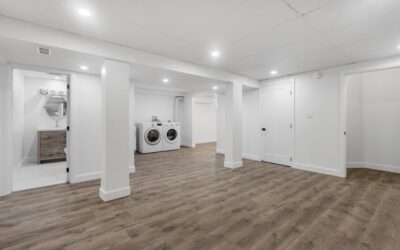
A bare cinder block wall makes any room feel like an unfinished garage, but you have more options than you might think for warming it up. Learning how to cover cinder block walls interior starts with one honest question: how much finish do you want, and how much moisture are you fighting? Your choices range from a simple coat of masonry paint to building out furring strips and hanging drywall for a fully finished room. Basements add a moisture wrinkle you cannot ignore. Here is a clear rundown of every method, from quick and cheap to permanent and polished.
- First, Deal With Moisture
- Option 1: Paint or Masonry Sealer
- Option 2: Parging for a Smoother Surface
- Option 3: Furring Strips and Drywall
- Option 4: Paneling or Wood Slats
- Insulation Matters in Basements
- Prepping the Block Before You Start
- Cost Expectations for Each Method
- Common Mistakes to Avoid
- Choosing the Right Method for Your Space
- The Bottom Line
First, Deal With Moisture
Before you cover anything, especially below grade, address water. Cinder block is porous and wicks moisture from the soil outside. Run a hand over the wall and look for damp spots, white powdery efflorescence, or a musty smell. Tape a square of plastic to the wall for a day; condensation underneath means moisture is coming through the block. Fix grading, gutters, and any active leaks first, then seal the interior with a waterproofing masonry primer. Skipping this step traps water behind whatever you install and invites mold, so it is non-negotiable in a basement.
Option 1: Paint or Masonry Sealer
The fastest, cheapest finish is simply painting the block. Start with a masonry or block-filler primer to seal the porous surface and level out the pitted texture, then topcoat with a quality latex. For damp areas, use a waterproofing paint rated for masonry. Painting will not hide the mortar joints or the block texture, so the wall still reads as block, but a clean coat of light color dramatically brightens a space and costs under a dollar per square foot. It is the right call for garages, workshops, and utility areas.
Option 2: Parging for a Smoother Surface
If you want a more finished, stucco-like look without framing, parging is a good middle ground. Parging means troweling a thin coat of mortar or a surface-bonding cement over the block to smooth the joints and texture. Once cured, you can paint it. This gives you a solid, seamless masonry surface that looks intentional rather than raw. It takes some skill to trowel evenly, but it adds durability and a cleaner appearance without stealing floor space.
Option 3: Furring Strips and Drywall
For a room you actually want to live in, this is the gold standard. You fasten vertical furring strips, one-by-twos or two-by-twos, to the block with masonry screws or construction adhesive, then hang drywall over them. The strips create an air gap and a flat plane, and the drywall gives you a true finished wall you can paint, texture, or trim like any other room. Here is the basic sequence:
- Seal the block with waterproofing primer.
- Add rigid foam insulation between or behind the strips for warmth and a vapor break, especially in basements.
- Attach furring strips 16 inches on center, shimming them plumb.
- Run any electrical, then hang, tape, and finish the drywall.
This method costs more and takes a weekend or two, but it turns a cold block wall into a warm, insulated, paintable room.
Option 4: Paneling or Wood Slats
Want warmth and character without full drywall? Attach furring strips as above, then screw on wood paneling, shiplap, or vertical slats. This delivers texture and a cozy, designed feel and is more forgiving than taping drywall. Peel-and-stick or nail-up paneling also hides imperfect block quickly. In a finished basement or a feature wall, wood slats over a dark painted block backer create a striking modern look.
Insulation Matters in Basements
Any interior finish over basement block should include a plan for insulation and vapor control, because bare block is a thermal sponge that makes rooms cold and clammy. Rigid foam board adhered to the sealed block, seams taped, gives you both insulation and a moisture barrier before you frame or panel. Avoid trapping fiberglass batts directly against damp block, where they can hold water and grow mold. When in doubt about your climate zone’s vapor rules, check with a local building inspector.
Prepping the Block Before You Start
No matter which finish you choose, good prep makes the difference between a wall that lasts and one that fails. Start by cleaning the block thoroughly; wire-brush off any loose mortar, dust, or flaking paint, and scrub away efflorescence, the white powdery salt deposit, with a stiff brush. Fill large cracks or gaps with hydraulic cement or masonry patch, and address any spot where water is actively seeping. Let everything dry fully. Skipping this cleaning step means primer, adhesive, and mortar bond poorly, so whatever you install later can bubble, peel, or pop loose from the wall within a season.
Cost Expectations for Each Method
Budget varies widely depending on how finished you want the wall. Here is a rough sense of what to expect per square foot in materials, before labor:
- Masonry primer and paint: the cheapest route, often under $1 per square foot.
- Parging: low material cost, but skilled troweling adds labor if you hire out.
- Furring strips and drywall: the priciest, factoring strips, foam insulation, drywall, and finishing.
- Paneling or wood slats: mid-range, depending on the wood you choose.
Remember that a basement build-out also needs the waterproofing and insulation dollars baked in, which are easy to overlook until the quote arrives.
Common Mistakes to Avoid
The biggest error homeowners make is finishing over a wall that has an unresolved water problem, which simply hides the moisture until mold and rot appear behind the new surface. A close second is failing to insulate, leaving a beautiful new wall that is still cold and prone to condensation. Others fasten furring strips without checking they are plumb, producing wavy drywall, or trap fiberglass batts against damp block. Take the time to fix water at its source, insulate properly, and build on a clean, plumb foundation, and your covered block wall will look and perform like any other room in the house.
Choosing the Right Method for Your Space
- Garage or utility room: masonry primer and paint.
- Cleaner look, no framing: parging then paint.
- Finished living space: furring strips, foam, and drywall.
- Warm accent or feature wall: paneling or wood slats over furring.
The Bottom Line
When you plan how to cover cinder block walls interior, let the room’s purpose and its moisture level guide you. Handle water first, then pick your finish, from a quick coat of paint to a fully framed and insulated drywall build-out. Do the prep right and that cold, industrial block disappears behind a wall that looks and feels like it belongs in a real room.