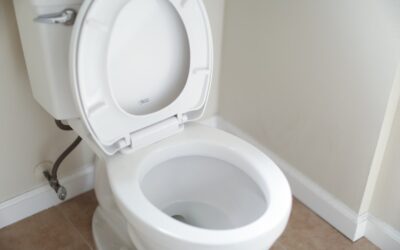
The toilet flange is the one cut on a bathroom floor that makes first-time tilers nervous, and it does not need to. The toilet base covers a ring several inches wider than the flange, so the curve only has to be close, not perfect. Learning how to cut tile around a toilet comes down to an accurate template, a series of relief cuts and patient nibbling to the line. With those three steps, even porcelain comes out clean enough that nobody will ever see the edge once the bowl is set.
Part of our Bathroom Remodeling & Flooring guide — explore the full guide →
Straight cuts across a room are a different technique. The focus here is the curved cut around the drain opening, plus the gap and height details that make the toilet seal and sit properly afterward.
- How to Cut Tile Around a Toilet: What the Base Hides
- Tools and Materials
- Step 1: Prepare the Flange Area
- Step 2: Make an Accurate Template
- Step 3: Make Relief Cuts
- Step 4: Nibble to the Line
- Step 5: When the Flange Falls in One Tile
- Step 6: Dry Fit and Set
- Troubleshooting
- Silica Dust and Saw Safety
- Costs and When to Call a Pro
- Frequently Asked Questions
How to Cut Tile Around a Toilet: What the Base Hides
A typical floor flange has an outside diameter of roughly 7 inches. A standard toilet’s footprint, the ceramic ring that touches the floor, is noticeably larger, often extending a couple of inches or more past the flange on every side. That means your cut can be off by half an inch in places and still disappear.
Aim for a gap of about 1/8 to 1/4 inch between the tile edge and the outside of the flange. The gap lets the flange sit without being pinched and leaves room for the wax ring to spread. Measure your own toilet’s footprint before cutting; compact and skirted models vary, and you want to confirm the bowl overlaps your planned cut all the way around.
Tools and Materials
- Tile nippers (for nibbling curves in small bites)
- A wet tile saw for straight relief cuts, or an angle grinder fitted with a diamond blade
- A diamond hole saw or core bit if the flange falls entirely within one tile
- Cardboard, poster board or heavy paper for a template
- A compass, tape measure, combination square and fine marker
- A rubbing stone or diamond hand pad to smooth sharp edges
- Spray bottle of water for keeping cuts wet
- Safety glasses, hearing protection, work gloves and an N95 or P100 respirator
Step 1: Prepare the Flange Area
Remove the toilet, scrape off the old wax ring and stuff a rag into the drain opening to block sewer gas and keep debris out. Check the flange for cracks or broken bolt slots. A damaged flange should be repaired or replaced before tiling, and if the drain pipe itself is cracked or the repair involves cutting into the waste line, bring in a licensed plumber.
Think about height now. After tile goes down, the top of the flange should ideally sit level with or slightly above the finished floor surface. If your new tile and thinset will raise the floor above the flange, plan for a flange extender or spacer kit so the wax ring seals properly.
Step 2: Make an Accurate Template
Lay full tiles up to the flange first, dry, with spacers. Then decide which tiles will be cut. If possible, arrange the layout so a grout line runs through or near the flange center. Splitting the curve across two or four tiles makes the cuts much easier than one big hole.
- Cut a piece of cardboard the exact size of the tile to be cut.
- Set it in position, butted to its neighbors with spacer gaps, and mark where it overlaps the flange.
- Measure from two adjacent edges of the cardboard to the flange center and mark that point.
- Set the compass to the flange radius plus your gap (for a 7 inch flange with a 1/4 inch gap, about 3.75 inches) and draw the arc.
- Cut out the template with scissors, test it around the flange and trim until it fits.
Transfer the arc to the tile with a fine marker. On glazed tile, a strip of painter’s tape gives you a surface that takes a clear line.
Step 3: Make Relief Cuts
Relief cuts are a series of straight cuts from the tile edge to the curved line, spaced about 1/4 to 1/2 inch apart. They divide the waste into narrow fingers that snap away cleanly instead of cracking the whole tile.
- With a wet saw: push the tile into the blade along each relief line, stopping right at the arc. The saw cuts straighter at the edges, so cut the longest fingers first.
- With an angle grinder: clamp the tile to a sturdy surface, mist it with water and make shallow passes along each relief line to the arc, then a light scoring pass along the arc itself.
Do not cut past the line. A kerf that crosses the curve will show as a notch if the toilet does not fully cover it.
Step 4: Nibble to the Line
Once the fingers are cut, use tile nippers to snap them off. Take small bites of 1/8 to 1/4 inch at a time, working from the edge toward the curve. Hold the nippers so the jaws grab just the edge of the tile and twist gently instead of squeezing hard. Big bites crack porcelain.
When you get close to the arc, switch to even smaller nibbles to refine the shape. A grinder held at a slight angle can also smooth the arc after nipping. Finish by rubbing the edge with a stone so it is not razor sharp.
Step 5: When the Flange Falls in One Tile
If the flange lands in the middle of a single tile and you cannot shift the layout, you have two good options:
- Hole saw: a diamond hole saw sized just above the flange diameter cuts a clean circle. Keep it wet, run it slowly at a slight angle to start the groove, then bring it upright.
- Split the tile: cut the tile straight through the center of the planned circle, cut each half’s arc separately with relief cuts and nippers, then set both halves back together. The joint hides under the toilet.
Step 6: Dry Fit and Set
Dry fit every cut piece around the flange before mixing thinset. Check that the gap is even and that none of the cut edges will extend outside the toilet footprint. Then back-butter and set the tiles as you would the rest of the floor, keeping thinset out of the gap around the flange. Once grouted, leave the gap at the flange empty or fill it with a flexible sealant so the wax ring area stays clean.
Set the toilet only after the thinset and grout have cured according to the product directions, and use a new wax ring or a foam seal sized for the flange height.
Troubleshooting
- Tile cracked across while nipping: bites were too large, or the relief cuts were too far apart. Space cuts closer and nibble smaller.
- Cut edge visible past the toilet: the arc was too big. Recut a replacement tile with a tighter template.
- Toilet rocks after setting: the floor around the flange is uneven or the flange sits too high. Shim with plastic toilet shims, never by overtightening the bolts.
- Flange now below the tile: add a flange extender or spacer before setting the toilet.
- Glaze chipping along the cut: score the glaze lightly first and keep the blade wet.
Silica Dust and Saw Safety
Cutting ceramic, porcelain and stone tile releases fine crystalline silica dust, which damages lungs over time. Wet-cut whenever possible, with a wet saw or by misting the tile while using a grinder, and wear an N95 or P100 respirator whenever you dry cut, grind or nip. Work outdoors or in a well-ventilated area, and clean up with a HEPA vacuum or wet mop instead of sweeping.
Angle grinders kick if the blade binds. Keep the guard on, use both hands, clamp the tile rather than holding it, and wear safety glasses and hearing protection. Keep the wet saw’s cord and plug away from the water tray, and plug it into a GFCI-protected outlet.
Costs and When to Call a Pro
Tile nippers and a diamond hole saw each cost relatively little, and a basic wet saw can often be bought or rented for a modest amount. Professional bathroom floor tiling is typically priced per square foot, and the flange cut is part of standard labor. If the subfloor around the toilet is soft or rotted, the flange is broken or the drain line needs moving, hire a licensed plumber for the drain work and an experienced tile setter for the floor so the toilet seals and stays put.
Once you have learned how to cut tile around a toilet, the same template and relief-cut technique handles other curves, like tile around a tub drain or a pipe escutcheon.
Frequently Asked Questions
How much gap should I leave around a toilet flange?
About 1/8 to 1/4 inch between the tile and the outside of the flange is typical. The toilet base covers a much wider ring, so the gap is hidden.
Should tile go under the toilet flange or around it?
On most remodels the tile goes around the flange, and the flange should end up level with or slightly above the finished tile. If the floor rises above it, use a flange extender.
Can I cut a curve in tile without a wet saw?
Yes. Score relief lines with an angle grinder and diamond blade, or use a hand scoring tool on soft ceramic, then nibble to the curve with tile nippers.
What is the best way to cut porcelain around a toilet?
Use a wet saw or misted grinder for relief cuts, then take very small bites with sharp nippers. Porcelain is hard and brittle, so close relief cuts are essential.
Do I need a new wax ring after tiling?
Yes. Always use a new wax ring or foam seal, sized for the final flange height, when you reset a toilet.
Prefer to explore on your own?
See how new flooring looks in your actual room in seconds — free, no signup.
Try the free Floor Studio →