The hardest part of installing a sauna indoors is not bolting the panels together. It is picking the right room, prepping a floor that can handle heat and moisture, and getting the electrical circuit and ventilation right before the first session. A prebuilt kit can go together in a day or two, but the planning around it takes longer.
Here is the short version. Choose a room with a solid, water-tolerant floor and room for heater clearances. Assemble the kit on a level surface, set intake and exhaust vents where the maker specifies, keep every clearance around the heater, and have a licensed electrician run the dedicated circuit. Most traditional electric heaters need a 240V hardwired connection, so that part is not a DIY step for most homeowners.
- Installing a Sauna: Planning the Room
- Tools and Materials
- Step-by-Step Kit Installation
- Venting: Intake and Exhaust Placement
- Heater Clearances and Fire Safety
- Electrical Requirements for a Sauna Heater
- Safe Use After Installation
- Cost Ranges and Troubleshooting
- When to Call a Licensed Professional
- Frequently Asked Questions
A pre built sauna, whether a panel kit or a modular cabin, arrives with precut walls, benches, a door and often the heater. A sauna unit for home use can also be a small infrared cabin that plugs in, which changes the electrical side. The steps here focus on a traditional electric-stone sauna kit, with notes where infrared differs.
Installing a Sauna: Planning the Room
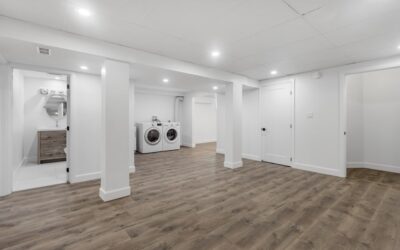
Basements, large bathrooms, spare rooms and garages are common spots. Each has trade-offs, so check these points before ordering anything:
- Footprint and height: measure the kit’s exterior dimensions plus working room on all sides. Ceiling height matters; many kits need more than the finished interior height to assemble the roof panels.
- Floor: concrete, tile or another water-tolerant surface is ideal. Carpet does not belong under or inside a sauna.
- Access for panels: confirm the largest panel fits through doors and down stairs.
- Distance to the electrical panel: a shorter run is simpler and cheaper for the electrician.
- Nearby water: a shower nearby is convenient but is not required inside the sauna room.
- Air supply: the room needs a source of fresh air for the intake vent.
Sauna insulation, vapor barriers and flooring each deserve careful attention if you are building a custom room from framing. A kit that includes its own insulated panels simplifies much of that work.
Tools and Materials
- Kit components, hardware and the manufacturer’s manual
- Level (4-foot and torpedo), tape measure, square
- Drill-driver with bits, rubber mallet, clamps
- Shims (composite or cedar), utility knife
- Step ladder, work gloves and safety glasses
- Duckboard or floor tiles if the kit calls for them
- Heater, stones and heater guard (usually included)
- Non-contact voltage tester
Step-by-Step Kit Installation
- Prep the floor. Clean, dry and check for level. Grind high spots on concrete or use a self-leveling compound for dips, following cure times. Correct any moisture problem first when installing a sauna on a basement floor; a slab that wicks water will cause issues later.
- Lay out the footprint. Snap chalk lines for the wall positions. Keep the required gap from surrounding walls so air can move and you can reach the back of the cabin.
- Set the floor frame or base. Some kits have a base frame or sill; others sit directly on the floor. Shim until level in both directions.
- Stand the wall panels. Start with a corner, clamp panels together and fasten per the manual. Check plumb on every panel before moving to the next.
- Install the ceiling panels. This is a two-person job. Keep the insulation side oriented as the manual shows.
- Fit the door. Adjust hinges so the door swings freely and closes without binding. Sauna doors should open outward and never lock from either side.
- Install benches and backrests. Fasten to the wall cleats with hidden fasteners so no metal heads contact skin.
- Place the vents. Cut or open intake and exhaust vents exactly where the maker specifies.
- Mount the heater and guard. Position it with every listed clearance to benches, walls, ceiling and door. Install the guard rail.
- Stop for the electrician. The heater, controls and any lighting get connected by a licensed electrician before stones are loaded.
- Load the stones. Rinse them, then stack loosely so air flows between them. Do not pack them tightly.
- Initial burn-off. Run the heater empty with the door and vents open, per the manual, to burn off manufacturing residue.
Venting: Intake and Exhaust Placement
Good ventilation keeps the air fresh and lets the sauna dry out between uses. A common arrangement puts the fresh-air intake low on the wall near or under the heater, so incoming air warms quickly, and the exhaust vent high on the opposite wall or low under a bench, depending on the design. The exact layout depends on your heater and cabin, so use the manufacturer’s diagram rather than a generic rule.
Never block vents with towels or benches. The room the sauna sits in also needs airflow, so avoid tucking the cabin into a sealed closet. After each session, prop the door open briefly and let the benches dry.
Heater Clearances and Fire Safety
Clearances are the single most important fire safety detail when installing a sauna. The heater manual lists minimum distances to benches, walls, ceiling and the door, and those numbers are tied to the heater’s certification. Treat them as absolute.
- Use only the heater guard supplied or approved by the heater maker.
- Keep towels, clothing and anything combustible off the heater and stones.
- Do not store items inside the sauna.
- Install only lighting rated for sauna temperatures, placed where the manual allows.
- Use a timer or control with automatic shut-off, and never leave the heater running unattended for long periods.
Electrical Requirements for a Sauna Heater
A typical electric sauna heater draws enough current that it needs its own dedicated 240V circuit, sized by wire gauge and breaker to the heater’s rating. The connection is hardwired, often through a separate control panel and contactor. That work belongs to a licensed electrician, who will pull the permit, size the conductors and use wiring rated for high-temperature locations where required.
Small infrared cabins are different. Many run on 120V and plug into a dedicated receptacle. Plug them directly into the wall, never into an extension cord or power strip. If the receptacle is in a bathroom, basement or other damp area, it needs GFCI protection.
For any hands-on work near existing wiring, such as removing a cover plate before the electrician arrives, turn off the breaker and confirm power is off with a non-contact voltage tester. Never test, probe or measure wiring while it is live.
Safe Use After Installation
Follow the session time limits in the heater and cabin manuals, and start with short sessions. Drink water before and after. Never use the sauna alone and never after drinking alcohol. Anyone who is pregnant or has heart or blood pressure conditions should check with a doctor before using a sauna. Children must always be supervised by an adult. Post a small sign with these rules near the door so guests see them too.
Cost Ranges and Troubleshooting
Indoor sauna kits vary widely. Small infrared cabins sit at the lower end, while larger traditional kits with electric-stone heaters cost more. Add floor prep, the electrician’s labor and permit fees. Electrical cost depends mostly on the distance from the panel and whether the panel has capacity for a new 240V circuit; an older panel may need an upgrade, which is a bigger expense.
Common Problems
- Heater slow to reach temperature: check vent sizing, door seal and stone loading. Tightly packed stones restrict airflow.
- Breaker trips: stop and call the electrician. Do not upsize a breaker yourself.
- Gaps between panels: the floor is likely out of level. Re-shim the base.
- Musty smell: improve drying time between sessions and check the surrounding room and slab for moisture.
- Door drags: adjust hinges and confirm the cabin is still plumb.
When to Call a Licensed Professional
A licensed electrician should handle the dedicated circuit, heater hookup, control panel and any lighting. Get the permits your jurisdiction requires. If the floor has moisture problems, the room needs structural changes or you are converting a space that was not meant for high heat, involve a contractor. Some homeowners also pay the kit supplier’s installer to assemble the cabin, which can protect the warranty.
Frequently Asked Questions
Can I install a sauna kit myself?
Many homeowners assemble the cabin themselves with a helper. The heater’s electrical connection and any new circuit should be done by a licensed electrician.
Does a home sauna need a 240V circuit?
Most traditional electric heaters do. Some small infrared cabins run on 120V. Check the spec sheet for voltage, amperage and breaker size.
Where should the sauna vents go?
Follow the heater and cabin maker’s diagram. Intake is often low near the heater, with exhaust placed high or under a bench on the opposite side.
What floor is best under a sauna?
Concrete or tile work well because they tolerate heat and moisture. Avoid carpet, and fix any slab moisture before installing.
How long does it take to assemble a prebuilt sauna?
Two people can often assemble a kit in a day or two, not counting floor prep and the electrician’s visit.