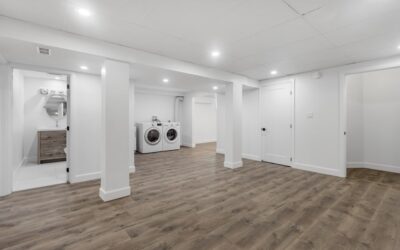
Building a sauna from raw lumber costs less than many prefab kits and lets you fit the room exactly to a basement corner, garage bay or backyard shed. The catch is that a sauna is a small, very hot, very humid room, so every layer matters: framing, insulation, a foil vapor barrier, the wood lining, benches, the door and a properly sized heater. Get the layers in the right order and a home made sauna can last decades.
Here is the core sequence: frame a small room with a low ceiling, insulate the walls and ceiling, staple a foil vapor barrier with the shiny side facing in, line the room with softwood tongue and groove over furring strips, build slatted benches, hang an outward-swinging door, and size the heater to the room’s cubic footage. The heater wiring goes to a licensed electrician.
- Planning Before Building a Sauna
- Step 1: Frame the Room
- Step 2: Insulate the Walls and Ceiling
- Step 3: Install a Foil Vapor Barrier
- Step 4: Add Furring Strips and Wood Lining
- Step 5: Build the Benches
- Step 6: Hang the Door
- Step 7: Size and Install the Heater
- Fire Safety and Heater Clearances
- Ventilation
- Safe Use Habits
- Troubleshooting
- Cost Ranges
- When to Call a Licensed Professional
- Frequently Asked Questions
We cover planning, materials, each build step, heater sizing, ventilation, fire safety, costs and the parts that call for licensed trades. This is a traditional dry sauna build, not a tiled steam room.
Planning Before Building a Sauna
Keep the room small. A 5 by 7 foot room with a 7 foot ceiling seats three or four people and heats efficiently. Ceilings between 7 and 7.5 feet are typical. Taller ceilings waste heat above the upper bench.
- Location: Indoors on a concrete slab is easiest. A basement corner uses two existing foundation walls. Outdoors, a small insulated building on a proper foundation works well.
- Floor: Concrete or tile is ideal because it does not burn or rot. Removable wood duckboards on top feel better underfoot. Avoid carpet and vinyl near the heater.
- Power: Most electric sauna heaters need a dedicated 240V circuit. Confirm your panel has space before you start framing.
- Permits: Many jurisdictions require permits for new electrical circuits and for outdoor structures. Check before you build.
Tools and Materials
- 2×4 lumber for walls and ceiling joists
- Mineral wool or fiberglass batt insulation (unfaced)
- Foil vapor barrier made for saunas and foil tape
- 1×2 or 1×3 furring strips
- Tongue and groove boards: cedar, hemlock, spruce or aspen, clear grade
- Stainless or hot-dipped galvanized fasteners
- Bench lumber (smooth, knot-free softwood) and a heater guard rail
- Sauna door, heater, rocks and a wall thermometer
- Saw, drill, stapler, level, finish nailer and hearing and eye protection
Step 1: Frame the Room
Frame the walls with 2×4 studs at 16 inches on center. Against a foundation wall, build a stud wall with a small air gap in front of the concrete. Add solid blocking where benches, the heater and the door will mount, since you will need something solid to screw into later.
Frame the ceiling with 2×4 joists at 16 or 24 inches on center. Keep the rough opening for the door around 24 to 30 inches wide and 72 to 80 inches tall, matching your door.
Step 2: Insulate the Walls and Ceiling
Fill every stud and joist bay with unfaced mineral wool or fiberglass. Mineral wool handles heat well and resists moisture. Insulate the ceiling thoroughly, because the hottest air collects there. Do not use foam boards with plastic facings inside the hot room unless the product is rated for sauna temperatures.
Step 3: Install a Foil Vapor Barrier
Staple a foil vapor barrier over the studs and joists with the shiny side facing into the sauna. Overlap seams by several inches and seal them with foil tape. Wrap the barrier into the door opening and around any vent openings. The foil keeps moisture out of the insulation and reflects heat back into the room.
Use only one vapor barrier. A plastic sheet behind the foil can trap moisture between layers.
Step 4: Add Furring Strips and Wood Lining
- Fasten 1×2 furring strips over the foil into each stud. This creates a small air gap behind the paneling and gives you a nailing surface.
- Start the ceiling first. Blind-nail tongue and groove through the tongue so fasteners stay hidden and do not heat up against your skin.
- Run wall boards horizontally or vertically. Leave a small gap at the floor so boards can breathe.
- Leave the wood unfinished inside. Stains, varnish and paints can off-gas at sauna temperatures.
Western red cedar is the classic choice for its aroma and stability, though it costs more. Hemlock, spruce and aspen are low-odor alternatives that stay cooler to the touch. For a custom built sauna, many builders use cedar on the walls and a softer, knot-free wood on benches.
Step 5: Build the Benches
Typical bench heights are about 18 inches for the lower bench and 36 to 42 inches for the upper bench, with the upper bench roughly 36 to 42 inches below the ceiling. Make seats 20 to 24 inches deep.
- Use smooth, knot-free boards, spaced 3/8 to 1/2 inch apart so water drains and air circulates.
- Screw from underneath so no metal is exposed on the seating surface.
- Round over all exposed edges.
- Build benches in removable sections so you can clean and dry beneath them.
Step 6: Hang the Door
A sauna door must swing outward and should not lock. It needs to open with a light push from inside. Use a wooden handle inside and out, since metal handles get hot. Tempered glass doors let light in and make a small room feel bigger. Leave a small gap at the bottom for fresh air intake unless you have a separate low intake vent.
Step 7: Size and Install the Heater
Heater size depends on room volume. A common rule of thumb is about 1 kW of heater power per 45 to 50 cubic feet of room, with more power needed for glass walls, uninsulated walls or masonry. A 5 by 7 by 7 foot room is 245 cubic feet, which typically calls for a heater in the 5 to 6 kW range. Always follow the heater maker’s sizing chart, which accounts for these factors.
Mount the heater on solid blocking at the height and location the manual specifies, usually near the door and below the upper bench. Place the control according to the instructions.
Electrical Hookup
Hardwired sauna heaters need a dedicated 240V circuit with wire and breaker sized to the heater. This must be installed by a licensed electrician, and most areas require a permit and inspection. Wiring inside the hot room must use high-temperature cable as specified by the heater maker. If you do any work near existing wiring during the build, turn off the breaker and confirm power is off with a non-contact voltage tester first. Never test or measure voltage on a live circuit.
Fire Safety and Heater Clearances
- Keep every clearance in the heater manual: to walls, to the ceiling, to benches and to the floor. These distances are what keep wood from charring over time.
- Build a wooden guard rail around the heater so no one falls or leans onto it.
- Use only the rocks and heater model listed for your room. Do not pile rocks above the heater’s rim.
- Never dry towels or clothing on or over the heater.
- Use only UL-listed heaters and controls, and install a smoke alarm outside the sauna door.
Ventilation
Good airflow keeps the air fresh and helps the room dry after use. A common setup places a fresh air intake low near the heater and an exhaust vent on the opposite wall, placed high or low depending on the heater design. Heater manufacturers often specify vent locations, so follow those first. After each use, prop the door open to let the wood dry.
Safe Use Habits
- Follow session time limits and start with short sessions.
- Never use the sauna alone after drinking alcohol.
- Check with a doctor before use if you are pregnant or have heart or blood-pressure conditions.
- Supervise children closely.
Troubleshooting
Room heats slowly: The heater may be undersized, the ceiling may be too high or the door may leak heat. Check sizing and seals.
Dark stains on wood behind the heater: Clearances may be too tight. Stop using the heater and recheck the manual’s distances.
Musty smell: The room is not drying between sessions. Improve ventilation and leave the door open after use.
Breaker trips: Have the electrician verify that the circuit is sized correctly and dedicated to the heater.
Cost Ranges
A DIY indoor build often costs $2,500 to $7,000 for lumber, insulation, foil, cedar lining, door and heater, plus electrician fees. Cedar and glass doors push the price up. Outdoor saunas cost more because of foundation, roofing and siding. A custom infrared sauna build is a different project that uses infrared panels instead of a rock heater.
When to Call a Licensed Professional
Hire a licensed electrician for the heater circuit and hookup, and for any panel upgrade. Get permits where required. For outdoor structures, check setbacks and footings with your local building department, and consider a contractor for the foundation and roof.
Frequently Asked Questions
What size heater do I need when building a sauna?
Plan on roughly 1 kW per 45 to 50 cubic feet, adjusted upward for glass or masonry. Always use the heater maker’s sizing chart.
Which way does the foil vapor barrier face?
The shiny side faces into the sauna, with seams overlapped and sealed with foil tape.
Should I stain or seal the inside wood?
No. Leave interior wood bare. Many finishes off-gas at sauna temperatures.
Can I wire the sauna heater myself?
No. Hardwired heaters need a dedicated 240V circuit installed by a licensed electrician, usually with a permit.
Is building a sauna cheaper than buying a kit?
Often, especially for custom sizes. The savings depend on wood choice and how much of the labor you handle.