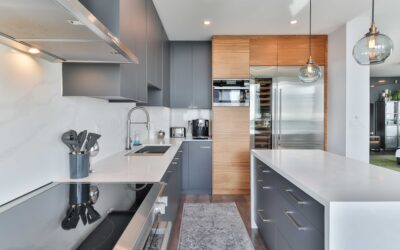
The countertop shadow cast by upper cabinets is the most common lighting complaint in any kitchen, and it is one of the cheapest to fix. Learning how to install under cabinet lighting LED strip takes an afternoon, costs $40 to $120 in parts, and eliminates that dim work zone completely. Done right, the strip is invisible and the light looks built in, not stuck on.
Part of our Kitchen Remodeling guide — explore the full guide →
- What You’ll Need
- Step 1: Measure and Plan Your Runs
- Step 2: Choose Color Temperature and Brightness
- Step 3: Clean and Test Before Sticking
- Step 4: Mount the Channel and Strip
- Step 5: Connect the Power Supply
- Step 6: Add Control and Dimming
- Hardwired vs Plug-In: Which to Choose
- Estimating How Many Strips You Need
- Troubleshooting Common Issues
What You’ll Need
LED strip kits vary, so confirm your parts list before starting. A basic plug-in install needs these pieces:
- LED strip lights rated for the length you measured, ideally 24V for longer runs with less voltage drop
- A matching power supply (driver) sized above your total wattage
- Connector clips or a soldering iron, plus corner connectors
- Aluminum channel with a diffuser cover (optional but strongly recommended)
- Isopropyl alcohol, a tape measure, scissors, and a dimmer or controller
An aluminum channel is the upgrade that separates a clean install from an amateur one. It hides the individual diodes, spreads the light evenly, and sinks heat to extend the strip’s life.
Step 1: Measure and Plan Your Runs
Measure the underside of each cabinet where you want light, then add up the total length. LED strips can only be cut at marked intervals, usually every 1 to 2 inches, so plan your cuts at those lines. Sketch how the strip will travel from cabinet to cabinet, noting where you need corner connectors to turn 90 degrees.
Decide early where the power supply will live. Most people hide it inside an adjacent cabinet or above the upper cabinets, keeping the visible run clean and the driver accessible.
Step 2: Choose Color Temperature and Brightness
Color temperature changes the entire feel of the kitchen. For task lighting on countertops, 3000K to 3500K gives a warm-neutral white that flatters both food and finishes. Cooler 4000K reads crisp and clean but can feel clinical in a warm-toned kitchen.
For brightness, look for strips rated around 400 to 600 lumens per foot for genuine task light. Also check the CRI (color rendering index); a rating of 90 or above shows true colors, which matters when you are checking whether the chicken is cooked.
Step 3: Clean and Test Before Sticking
Wipe the underside of the cabinets with isopropyl alcohol and let them dry fully. The adhesive on LED strips only bonds to a clean, grease-free surface, and kitchen cabinets are almost always coated in a fine film of cooking residue.
Before you commit the adhesive, connect the whole run to the power supply and power it on temporarily. This catches a bad connector or a dead section while it is still easy to fix, rather than after everything is stuck down.
Step 4: Mount the Channel and Strip
If you are using aluminum channel, cut it to length with a hacksaw and screw or clip it to the underside of the cabinet, positioned toward the front edge so the light washes down the backsplash rather than straight down the face. Peel the strip’s adhesive backing a few inches at a time and press it firmly into the channel.
Work slowly around corners, using solderless corner connectors or a small solder joint rather than bending the strip sharply, which can damage the copper traces inside.
Step 5: Connect the Power Supply
Route the low-voltage wire from the strip back to your hidden power supply, and connect it observing polarity, since LEDs only run one direction. Plug-in drivers simply plug into a nearby outlet, which keeps the whole project code-simple and DIY-friendly.
If you want the lights controlled by a wall switch or hardwired into a junction box, that portion is line-voltage work and may warrant an electrician depending on your local code. For most homeowners, a plug-in driver with an inline dimmer is the easiest and safest route.
Step 6: Add Control and Dimming
An inline dimmer or a smart controller turns a functional strip into a flexible one. Dimming lets you run full brightness for cooking and drop to a soft glow for evenings, which is where under-cabinet lighting really earns its keep. Smart controllers add phone and voice control plus scheduling.
Make sure your dimmer is rated for LED loads and matched to your driver type. A mismatched dimmer causes flicker and buzzing, the two most common complaints after an otherwise successful install.
Hardwired vs Plug-In: Which to Choose
The biggest decision after picking your strips is how they get power. Plug-in drivers are the DIY-friendly route: the driver simply plugs into an existing outlet, often one hidden inside an upper cabinet, and no permanent wiring is involved. This keeps the project firmly in weekend-warrior territory and fully reversible.
Hardwiring routes the low-voltage output from a driver that connects to your home’s wiring, controlled by a wall switch. It looks cleaner with no visible plug and integrates with existing switches, but it involves line-voltage connections that may require a permit and an electrician depending on local code. For most homeowners, a plug-in driver with an inline or smart dimmer delivers 90 percent of the benefit with none of the electrical risk.
Estimating How Many Strips You Need
Buy once by measuring carefully. Add up the linear feet under every cabinet you want lit, then check the strip’s rating in lumens and watts per foot. A common mistake is buying a single continuous roll and discovering it will not stretch across gaps between cabinet runs.
Instead, plan for separate segments joined by connector wires that jump the gaps, and size your driver to the total wattage of all segments combined. Multiply watts per foot by your total footage, then add at least 20 percent headroom so the power supply is never running at its limit. That margin keeps the driver cool and extends its service life considerably.
Troubleshooting Common Issues
If the far end of a long run looks dimmer than the near end, you are seeing voltage drop; switch to a 24V system or feed power to both ends of the strip. Flickering usually points to a loose connector or an underpowered driver, so size your power supply to at least 20 percent above the strip’s total wattage.
Master how to install under cabinet lighting LED strip once, and you will want it in the laundry room, the home office, and every dim shelf in the house. It is one of the highest-impact, lowest-cost lighting upgrades a homeowner can make.