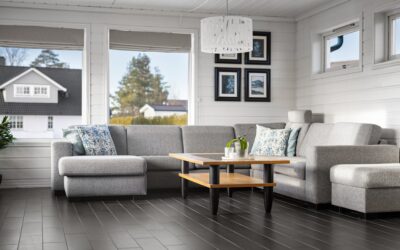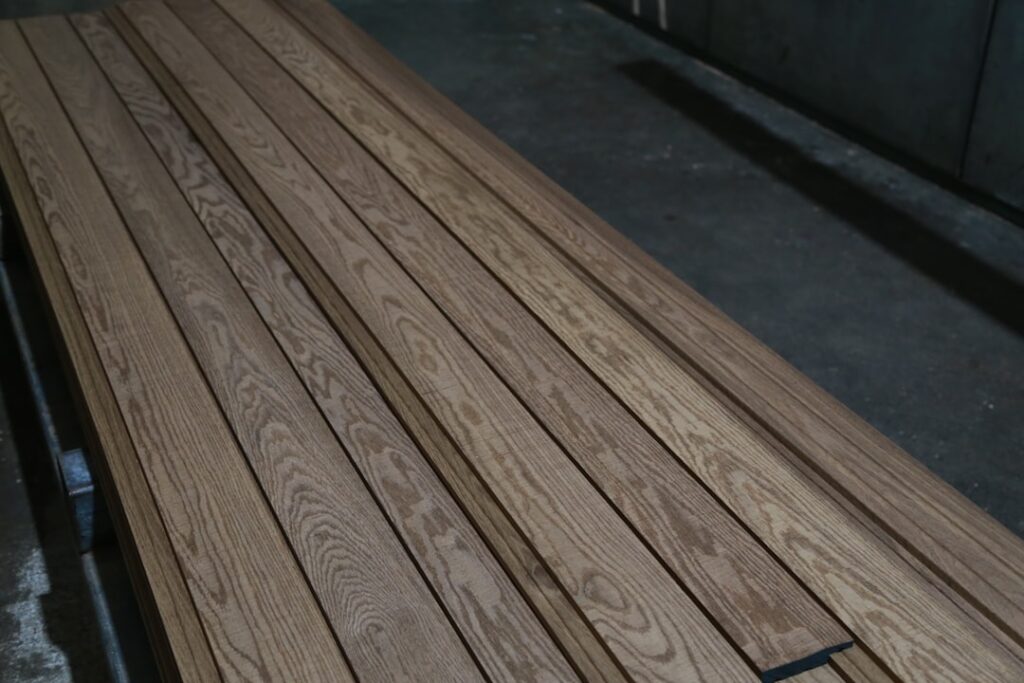
Knowing how to install vinyl flooring opens up one of the most rewarding DIY projects a homeowner can tackle. Vinyl flooring is affordable, waterproof, and available in several formats — each with a different installation method. Whether you are working with click-lock luxury vinyl plank, glue-down vinyl tile, peel-and-stick planks, or sheet vinyl, this guide walks you through subfloor preparation, the tools you need, and step-by-step instructions for each type.
Most vinyl flooring installations can be completed in a single weekend. The key to success is thorough subfloor preparation and understanding which vinyl format suits your room, skill level, and budget.
- Vinyl Flooring Types Overview
- Tools and Materials
- Subfloor Preparation
- Click-Lock LVP Installation (Step-by-Step)
- Glue-Down LVT Installation
- Peel-and-Stick Installation
- Sheet Vinyl Installation
- Working Around Obstacles
- Transitions and Trim
- Installation Method Comparison
- Frequently Asked Questions
- Can I install vinyl flooring over tile?
- Do I need underlayment for vinyl flooring?
- How long does vinyl flooring need to acclimate?
- Can I install vinyl flooring in a bathroom?
- What direction should I lay vinyl plank flooring?
- How do I fix a gap in click-lock vinyl flooring?
- Can I install vinyl plank flooring over concrete?
- How much does it cost to install vinyl flooring?
Vinyl Flooring Types Overview
Before you begin installation, identify which type of vinyl flooring you have. Each format uses a fundamentally different attachment method and has different subfloor requirements.
| Vinyl Type | Installation Method | Best For | DIY Difficulty | Cost per Sq Ft |
|---|---|---|---|---|
| Click-Lock LVP | Floating (clicks together) | Most rooms, DIY beginners | Easy | $2 – $7 |
| Glue-Down LVT | Full-spread adhesive | High-traffic commercial, basements | Moderate | $2 – $6 |
| Peel-and-Stick | Self-adhesive backing | Budget projects, rentals | Easy | $1 – $3 |
| Sheet Vinyl | Loose-lay or perimeter glue | Bathrooms, laundry rooms | Moderate to Hard | $1 – $4 |
Click-lock LVP is the most popular choice for homeowners. It floats over the subfloor without any adhesive, making it the easiest to install and remove. For a deeper look at click-lock systems, see our click flooring guide. For glue-down specifics, visit our glue-down vinyl plank resource.
Tools and Materials
Tools needed for all vinyl types:
- Tape measure and pencil
- Utility knife with extra blades
- Straight edge or T-square
- Spacers (1/4 inch for floating installations)
- Speed square
- Pull bar and tapping block (for click-lock)
- Rubber mallet
Additional tools by type:
- Click-lock LVP: Miter saw or jigsaw for crosscuts, oscillating multi-tool for door casings
- Glue-down LVT: 1/16-inch V-notch trowel, 100-lb floor roller
- Peel-and-stick: J-roller or rolling pin, heat gun (for corners and edges)
- Sheet vinyl: Floor roller, seam sealer, vinyl adhesive, notched trowel
Materials: Buy 10 percent extra vinyl for waste, cuts, and future repairs. Acclimate all vinyl flooring in the room for at least 48 hours before installation.
Subfloor Preparation
Subfloor preparation is the single most important step in any vinyl flooring installation. Vinyl is thin and flexible, so every imperfection in the subfloor telegraphs through the finished floor.
Concrete Subfloors
- Moisture test: Tape a 2×2-foot piece of plastic sheeting to the concrete. Wait 72 hours. If moisture forms underneath, you need a moisture barrier or should choose a waterproof SPC click-lock product
- Flatness: Check with a 10-foot straightedge. Variations must be less than 3/16 inch over 10 feet
- Patch and level: Fill low spots with self-leveling compound. Grind down high spots with a concrete grinder
- Clean: Sweep, vacuum, and remove any paint, adhesive residue, or grease
Plywood Subfloors
- Minimum thickness: 3/4 inch total (including underlayment)
- Screws: Make sure all screws are flush. Drive any popped screw heads below the surface
- Patch: Fill seams and knotholes with floor-patching compound
- Sand: Sand rough spots and dried patching compound smooth
Existing Flooring
You can install vinyl over existing vinyl, tile, or hardwood if the surface is smooth, flat, and firmly bonded. Do not install over carpet or cushioned flooring. If installing over textured tile, use a skim coat of self-leveling compound to create a flat surface.
Click-Lock LVP Installation (Step-by-Step)
Click-lock luxury vinyl plank is a floating floor. Planks snap together at the edges and ends, and the assembled floor rests on top of the subfloor without fasteners or adhesive. This is the most popular method and the best choice for DIY installers. For detailed plank-specific instructions, see our how to install vinyl plank guide.
Step 1: Install Underlayment
If your LVP does not have a pre-attached underlayment pad, roll out a vinyl-compatible underlayment. Butt seams together (do not overlap) and tape them with underlayment tape. Some products on concrete require a separate moisture barrier — check the manufacturer’s instructions.
Step 2: Plan Your Layout
Measure the room width and divide by the plank width to determine how many rows you need. If the last row will be less than half a plank wide, rip the first row narrower to balance the layout. Stagger end joints by at least 6 inches between adjacent rows — most manufacturers require 8 to 12 inches.
Step 3: Start the First Row
Begin along the longest, most visible wall. Place 1/4-inch spacers against the wall. Lay the first plank with the tongue facing the wall (or cut the tongue off, depending on the product). Click the end joints of subsequent planks in the first row by angling the short end at about 20 degrees and pressing down until it locks.
Step 4: Install Subsequent Rows
Start the second row with the cut-off piece from the first row (if it is at least 8 inches long). Angle the long side of the plank into the previous row’s groove at approximately 20 degrees and fold down. You should hear or feel a click. Use a tapping block and rubber mallet to close any gaps along the end joints. Never strike the plank directly — always use the tapping block.
Step 5: Continue Across the Room
Work left to right, row by row. Keep the floor surface clean — a small piece of debris under a joint will prevent it from clicking flat. Check for gaps frequently. Use a pull bar for the last row and any planks too close to the wall for a tapping block.
Step 6: Cut the Last Row
Measure the remaining gap at several points (walls are rarely perfectly straight). Rip the last row of planks to fit, maintaining the 1/4-inch expansion gap. A utility knife and straight edge work for most LVP, though a table saw gives cleaner cuts on rigid SPC products.
Glue-Down LVT Installation
Glue-down vinyl is permanently adhered to the subfloor with a full-spread adhesive. It creates the most stable installation and is preferred for commercial spaces, large open rooms, and areas with heavy rolling loads like kitchens with islands. Learn more in our how to lay vinyl flooring guide.
Step 1: Apply Adhesive
Spread the manufacturer-recommended adhesive with a 1/16-inch V-notch trowel. Work in sections — spread adhesive for about 3 to 4 rows at a time. Let the adhesive tack up according to the product instructions, usually 15 to 30 minutes. The adhesive should feel sticky but should not transfer to your finger when touched.
Step 2: Set the Tiles or Planks
Place each tile into the adhesive carefully. Do not slide tiles into position — this pushes adhesive up between joints. Set the tile down next to the adjacent piece and press it in. Work from the center of the room outward, following your chalk-line layout.
Step 3: Roll the Floor
After installing each section, roll it with a 100-pound floor roller. Roll in both directions. This ensures full adhesive contact and removes air pockets. Roll the entire floor again after the full installation is complete.
Step 4: Clean Excess Adhesive
Wipe any adhesive that squeezes up between seams immediately with a damp cloth. Dried adhesive is extremely difficult to remove from the vinyl surface.
Peel-and-Stick Installation
Peel-and-stick vinyl tiles use a pre-applied adhesive backing. Peel the release paper and press the tile into place. The method is simple, but the adhesive is less forgiving than you might expect — subfloor preparation is critical.
Key tips for peel-and-stick:
- The subfloor must be completely clean and dust-free. Even a thin layer of dust will prevent adhesion
- Room temperature must be at least 65 degrees Fahrenheit for proper adhesive activation
- Start from the center of the room using chalk lines as guides
- Press each tile firmly with a J-roller, especially at the edges
- Use a heat gun to warm tiles when fitting around curves or obstacles — it makes the vinyl more pliable
Sheet Vinyl Installation
Sheet vinyl comes in 6-foot or 12-foot-wide rolls. Installation is more challenging because you are working with large, unwieldy pieces that must be cut precisely to fit the room shape.
Template Method (Recommended for Beginners)
Create a paper template of the room using heavy kraft paper. Tape sheets of paper together, cut around obstacles, and ensure the template lies flat. Transfer the template to the vinyl sheet and cut with a utility knife and straight edge, adding 3 inches extra on all sides.
Installation
Roll the cut sheet into the room and position it. Let it relax and flatten for 30 minutes. Trim the edges to fit, leaving a 1/8-inch gap at walls. For perimeter-glue installations, fold back the edges and apply adhesive in a 6-inch band along all walls and seams. Press the vinyl into the adhesive and roll with a floor roller.
For full-spread adhesive installations, fold half the sheet back, apply adhesive with a notched trowel, let it tack, then carefully lay the vinyl into the adhesive. Repeat for the other half. Roll the entire floor.
Working Around Obstacles
Door casings: Undercut door casings and jambs so vinyl slides underneath. Use an oscillating multi-tool or a flush-cut saw with a scrap piece of vinyl as a depth guide. This creates a much cleaner look than trying to cut vinyl to fit around the casing profile.
Pipes: Measure and mark the pipe location on the plank. Drill a hole 1/2 inch larger than the pipe diameter. Cut a straight line from the hole to the nearest edge of the plank. Install the plank around the pipe, glue the cut piece back, and cover with a pipe escutcheon ring.
Toilet flanges: Remove the toilet before installing vinyl in bathrooms. Cut the vinyl to fit around the flange, then reinstall the toilet on top of the new floor. You may need a longer toilet flange or wax ring extender to account for the added floor height.
Cabinets and islands: Do not install floating vinyl under fixed cabinets or kitchen islands. The weight prevents the floor from expanding and contracting, leading to buckling. Install up to the cabinet toe kick and cover the gap with quarter-round molding.
Transitions and Trim
Transitions create clean junctions between vinyl flooring and adjacent flooring materials or between rooms.
| Transition Type | Use | How It Works |
|---|---|---|
| T-Molding | Two floors at the same height | Bridges the gap between two floating floors |
| Reducer | Vinyl meets a lower floor (tile, carpet) | Ramps down from the higher vinyl surface |
| End Cap | Vinyl meets a vertical surface (fireplace, slider door) | Finishes the edge cleanly |
| Quarter Round | Wall perimeter | Covers the expansion gap along baseboards |
| Stair Nosing | Top of stairs | Wraps the vinyl over the stair tread edge |
For floating click-lock floors, install a metal or plastic transition track in the doorway first, then click the vinyl into the track. Never glue or nail floating vinyl directly — it must be free to move. For more on vinyl flooring options, visit our vinyl flooring overview.
Installation Method Comparison
| Factor | Click-Lock LVP | Glue-Down LVT | Peel-and-Stick | Sheet Vinyl |
|---|---|---|---|---|
| DIY Friendly | Excellent | Moderate | Excellent | Difficult |
| Install Time (200 sq ft) | 3 – 5 hours | 5 – 8 hours | 2 – 4 hours | 4 – 6 hours |
| Removable | Yes | No | Partially | No |
| Stability | Good | Excellent | Fair | Excellent |
| Subfloor Prep | Moderate | Critical | Critical | Critical |
| Waterproof | Yes (SPC/WPC) | Yes | Water-resistant | Yes |
| Best Rooms | Any room | Kitchen, commercial | Low-traffic rooms | Bathroom, laundry |
Frequently Asked Questions
Can I install vinyl flooring over tile?
Yes, as long as the tile is firmly bonded, flat, and clean. If the grout lines are deep (more than 1/8 inch), apply a skim coat of self-leveling compound to create a smooth surface. Click-lock SPC vinyl is rigid enough to bridge minor grout lines without leveling.
Do I need underlayment for vinyl flooring?
Click-lock LVP needs underlayment unless it has an attached pad. Glue-down and peel-and-stick vinyl do not use underlayment — the adhesive must bond directly to the subfloor. Sheet vinyl does not require underlayment but needs a perfectly smooth subfloor.
How long does vinyl flooring need to acclimate?
Most manufacturers require 48 hours of acclimation in the room where it will be installed. Keep the boxes flat and the room at normal living temperature (65 to 85 degrees Fahrenheit). SPC vinyl with a stone-polymer core is more dimensionally stable and some brands allow installation with minimal acclimation.
Can I install vinyl flooring in a bathroom?
Absolutely. Vinyl is one of the best bathroom flooring options because it is waterproof. Use click-lock SPC or WPC vinyl for easy installation, or sheet vinyl for a seamless, zero-leak surface. Ensure all edges and transitions are properly sealed.
What direction should I lay vinyl plank flooring?
Install planks parallel to the longest wall or in the direction of incoming natural light. In hallways, always run planks lengthwise. In open-concept spaces, choose the direction that carries the eye toward the most prominent feature or window.
How do I fix a gap in click-lock vinyl flooring?
Gaps usually mean the plank did not fully click in. Remove planks back to the gapped row and reinstall, ensuring each plank clicks flush. For small gaps that appear over time, check for debris under the plank or an obstruction preventing expansion. Temperature fluctuations can also cause temporary gaps in WPC products.
Can I install vinyl plank flooring over concrete?
Yes. Click-lock SPC vinyl is ideal for concrete subfloors. Perform a moisture test first. Use a 6-mil polyethylene vapor barrier over the concrete before installing the underlayment and vinyl. Ensure the concrete is flat within 3/16 inch over 10 feet.
How much does it cost to install vinyl flooring?
DIY material cost ranges from $1 to $7 per square foot depending on the vinyl type. Professional installation adds $1.50 to $4 per square foot. A typical 200-square-foot room costs $400 to $1,400 for materials only, or $700 to $2,200 installed by a professional. See our vinyl flooring guide for detailed pricing.
Prefer to explore on your own?
See how new flooring looks in your actual room in seconds — free, no signup.
Try the free Floor Studio →