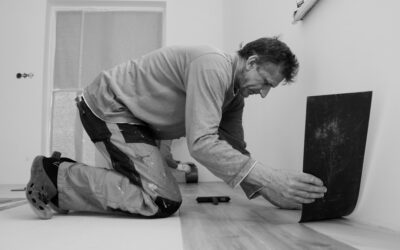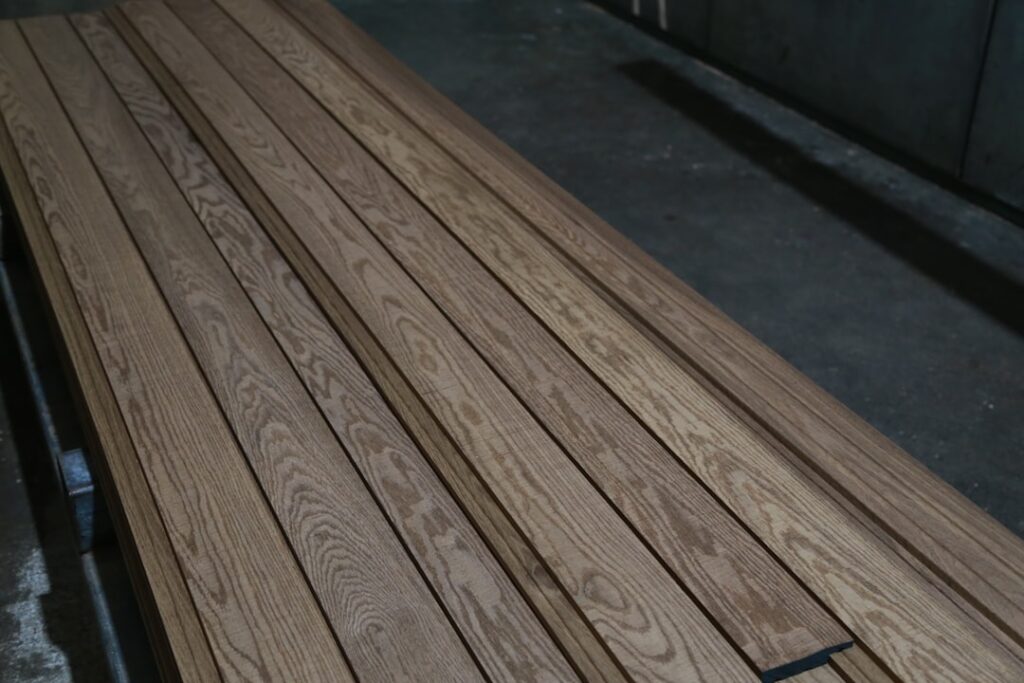
Learning how to lay vinyl flooring is one of the most accessible and rewarding DIY projects a homeowner can tackle. Modern vinyl flooring — whether click-lock luxury vinyl plank (LVP), peel-and-stick tile, or sheet vinyl — is designed to be installed without specialized tools, professional training, or weeks of downtime. Most rooms can be completed in a single day.
This guide provides complete step-by-step instructions for all three major vinyl flooring types, including subfloor preparation, acclimation, laying the first row, cutting techniques, working around toilets and cabinets, and installing transitions. Whether you are a first-time DIYer or an experienced home renovator, these instructions will help you achieve a professional-looking result.
- Subfloor Preparation
- Acclimation
- Installing Click-Lock LVP (Luxury Vinyl Plank)
- Installing Peel-and-Stick Vinyl
- Installing Sheet Vinyl
- Cutting Techniques
- Working Around Obstacles
- Transitions and Finishing
- Frequently Asked Questions
- Can a beginner install vinyl flooring?
- Do you need underlayment for vinyl flooring?
- Which direction should vinyl planks run?
- How long does vinyl flooring need to acclimate?
- Can you install vinyl flooring over concrete?
- How do you cut vinyl flooring around a toilet?
- How long does it take to install vinyl flooring?
Subfloor Preparation
Subfloor prep is the most important step in any vinyl flooring installation. Vinyl is thin and flexible — every bump, dip, crack, and debris particle underneath will telegraph through the surface and become visible (and sometimes uncomfortable) on the finished floor.
Requirements for All Vinyl Types
- Clean: Sweep and vacuum the subfloor thoroughly. Remove all debris, staples, nails, dried adhesive, and paint drips.
- Flat: The subfloor must be flat within 3/16 inch over a 10-foot span. Use a long straightedge or level to check. High spots can be sanded or ground down. Low spots should be filled with a floor-leveling compound (self-leveling for concrete, patching compound for plywood).
- Dry: Test concrete subfloors for moisture using a calcium chloride test (under 3 lbs per 1,000 sq ft per 24 hours) or relative humidity test (under 75% RH). Excessive moisture requires a vapor barrier or moisture mitigation system before vinyl installation.
- Smooth: Plywood subfloors should be free of splinters, raised grain, and edge gaps. Fill gaps wider than 1/8 inch with floor patching compound. Sand any rough areas smooth.
Can You Install Over Existing Flooring?
Vinyl can be installed over many existing surfaces, including concrete, plywood, existing vinyl (if single layer, flat, and firmly bonded), tile (if grout lines are filled or leveled), and hardwood (if flat and stable). You cannot install vinyl over carpet, cushioned or padded flooring, or any surface that is loose, crumbling, or soft.
When installing over existing tile, use a floor-leveling compound or embossing leveler to fill grout lines. The grout pattern will telegraph through thin vinyl if not addressed.
Acclimation
Most vinyl flooring manufacturers recommend acclimating the product in the installation room for 24 to 48 hours before installation. This allows the vinyl to adjust to the room’s temperature and humidity, reducing the risk of expansion, contraction, or buckling after installation.
Stack the boxes flat in the room with temperature maintained between 65 and 85 degrees Fahrenheit. Do not store vinyl in garages, unheated spaces, or direct sunlight during acclimation. Some rigid-core (SPC) products have very low expansion rates and may not require acclimation — check the manufacturer’s specific instructions.
Installing Click-Lock LVP (Luxury Vinyl Plank)
Click-lock LVP is the most popular vinyl flooring format and the easiest to install. Planks snap together at the edges and ends without glue, nails, or adhesive — creating a “floating” floor that sits on top of the subfloor.
Tools Needed
- Tape measure
- Utility knife (sharp blades)
- T-square or straight edge
- Spacers (1/4 inch — often included)
- Rubber mallet
- Tapping block
- Pull bar (for last row)
- Speed square
- Pencil
Step 1: Plan Your Layout
Measure the room width and divide by the plank width to determine how many rows you need. If the last row would be less than 2 inches wide, adjust by trimming the first row wider so the last row is not uncomfortably narrow. Plan to stagger end joints by at least 6 inches (preferably 12 inches) between adjacent rows for structural integrity and a natural appearance.
Step 2: Install Underlayment (If Required)
Some click-lock LVP requires a separate underlayment; many products have it pre-attached. If your product needs underlayment, roll it out across the subfloor with seams butted (not overlapped) and taped. On concrete subfloors, use underlayment with a built-in vapor barrier, or install a separate 6-mil polyethylene vapor barrier.
Step 3: Lay the First Row
Start along the longest, most visible wall. Place 1/4-inch spacers between the planks and the wall to create an expansion gap. Lay the first plank with the tongue side facing the wall (most manufacturers recommend cutting off the tongue on the first row for a clean wall edge). Connect end joints by angling the short end of the next plank into the previous plank and pressing down until it clicks.
Ensure the first row is perfectly straight — use a chalk line if the wall is not straight. The first row dictates the alignment of every subsequent row. If the wall is uneven, scribe the first row to the wall contour and trim.
Step 4: Continue Row by Row
Start the second row with a plank cut to create staggered end joints (at least 6 inches offset from the first row). Angle the long edge of the second-row plank into the first row’s groove and press down until it clicks flush. Work from left to right (or right to left — pick one direction and stay consistent). Use a tapping block and rubber mallet to close any gaps — never strike the plank directly.
Step 5: Install the Last Row
Measure the width needed for the last row, accounting for the 1/4-inch expansion gap. Rip-cut the planks to width using a utility knife and straightedge (score and snap) or a table saw for rigid-core products. Use a pull bar to click the last row into place since there is no room for a tapping block against the wall.
Step 6: Install Baseboards and Transitions
Remove spacers and install baseboards or quarter-round molding to cover the expansion gap. The molding should be fastened to the wall, not the floor, to allow the floating floor to move freely.
For detailed LVP guidance, see our vinyl plank installation guide.
Installing Peel-and-Stick Vinyl
Peel-and-stick vinyl tiles and planks have a factory-applied adhesive backing protected by a release liner. You peel the liner and press the tile onto the subfloor — no additional adhesive, click mechanisms, or specialty tools required.
Key Differences from Click-Lock
- No expansion gap needed — peel-and-stick tiles are adhered directly to the subfloor.
- Subfloor must be even cleaner and smoother — any debris prevents adhesion.
- Temperature matters — install in rooms above 65 degrees Fahrenheit. Cold floors prevent proper adhesive bonding.
- Some professionals recommend applying a thin coat of floor primer to porous subfloors (plywood, concrete) to improve adhesive bond.
Step-by-Step
- Find the room’s center. Snap chalk lines from the midpoints of opposite walls to create a crosshair at the room’s center. Starting from the center ensures even tile placement and symmetrical cuts at the walls.
- Dry-lay tiles from the center to the walls along both chalk lines. Adjust the layout so the border tiles at opposite walls are roughly equal in width (and at least half a tile wide).
- Peel and press the first tile at the center intersection, aligning it precisely with the chalk lines. Press firmly across the entire surface.
- Work outward from the center in a pyramid pattern, butting each tile tightly against its neighbors. Press each tile firmly with a hand roller or rolling pin to ensure full adhesive contact.
- Cut border tiles by placing a full tile on top of the last full tile in the row, then placing another tile on top with its edge against the wall. Use the top tile’s edge as a cutting guide to mark the middle tile. Cut with a utility knife and straightedge.
- Roll the entire floor with a 75-pound floor roller (available for rent at hardware stores) within 1 hour of installation to ensure complete adhesive bonding.
Learn more at our peel-and-stick flooring guide.
Installing Sheet Vinyl
Sheet vinyl is a continuous roll that covers the floor in one or two large pieces. Installation requires precise cutting and fitting but no clicking or adhesive on the surface.
Step-by-Step
- Make a paper template of the room using kraft paper or rosin paper. Tape sheets together to create a pattern that covers the entire floor, cutting around toilets, cabinets, and door frames. Mark reference lines on the template.
- Unroll the vinyl in a large, clean space (garage or adjacent room). Place the template on the vinyl, align it with the pattern, and tape it down.
- Cut the vinyl 3 inches larger than the template on all sides using a sharp utility knife.
- Position the vinyl in the room. Push it into corners and against walls. Make relief cuts at inside and outside corners to allow the vinyl to lay flat.
- Trim the edges using a straight edge and utility knife, leaving a 1/8-inch gap at walls (covered by baseboard).
- Secure the vinyl using full-spread adhesive (for rooms over 10×10 feet) or perimeter tape (for smaller rooms). Press firmly with a floor roller.
- Install transitions and baseboards.
Cutting Techniques
Clean, accurate cuts make the difference between a professional-looking installation and an amateur one.
Straight Cuts (Click-Lock LVP)
Score the plank face with a utility knife using a T-square or straightedge. Score firmly but in a single pass — pressing too hard can cause the blade to wander. Bend the plank along the score line and snap it cleanly. For rigid-core (SPC) planks, a sharper score may be needed, or use a vinyl plank cutter (a guillotine-style tool) for fast, clean cuts.
Lengthwise (Rip) Cuts
Mark the cut line on the plank face. Score with a utility knife and straightedge, then snap. For rigid-core planks that resist snapping, use a table saw, jigsaw, or oscillating multi-tool. Always cut with the decorative face up to minimize chipping.
Curved and Notch Cuts
For curves around toilet flanges, pipes, and irregular obstacles, trace the shape onto the plank using a compass or cardboard template. Cut with a jigsaw, oscillating multi-tool, or tin snips (for thinner vinyl). For notches around door frames, use a jigsaw or utility knife with multiple passes.
Working Around Obstacles
Toilets
Remove the toilet before installing vinyl in a bathroom (strongly recommended). Install the flooring up to and around the toilet flange, then reinstall the toilet on top of the new floor. If removing the toilet is not possible, cut a semicircle from the back edge of the plank to fit around the flange. Use a cardboard template to get the shape right before cutting the vinyl.
Cabinets and Islands
For floating click-lock floors, do not install under cabinets or kitchen islands — the weight prevents the floor from expanding and contracting freely, which can cause buckling. Install up to the base of the cabinet and cover the expansion gap with quarter-round molding or base shoe. For glued or peel-and-stick vinyl, you can install under cabinets since the floor is adhered and does not need to move.
Door Frames and Casings
Use an oscillating multi-tool or jamb saw to undercut door frames and casings so the vinyl slides underneath. This creates a much cleaner look than trying to cut the vinyl to fit around the frame profile. Lay a piece of vinyl (or vinyl plus underlayment) next to the frame as a height guide, then cut the frame at that height.
Pipes and Vents
Drill or cut a hole in the plank slightly larger than the pipe diameter (1/4-inch gap all around). Cut a straight line from the hole to the nearest plank edge. Slide the plank around the pipe and glue the cut seam together. Cover the gap around the pipe with an escutcheon plate (pipe cover ring).
Transitions and Finishing
Transition strips bridge the gap between your new vinyl floor and adjacent surfaces. Choose the right profile for each situation.
| Transition Type | Use |
|---|---|
| T-molding | Between two floors at the same height |
| Reducer | Between vinyl and a lower surface (like carpet) |
| End cap (baby threshold) | Where the floor ends at a doorway, step, or fireplace |
| Stair nose | At the edge of a step or landing |
| Quarter round / base shoe | Along walls to cover the expansion gap |
Most vinyl flooring brands sell color-matched transitions. Install transitions in doorways, at the threshold between rooms with different flooring, and wherever the floor meets a vertical surface that cannot be covered by baseboard.
For more vinyl installation guides, see our vinyl flooring overview and LVP flooring guide.
Frequently Asked Questions
Can a beginner install vinyl flooring?
Yes. Click-lock LVP is one of the most beginner-friendly flooring products available. The planks snap together without glue or nails, cuts are made with a utility knife, and most rooms can be completed in a day. Peel-and-stick is also easy but requires a very clean, smooth subfloor. Sheet vinyl is the most challenging type for DIY due to the precision cutting required.
Do you need underlayment for vinyl flooring?
It depends on the product. Many click-lock LVP planks have underlayment pre-attached to the bottom of each plank. If your product does not, install a thin vinyl-compatible underlayment. Peel-and-stick vinyl does not use underlayment. Sheet vinyl has built-in cushioning and does not need a separate underlayment. Always check the manufacturer’s specifications.
Which direction should vinyl planks run?
Install vinyl planks parallel to the longest wall or the main light source for the most natural appearance. In hallways, always run planks lengthwise. In open-concept spaces, choose one direction and maintain it throughout for visual continuity.
How long does vinyl flooring need to acclimate?
Most manufacturers recommend 24 to 48 hours of acclimation in the installation room at 65 to 85 degrees Fahrenheit. Some rigid-core (SPC) products with minimal expansion rates may not require acclimation. Always follow the manufacturer’s specific instructions — failure to acclimate can void the warranty.
Can you install vinyl flooring over concrete?
Yes. Concrete is an excellent subfloor for vinyl as long as it is clean, flat, dry, and free of cracks wider than 1/8 inch. Test for moisture (under 75% RH or 3 lbs/1000 sqft/24hrs by calcium chloride test). Use a vapor barrier on concrete subfloors with click-lock LVP. Self-leveling compound can correct minor unevenness.
How do you cut vinyl flooring around a toilet?
The easiest method is to remove the toilet, install the vinyl around the flange, and reinstall the toilet. If that is not possible, create a cardboard template of the toilet base shape, trace it onto the plank, and cut with a jigsaw or utility knife. Leave a 1/4-inch gap around the flange for expansion (hidden by the toilet base).
How long does it take to install vinyl flooring?
A typical 200-square-foot room takes 3 to 6 hours for click-lock LVP (including subfloor prep and transitions). Peel-and-stick is slightly faster. Sheet vinyl takes longer due to template making and precision cutting — plan 4 to 8 hours for a medium bathroom. A full house (1,000+ square feet) typically takes 2 to 4 days.
Ready to start your project? See our vinyl plank installation guide for more detail, or browse all vinyl flooring options.
Prefer to explore on your own?
See how new flooring looks in your actual room in seconds — free, no signup.
Try the free Floor Studio →