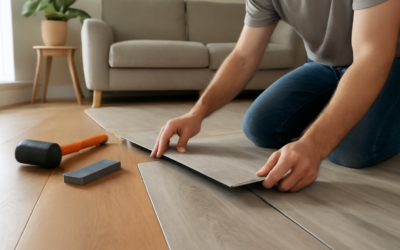
Vinyl flooring has overtaken laminate as the most installed product in UK and US homes, and a competent DIYer can fit a small to medium room in a weekend. How to fit vinyl flooring properly comes down to subfloor preparation more than the install itself — get the substrate right and the rest is patience and good cuts. This guide covers the three main vinyl install types — sheet, click LVP, and glue-down LVT — with step-by-step methods, the tools you need, and the mistakes that cause callbacks. The terms “fit” and “install” are used interchangeably to serve UK and US readers.
Choose the Right Vinyl Type for the Job
Three formats dominate the market. Sheet vinyl comes in 12-foot wide rolls, the cheapest option ($1 to $4 per sq ft material), best for bathrooms and kitchens where you want zero seams. Click-lock LVP and SPC are floating planks (5 to 8 mm thick), most common in living areas at $3 to $7 per sq ft. Glue-down LVT is fully bonded to the substrate, used in commercial settings and high-traffic residential zones at $4 to $10 per sq ft installed.
Pick by use case. Wet rooms (bathrooms, laundry, mudrooms) benefit from sheet vinyl’s continuous surface. Living rooms and bedrooms suit click LVP for ease of fit and replaceability. Commercial-grade homes and zones with rolling loads (kitchens with heavy appliances, home gyms) work best with glue-down LVT.
Subfloor Preparation: The 80 Percent of the Job
Vinyl flooring telegraphs every imperfection in the subfloor below. Bumps, dips, screw heads, and seams all show through within months. Preparation is non-negotiable.
For wood subfloors, screw down any squeaky sections with 2-inch deck screws into joists, set every screw 1/16 inch below flush, and skim-coat low spots with floor patch like Henry 547 or Mapei Planiprep. Sand high spots with a belt sander. The finished subfloor should be flat to within 3/16 inch over a 10-foot span.
For concrete subfloors, check moisture with a calcium chloride test — should read below 4 lbs per 1,000 sq ft per 24 hours. Higher readings need a moisture barrier or self-leveling underlayment with built-in vapor block. Grind down any high spots, fill cracks with concrete patch, and vacuum thoroughly.
Tools You Need
Same tool kit applies to all three vinyl types with minor additions:
- Tape measure, chalk line, and combination square.
- Utility knife with hook blades (Stanley 1992B blades for tough cuts).
- Straight edge or T-square at least 4 feet long.
- Tapping block and pull bar for click-lock fit.
- Rubber mallet (white rubber to avoid black marks on planks).
- 1/4-inch spacers for expansion gaps around walls.
- Notched trowel (1/16 x 1/16 x 1/16 inch U-notch) for glue-down LVT.
- 100 lb vinyl floor roller for glue-down installations.
- Jigsaw or oscillating multi-tool for cutting around door jambs and obstacles.
Skip the cheap utility knives — for vinyl plank, a Husky or Olfa with a heavy-duty hook blade cuts cleaner and lasts longer. Budget $80 to $150 for a complete tool kit if you do not already own these.
Fitting Sheet Vinyl Step-by-Step
Sheet vinyl is deceptively tricky because of the size of the material. The process:
- Acclimate the roll for 24 hours in the room at 65 to 75°F.
- Make a paper template of the room using rosin paper or builder’s paper. Tape pieces together as you trace each wall.
- Transfer the template to the vinyl roll in a flat space (driveway, garage). Trace, cut with a sharp utility knife.
- Test fit in the room. Trim where needed, leaving a tight wall fit for sheet (no expansion gap required).
- Apply adhesive using a notched trowel — most modern sheet vinyl uses perimeter glue, with a 6-inch band along walls and seams only.
- Roll with a 100 lb roller to bond the perimeter. Allow 24 hours before walking on the floor and 72 hours before placing furniture.
For seams, overlap by 2 inches, double-cut through both layers with a straight edge, remove the cut strips, and seam-seal with the manufacturer’s recommended seam sealer. A bad seam shows for the life of the floor.
Click-Lock LVP and SPC Install
Click vinyl is the easiest install for DIYers. Lay an underlayment if not already attached to the planks (most modern SPC has 1.5 mm IXPE pad pre-attached). Begin in a corner along the longest wall, with the tongue side facing the wall.
Place 1/4-inch spacers along the perimeter. Click planks into each other end-to-end first, then angle the next row into the long edge of the previous row using a tapping block. Stagger end joints by at least 8 to 12 inches between rows for visual variety and structural strength.
Cut the last plank in each row with a utility knife — score, snap. Use a jigsaw for door jamb notches. Once all planks are down, remove the spacers, install transitions and quarter round trim, and the job is complete. A 200 sq ft room typically takes 6 to 10 hours including prep.
Glue-Down LVT Install
Glue-down requires more discipline. Snap chalk lines to establish a starting reference — center of the room or along a focal axis. Spread adhesive with the manufacturer-specified notched trowel one section at a time. Most LVT adhesives have a 30 to 60 minute working time.
Lay each tile or plank into the wet adhesive, press firmly, and roll the section with a 100 lb floor roller within 30 minutes of placement. Wipe excess adhesive with mineral spirits or the manufacturer-recommended cleaner before it cures. Stay off the floor for 24 hours.
Common Mistakes to Avoid
Five mistakes account for most failed vinyl installs. First, skipping subfloor moisture testing on concrete. Second, fitting too tight to walls without expansion gaps on click systems — buckling within months guaranteed. Third, using a metal hammer instead of a rubber mallet, marring plank edges permanently. Fourth, not staggering end joints, which creates “Hs” of weak points. Fifth, walking on glue-down LVT before the adhesive cures, lifting tiles and creating ridges.
Also avoid installing vinyl directly over old vinyl in homes built before 1985 — asbestos backing was common until then. Test or remove with abatement professionals.
Finishing the Install
Trim work makes the difference between a DIY-looking floor and a professional one. Use quarter round or shoe molding to cover expansion gaps along walls. Match the trim to the floor or to existing baseboards depending on the look you want. Install transition strips at door openings and where vinyl meets other floor types.
Caulk where the floor meets bathtubs, showers, and toilet bases with a clear silicone caulk to keep water out of the seams. The first cleaning should wait 48 hours after install and use only the manufacturer-recommended cleaner — common floor cleaners can dull the wear layer. With clean prep, sharp cuts, and patience on the lock-in, knowing how to fit vinyl flooring is genuinely within reach for any homeowner with a free weekend.
Prefer to explore on your own?
See how new flooring looks in your actual room in seconds — free, no signup.
Try the free Floor Studio →