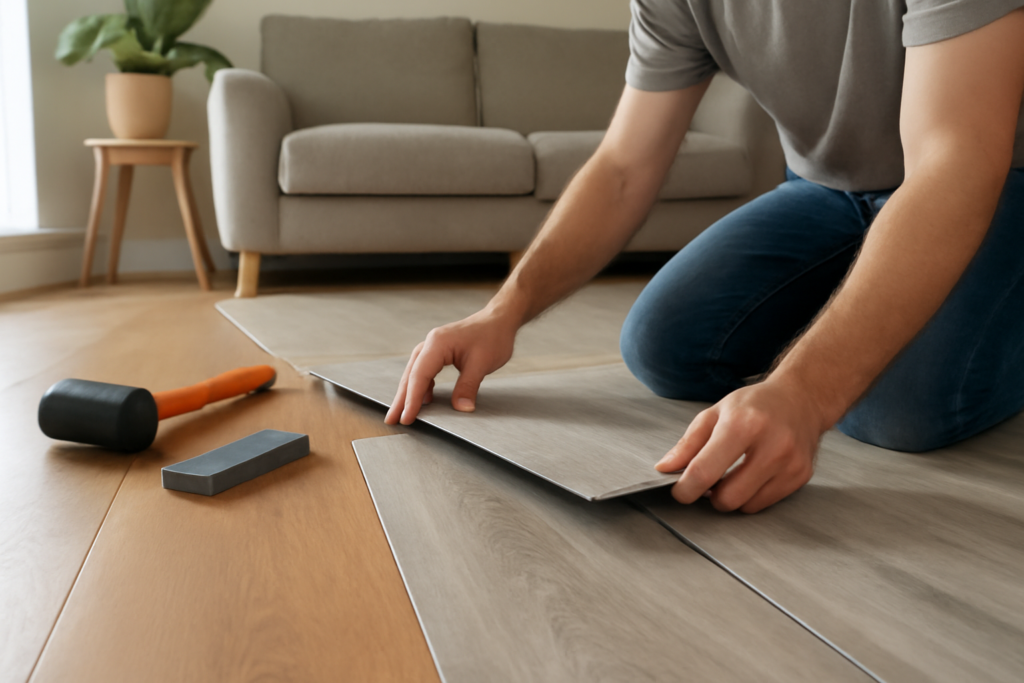
The single biggest reason vinyl plank took over remodeling shows and weekend projects alike is that you no longer need a bucket of adhesive to install it. Click fit vinyl flooring snaps together edge to edge like puzzle pieces and floats over your subfloor, which means a determined homeowner can floor an entire room in an afternoon with a utility knife and a tapping block. It looks like wood or stone, resists water, and can often go straight over your existing floor. Here is how the locking system actually works, what to look for when buying, and where it beats the glue-down alternative.
- What Click Fit Vinyl Flooring Actually Is
- How the Locking System Works
- The Big Advantages
- What It Costs
- What to Look For When Buying
- How to Install Click Fit Vinyl
- Where It Works Best — and Where It Doesn’t
- Common Mistakes That Cause Joints to Fail
- Caring for a Click Vinyl Floor
- Click vs Glue-Down: Quick Take
- The Bottom Line
What Click Fit Vinyl Flooring Actually Is
Click fit vinyl — also called click-lock or floating vinyl plank — is a rigid or semi-rigid plank with a machined tongue-and-groove profile milled into all four edges. Instead of gluing each board to the floor, you angle one plank into the next and press or tap it down until the locking edges snap together mechanically. The whole floor becomes one connected surface that “floats” freely on top of the subfloor, held in place by its own weight and the perimeter walls.
Most click products today are rigid core, meaning they have a stiff SPC (stone plastic composite) or WPC (wood plastic composite) center layer. That rigidity is what lets the locking joints stay tight and bridge minor imperfections in the subfloor.
How the Locking System Works
There are two common joint styles, and knowing the difference makes installation far smoother.
Angle-Angle (Fold-Down)
The most popular system. You insert the long edge of a new plank at roughly a 20 to 30 degree angle into the plank already down, then lower it flat. As it drops, the joint locks. Repeat down the row, then connect the short ends the same way. It goes fast once you find the rhythm.
Angle-Tap (Drop-Lock)
Here the long edge angles in, but the short end is dropped straight down and tapped tight with a rubber mallet and tapping block. Some homeowners find this even quicker for the end joints.
Either way, a good click floor should snap with a clean audible click and leave no visible gap or lip between planks. If joints keep popping apart, the subfloor is usually the culprit.
The Big Advantages
- No adhesive — no fumes, no cure time, no mess, and you can walk on it immediately.
- DIY friendly — most people install a room without professional help.
- Goes over existing floors — it can float over tile, plywood, concrete, and even old vinyl if flat.
- Waterproof options — SPC and WPC cores handle spills, kitchens, and bathrooms.
- Repairable — a damaged plank in a floating floor can be unclicked and swapped.
- Removable — renters and flippers can take it up and reuse it.
What It Costs
Click fit vinyl spans a wide price range depending on core type, wear layer, and brand. Budget SPC planks start around $1.50 to $2.50 per square foot. Mid-range products with thicker wear layers and better visuals run $3 to $5 per square foot. Premium WPC and designer lines reach $5 to $7 or more. Because you skip adhesive and often skip pro labor, the installed cost is dramatically lower than tile or hardwood — many DIYers finish a 200-square-foot room for $500 to $900 in materials.
What to Look For When Buying
Not all click planks are equal. Focus on these specs before you buy.
Wear Layer Thickness
This clear top layer determines durability. For a home, 12 mil is a reasonable minimum, 20 mil is solid for busy households with kids and pets, and 28 mil or higher suits heavy traffic. It is measured in mils, not millimeters, so do not confuse it with overall thickness.
Core Type
SPC is denser, thinner, harder, and more dent-resistant — great over imperfect subfloors and in temperature-swinging spaces. WPC is a bit thicker, warmer, and softer underfoot. Choose SPC for durability and stability, WPC for comfort.
Attached Underlayment
Many click planks include a pre-attached IXPE or cork pad. This saves buying separate underlayment and adds sound absorption. If yours has no pad, budget for a foam underlayment.
Overall Thickness
Ranges from about 4 mm to 8 mm. Thicker planks feel more substantial and lock more securely, but height at doorways can become an issue.
How to Install Click Fit Vinyl
The process is refreshingly simple, but preparation makes or breaks it.
- Acclimate the boxes flat in the room for 48 hours at 65 to 85°F.
- Make the subfloor flat within 3/16 inch over 10 feet, clean, and dry.
- Add underlayment if the planks lack an attached pad.
- Plan your layout so the last row is at least 2 inches wide, not a sliver.
- Leave a 1/4- to 3/8-inch expansion gap around all walls and fixed objects.
- Stagger end joints by at least 6 to 8 inches for strength and a natural look.
- Use a tapping block and pull bar to close end joints tightly.
- Reinstall baseboard or add quarter-round to cover the expansion gap.
Where It Works Best — and Where It Doesn’t
Click fit vinyl shines in kitchens, living rooms, hallways, basements, and full-home installs where you want a fast, waterproof, wood-look floor. Because it floats, it also handles the seasonal movement of a house well. It is not the best choice for very large commercial spans or rooms with wild temperature swings and no climate control, such as an unconditioned sunroom, where extreme heat can expand the floor and stress the joints. In those cases a glue-down vinyl that is bonded flat is more stable. For the vast majority of homes, though, floating click planks are the sweet spot.
Common Mistakes That Cause Joints to Fail
When a click floor develops gaps or peaking planks, the cause is almost never the product — it is the install. Watch for these pitfalls:
- Skipping acclimation — cold planks installed then warmed will expand and buckle.
- No expansion gap — planks pressed tight to the wall have nowhere to go and lift in the middle on hot days.
- Uneven subfloor — dips greater than 3/16 inch over 10 feet flex the joints until they pop apart.
- Grit under the planks — a pebble or crumb under the floor holds a plank high and stresses the lock.
- Short end-joint stagger — end seams closer than 6 inches create weak points and an unnatural pattern.
Take an extra hour on subfloor prep and layout planning and you eliminate almost every long-term problem a floating floor can have.
Caring for a Click Vinyl Floor
Maintenance is minimal, which is part of the appeal. Sweep or dry-mop regularly to keep grit off the wear layer, and damp-mop with a pH-neutral vinyl cleaner as needed. Skip abrasive pads, wax, and steam mops unless the manufacturer approves them. Put felt pads under furniture and a mat at exterior doors to catch sand and grit, the main thing that dulls the finish over time. Handled this way, a quality click floor holds its look for 15 to 20 years.
Click vs Glue-Down: Quick Take
Glue-down vinyl feels rock solid, has no hollow sound, and is ideal for very large rooms and heavy rolling loads. But it demands a flawless subfloor, adhesive, cure time, and far more labor. Click fit vinyl flooring trades a hair of that solid feel for enormous gains in speed, cleanliness, and DIY simplicity — which is exactly why it dominates the residential market.
The Bottom Line
Click fit vinyl flooring gives you a waterproof, wood-look floor you can install yourself in a weekend with no glue and no professional crew. Buy a rigid SPC or WPC core with a wear layer matched to your traffic, prep the subfloor flat, respect the expansion gap, and the floating floor will stay tight and quiet for years. For most homeowners looking to upgrade a room quickly and affordably, click-lock vinyl is the easiest win in flooring.
Prefer to explore on your own?
See how new flooring looks in your actual room in seconds — free, no signup.
Try the free Floor Studio →