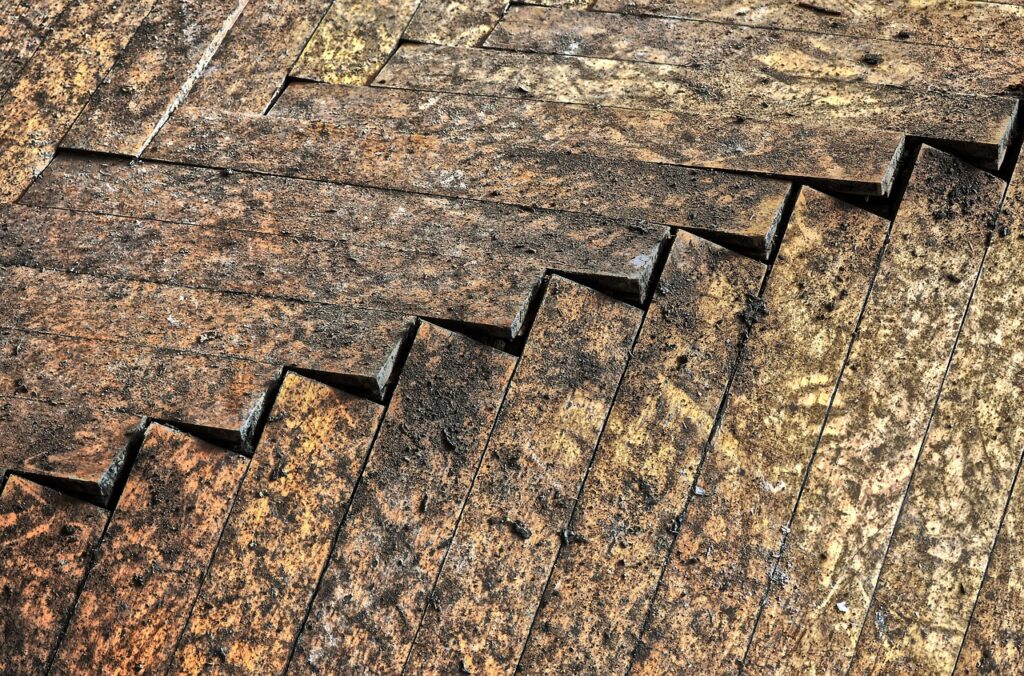
In my 20+ years of flooring experience, herringbone is the pattern that intimidates more DIYers and even some professionals than any other. And I understand why — the zigzag layout looks complex, the margin for error feels razor-thin, and one misaligned row can throw off the entire floor. But here is the thing: herringbone installation is more about patience and planning than skill. If you can lay standard plank flooring and you have a methodical mindset, you can lay herringbone.
This guide walks you through the entire process, from planning and layout to the final plank. I will cover techniques for engineered wood, solid hardwood, and luxury vinyl tile (LVT), because the core installation principles are the same across all materials — with a few important differences I will call out along the way.
Before You Start
Acclimate Your Flooring
This step is non-negotiable for wood flooring. Bring the herringbone planks into the room where they will be installed and let them acclimate for at least 48 hours — ideally a week for solid wood. The room should be at its normal living temperature and humidity. Stack boxes with air space between them, or spread planks loosely across the floor. LVT products need 24 to 48 hours of acclimation.
Calculate Material Quantities
Herringbone generates more waste than standard plank installation due to the angled cutting at borders. Order 15 to 20% more material than your room’s square footage. For a 400-square-foot room, that means ordering 460 to 480 square feet of material. Running short mid-project and discovering the next batch has a slightly different shade is a nightmare I have seen too many times.
Check Your Planks
Before starting, inspect every plank for damage, warping, or color inconsistencies. Set aside any defective pieces. Mix planks from multiple boxes as you install to blend any subtle shade variations between production batches.
Tools and Materials Needed
Essential Tools
- Tape measure
- Chalk line
- Carpenter’s square (large framing square preferred)
- Miter saw or table saw
- Utility knife (for LVT)
- Tapping block and pull bar
- Rubber mallet
- Spacers (10mm for wood, 5-8mm for LVT)
- Pencil or fine-tip marker
- Knee pads — you will be on the floor for hours
For Glue-Down Installation
- Flexible flooring adhesive (check manufacturer recommendation)
- Notched trowel (typically 1/16″ x 1/16″ x 1/16″ V-notch for LVT, larger for wood)
- Adhesive spreader
- Damp cloth for cleanup
- 75-pound floor roller
For Click-Lock Installation
- Tapping block designed for your specific click-lock system
- Pull bar for final planks near walls
- Quality underlay (if floating installation)
For Nail-Down Installation
- Pneumatic flooring nailer with 18-gauge cleats
- Compressor
- Face nails and putty for the first few rows
Subfloor Preparation
A perfect herringbone installation starts with a perfect subfloor. The tolerance for herringbone is even tighter than for standard planks because the short pieces amplify any unevenness.
Concrete Subfloors
- Test moisture levels — concrete must be below 3 lbs per 1,000 sq ft per 24 hours (calcium chloride test) or below 75% RH (in-situ probe test)
- Fill any cracks, holes, or depressions with a self-leveling compound
- Grind down any high spots
- The subfloor should be flat to within 3/16 inch over a 10-foot span
- Apply moisture barrier if required by the flooring manufacturer
Plywood Subfloors
- Ensure plywood is at least 3/4 inch thick and securely fastened to the joists
- Re-screw any squeaky or loose areas
- Sand down raised seams between plywood sheets
- Fill joints and screw holes with floor patching compound
- Sweep and vacuum thoroughly
Over Existing Flooring
You can install herringbone over existing hard flooring (vinyl, tile, hardwood) if it is flat, stable, and firmly adhered. Do not install over carpet or floating floors. For click-lock herringbone over existing hard flooring, use an appropriate underlay. For glue-down, the existing surface must accept adhesive — test a small area first.
Planning Your Layout
This is the most important phase of the entire project. Spending an extra hour planning saves hours of frustration and waste during installation.
Decide on Direction
The herringbone pattern creates a strong visual flow. Consider these guidelines:
- Point the V toward the main entry to draw the eye into the room
- Run the V parallel to the longest dimension to elongate the space
- In hallways, run the V along the length for a runway effect
- In open-plan spaces, orient toward the primary gathering area or focal wall
With or Without a Border?
A border — rows of straight planks running along the perimeter — frames the herringbone field and creates a more traditional, polished look. Without a border, the herringbone pattern runs right up to the walls, creating a more contemporary, seamless feel. If you choose a border, plan for two to three plank widths of straight border and account for this in your measurements.
Finding and Marking the Centerline
Herringbone always starts from the center of the room and works outward. Never start from a wall — you will end up with an unbalanced pattern.
Step-by-Step Centerline Layout
- Measure the room’s width at both ends and mark the midpoints on the floor
- Snap a chalk line between these two midpoints — this is your primary centerline
- Measure the room’s length at both sides and mark the midpoints
- Snap a second chalk line perpendicular to the first — confirm it is 90 degrees using a 3-4-5 triangle method (measure 3 feet along one line, 4 feet along the other, and the diagonal should equal exactly 5 feet)
- Dry-lay a test section of herringbone along the centerline to verify the pattern spacing and see how it intersects the walls
- Adjust if necessary — if the pattern creates very thin slivers at one wall, shift the centerline slightly to balance the border cuts
The Guide Board Technique
This is a trick I use on every herringbone installation. Take a straight piece of lumber (a 1×4 works well) and secure it temporarily along your centerline using double-sided tape or small nails. This guide board gives you a solid reference edge to align your first row of planks against, preventing drift and ensuring your starting row is perfectly straight. Remove it after the first few rows are secure.
Step-by-Step Installation
Step 1: Install the First Plank
Place the first plank against the guide board with its long edge running exactly along the centerline. The end of the plank should align with the perpendicular chalk line. For glue-down, spread adhesive in a small working area and press the plank into position. For click-lock, simply place it and hold it with spacers.
Step 2: Install the Second Plank
The second plank meets the first at a 90-degree angle. Place it so its end butts against the long edge of the first plank, and its long edge runs perpendicular to the first plank. The tongue-and-groove (or click-lock) connection should engage at the junction. Use your square to verify the 90-degree angle — this first joint sets the alignment for the entire floor.
Step 3: Build the Spine
Continue alternating planks to create the central “spine” or “leader row” of the herringbone pattern along the centerline. Each plank butts against the previous one at 90 degrees, creating the characteristic zigzag. This spine row is the foundation of the entire pattern — check alignment with your square every three to four pieces.
Step 4: Fill in Both Sides
Once the spine extends several feet, begin filling in on both sides. Each new plank’s end sits against the long edge of a plank in the previous row, and its long edge sits against the end of the adjacent plank. Work systematically — complete one side to a comfortable working distance, then switch to the other side to balance the floor.
Step 5: Continue to the Walls
Work outward from the center in both directions until you reach the walls. The last row of full planks should leave enough space for border cuts plus the expansion gap. Keep checking alignment periodically — even small errors compound over many rows.
Step 6: Roll the Floor (Glue-Down Only)
After every 30 to 45 minutes of glue-down installation, roll the completed area with a 75-pound floor roller to ensure full adhesive contact. Go over each section in both directions. This step is critical for long-term adhesion and preventing hollow spots.
Cutting Border Pieces
The border is where herringbone installation gets fiddly. Each perimeter plank must be individually measured and cut to fit the angle where the herringbone pattern meets the wall.
Measuring and Cutting Tips
- Measure each piece individually — walls are rarely perfectly straight, so each cut will be slightly different
- Use an offcut as a template — hold a full plank against the wall and mark the cut line where it overlaps the last installed piece
- Remember the expansion gap — cut pieces 10mm (for wood) or 5-8mm (for LVT) short of the wall
- For angled cuts along the herringbone edges, set your miter saw to 45 degrees and cut to the marked line
- Label border pieces as you cut them — it is easy to get confused about which piece goes where
Finishing Touches
Expansion Gaps
Remove all spacers and confirm that expansion gaps are consistent around the entire perimeter. For wood flooring, maintain a 10-12mm gap. For LVT, 5-8mm is typical. These gaps will be hidden by baseboards or trim.
Baseboards and Trim
Install baseboards to cover the expansion gaps. If you removed the original baseboards, consider adding quarter-round or shoe molding at the base for a cleaner transition. Pin-nail baseboards to the wall (not the floor) so the floor can move freely beneath them.
Transition Strips
Where the herringbone floor meets other flooring types (carpet, tile, different-height flooring), install appropriate transition strips. T-moldings work for floors of equal height; reducer strips handle height differences.
Final Cleaning
Sweep or vacuum all dust and debris. For glue-down installations, clean any adhesive residue from the surface using the manufacturer’s recommended cleaner. Damp-mop the entire floor with a mild floor cleaner and allow it to dry completely before moving furniture in.
Common Mistakes to Avoid
Starting from a Wall
The number one mistake. If you start from a wall, the pattern will almost certainly look off-center when viewed from the doorway. Always find center, establish your guide board, and work outward.
Not Checking Squareness
The 90-degree angle between planks is everything in herringbone. If your first few joints are off by even one degree, the error compounds exponentially. Check with a square after every three to four pieces for the first several rows, and periodically after that.
Spreading Too Much Adhesive
For glue-down herringbone, only spread enough adhesive for 20 to 30 minutes of working time. The pattern requires frequent adjustments, and if the adhesive skins over before you place the planks, you will get poor adhesion. Work in small sections.
Forgetting the Expansion Gap
In the concentration of getting the pattern right, it is easy to forget spacers at the walls. Without an expansion gap, wood flooring will buckle when it expands seasonally. Set spacers early and check them often.
Not Mixing Boxes
Even within the same production run, there can be subtle shade variations between boxes. Pull planks from multiple boxes as you work to distribute any color variation randomly across the floor, rather than creating visible batch boundaries.
Rushing the First Row
The spine row determines the quality of the entire floor. I have seen installers spend 45 minutes on the first 10 planks and then accelerate to a plank every 30 seconds once the pattern is established. The first row deserves your most careful, deliberate work.
Tips by Flooring Material
Engineered Wood Herringbone
- Glue-down is the preferred method for the most stable result
- Use a moisture-barrier adhesive over concrete subfloors
- Pre-cut several pieces at once to speed up the installation flow
- Apply gentle pressure when engaging tongue-and-groove — do not force connections
Solid Hardwood Herringbone
- Nail-down installation over plywood subfloors is standard
- Pre-drill nail holes to prevent splitting, especially near plank ends
- Face-nail the first few rows where the nailer cannot reach, then switch to blind nailing
- Extended acclimation (1-2 weeks) is critical due to solid wood’s greater movement
LVT Herringbone
- Click-lock LVT herringbone is the most DIY-friendly option
- Cuts can be made with a utility knife and straight edge — no saw needed
- LVT is thinner and more flexible, making alignment slightly easier
- Temperature matters — install in rooms between 65-85 degrees Fahrenheit for best adhesive performance
Frequently Asked Questions
How long does it take to lay herringbone flooring?
For an experienced installer, a 400-square-foot room takes approximately two to three days. For a DIYer, allow four to five days, including layout planning, installation, and finishing. The first day is typically the slowest as you establish the spine row and develop a rhythm. Speed increases significantly once the pattern is established and you are filling in the field areas.
Can I lay herringbone flooring as a floating floor?
Yes, if you are using a click-lock product designed for floating installation. Both engineered wood and LVT herringbone products are available with click-lock systems. The key is to use a quality acoustic underlay and to maintain expansion gaps at all walls. Floating herringbone may feel slightly less solid underfoot than a glue-down installation, but modern click-lock systems have improved dramatically and the difference is minimal.
What direction should herringbone flooring run?
There is no single correct answer, but the most common and visually effective approach is to point the V of the herringbone pattern toward the main entry point of the room. This draws the eye inward and creates a sense of depth. In hallways, run the V along the length. In open-plan spaces, orient toward the area where the floor is most visible, such as the living room from the kitchen.
Do I need underlay for herringbone flooring?
For floating click-lock installations, yes — use a quality acoustic underlay appropriate for your flooring type. For glue-down installations, no underlay is used — the adhesive bonds directly to the subfloor. For nail-down installations, no underlay is needed as the planks are mechanically fastened. Always check the flooring manufacturer’s specific recommendations, as some products have integrated backing that eliminates the need for separate underlay.
Is herringbone flooring harder to install than regular planks?
Yes, herringbone is more complex than standard plank installation. The layout planning is more involved, the number of cuts is greater, the margin for alignment error is smaller, and the installation speed is slower. I estimate herringbone takes roughly 40 to 60% longer to install than the same area in standard straight planks. However, the complexity is manageable if you are patient, methodical, and willing to check your alignment frequently. The visual reward is well worth the extra effort.
Prefer to explore on your own?
See how new flooring looks in your actual room in seconds — free, no signup.
Try the free Floor Studio →