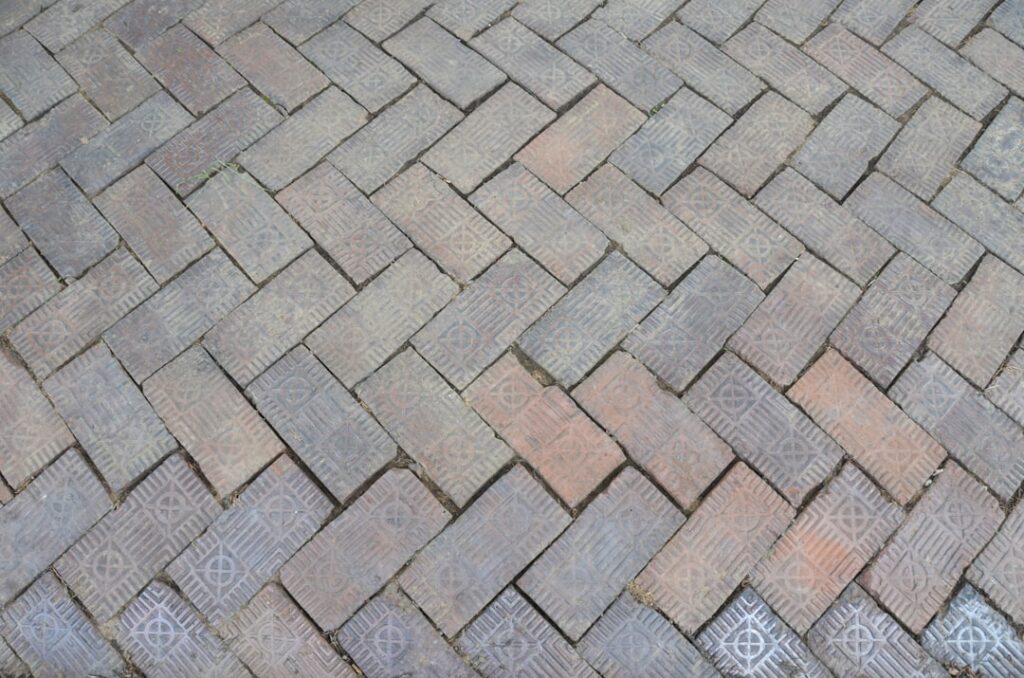
Every paver manufacturer’s technical guide says the same thing about driveways: use herringbone. That is not tradition talking — it is load mechanics. Herringbone pavers interlock in two directions at once, so braking tires and turning wheels cannot creep the field the way they walk a running-bond pattern out of line. Roman roads used the pattern (opus spicatum) for the same reason two thousand years ago. This guide covers the 45-degree versus 90-degree decision, the exact laying sequence from a starter line, border courses, cutting and waste math, and which paver sizes actually work in the pattern. Interior herringbone tile is a different craft with its own articles; everything here is outdoor pavers on a compacted base.
Why Herringbone Is the Strongest Pattern
A paver field fails by creep: repeated horizontal loads — braking, accelerating, power-steering scrub — shove units along their joint lines until joints open and edges ravel. In running bond, every second joint is a continuous straight line for that movement to exploit. Herringbone breaks every line. Each paver is locked at 90 degrees to its neighbors, so load applied along one unit’s axis is immediately resisted by the next unit’s side. Studies on interlocking concrete pavement consistently show herringbone fields develop the least creep and rutting under vehicular traffic, which is why ICPI guidance calls for herringbone (with units having a length-to-width ratio near 2:1) on driveways and streets. On a patio that only carries chairs, the strength margin is free — you choose herringbone there purely for the look.
45-Degree vs 90-Degree Herringbone
Both orientations interlock identically; the differences are visual and practical.
- 90-degree herringbone runs pavers parallel and perpendicular to the border. It reads calmer and more architectural, and — the big one — every edge cut is a simple square cut or an L, so cutting labor and waste stay low (5 to 8 percent). Best when the area is a clean rectangle.
- 45-degree herringbone sets the zigzag diagonal to the border. It is the classic European-street look, visually widens narrow driveways, and disguises out-of-square boundaries because no paver line parallels the edge. The cost is at the perimeter: every border paver gets a 45-degree cut, pushing waste to 10 to 15 percent and adding half a day of saw time on a typical driveway.
Performance between the two is effectively equal for residential loads; some engineers give 45-degree a slight edge where traffic direction is constant, since no joint line ever aligns with travel. Choose on geometry and appetite for cutting.
Paver Sizes That Work
Herringbone needs rectangles, ideally at a true 2:1 ratio: 4″ x 8″ (the classic, and the strongest look at driveway scale), 6″ x 12″, or 7″ x 14″ plank formats for modern patios. Holland stone at 4″ x 8″ x 2 3/8″ (60 mm) suits patios and walks; driveways call for 2 3/4″ to 3 1/8″ (70–80 mm) thick units. Non-2:1 rectangles (like 6″ x 9″) can lay a herringbone with small offset gaps at the notches — some systems are designed for it, but verify with a dry-laid square yard first. Squares cannot herringbone at all. For a driveway, confirm the manufacturer rates the unit for vehicular use; thin 1 3/8″ overlay pavers are patio-only regardless of pattern.
Laying Sequence From a Starter Line
Assume the base is done right — excavation, geotextile, 6″ to 10″ of compacted road base for driveways (4″ for patios), and a screeded 1″ bedding layer of concrete sand. Pattern work then goes like this:
- Establish the starter line. Snap a chalk line or pull a string dead straight along your longest fixed edge, or through the field’s center on large areas. For 45-degree work, set the line at exactly 45 degrees to the border using a 3-4-5 triangle (measure 3 ft and 4 ft along the legs; the diagonal must be 5 ft).
- Build the starter chevron. Lay the first pair as an L: one paver’s end butted against the other’s side at 90 degrees. Align the outside corners on the string. Add pairs along the line, checking alignment every 3 to 4 ft — errors here propagate across the whole field.
- Work outward in a stair-step diagonal, always placing each new paver against two already-laid edges. Never lay isolated rows; the two-edge contact is what keeps the pattern self-truing.
- Lay from the field, never stand on the screeded sand. Work forward off placed pavers, click units in by sliding them down the neighbor’s face — do not slide them horizontally across the sand, which plows bedding into the joint.
- Check joints and string lines every few courses. Herringbone hides small drift well but accumulates it; a string across the diagonals every 6 ft catches wander while it is still correctable by tapping with a rubber mallet.
- Leave all border cuts for the end, then compact the finished field with a plate compactor over a protective pad, sweep in joint sand, compact again, and top up.
Borders and Soldier Courses
A herringbone field needs a frame, structurally and visually. Install a soldier course — pavers laid side by side, long dimension perpendicular to the edge — or a sailor course (long dimension parallel) around the perimeter, set first against the edge restraint. The border does three jobs: it gives the field’s cut edges something to die into cleanly, it puts full-strength rectangles at the most vulnerable location, and it visually sharpens the pattern. On driveways, a double border or a contrasting-color soldier course in charcoal against a gray field is the most-requested upgrade and adds only $200 to $500 in material on a typical two-car drive. Concrete or composite edge restraint (Snap Edge, Pave Edge) spiked every 8″ to 12″ behind the border is non-negotiable — herringbone’s interlock is only as good as its confinement.
Cutting and Waste Percentages
Plan cuts with real numbers. A 90-degree layout in a rectangular area needs cuts only where the stair-step meets the border: order 5 to 8 percent overage. A 45-degree layout cuts every perimeter unit into a triangle or trapezoid: order 10 to 15 percent, at the high end for narrow walkways where perimeter is large relative to area. Useful tricks: the offcut from one 45-degree border cut often flips to fill the opposite side of the same notch; cutting pavers a hair strong (1/8″ gap to the border, hidden by joint sand) beats grinding for perfect fits. Rent a 14″ wet masonry saw ($60–$90/day) for big jobs, or run a diamond blade on an angle grinder for a small patio’s edge cuts. Always cut wet or with dust extraction — dry-cutting concrete releases silica, and a $30 P100 respirator is mandatory either way.
Estimating Materials: A Worked Example
Take a 20 x 40 ft driveway — 800 sq ft — in 4″ x 8″ pavers at 4.5 units per square foot. Field requirement: 3,600 pavers. A double soldier-course border consumes the perimeter’s 120 linear feet at roughly 3 units per foot per course, about 720 border pavers, leaving 2,880 in the herringbone field. Add waste: 8 percent for a 90-degree layout (about 290 pavers) or 13 percent for 45-degree (about 470). Total order lands between 4,600 and 4,800 units — round up to full bands, since partial-band returns rarely pay. Base materials for the same drive: roughly 20 tons of road base at 8″ compacted depth, 3 to 4 tons of concrete bedding sand, 130 ft of edge restraint, and 15 to 20 bags of joint sand. Pricing that out at typical yard rates puts materials near $4,800 to $6,500 before a single paver is laid, which is why the pattern’s extra 5 percent waste is a rounding error against getting the base right.
Herringbone vs Running Bond and Basketweave
Running bond lays fastest (crews price it 10 to 20 percent below herringbone), wastes least, and suits walkways fine — but its continuous joints creep under vehicles and its look is ordinary. Basketweave (pairs alternating direction) is charming and cottage-like, nearly cut-free in square areas, yet it interlocks poorly and belongs only on foot-traffic surfaces. Herringbone costs more in labor and waste, and repays it with the strongest interlock available and a pattern that makes even a $3-per-square-foot gray concrete paver read as considered design. For a driveway, the engineering answer and the aesthetic answer happen to be the same word — and installed cost lands around $12 to $22 per sq ft professionally, or $5 to $8 per sq ft in materials for a determined DIYer with a plate compactor and a patient string line.
Prefer to explore on your own?
See how new flooring looks in your actual room in seconds — free, no signup.
Try the free Floor Studio →