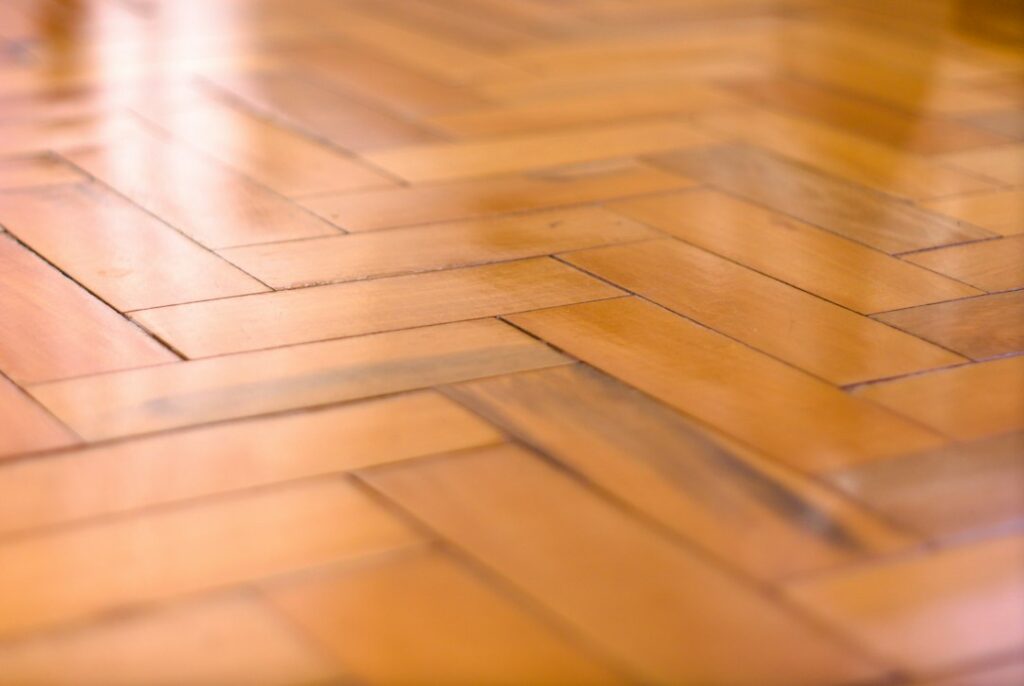
A herringbone pattern wall looks complicated, but the hardest part happens before you cut a single board: finding a true vertical center line and committing to it. Most crooked herringbone walls go wrong because the installer starts in a corner, trusting walls and ceilings that are rarely square, and the zigzag drifts a little more with every row. Start from the middle instead, and the pattern stays crisp from floor to ceiling.
Herringbone works in wood planks for a warm, textured focal wall behind a bed or sofa, and in tile for showers, fireplaces, and powder rooms. Both use the same layout logic. The difference is in the cutting tools, the fastening method, and how you finish the edges. Plan on a weekend for an average bedroom accent wall in wood, and a little longer for tile because of setting and grout time.
- Planning a Herringbone Pattern Wall
- Wood or Tile: Which Material Fits
- Tools and Materials
- Laying Out the Center Line
- Cutting Jigs and Repeatable Angles
- Step-by-Step Installation
- Finishing the Ends and Edges
- Troubleshooting Common Problems
- Cost Ranges and When to Call a Pro
- Frequently Asked Questions
Planning a Herringbone Pattern Wall
Pick the wall first. A herringbone pattern wall is busy by nature, so it shines on a single wall with few interruptions: behind a headboard, a media wall, a dining nook, or the back wall of a shower. Walls with several windows, outlets, and switches mean many fiddly cuts and a broken-up pattern.
Decide on scale. Narrow boards, around 3 to 4 inches wide, create a tight, detailed zigzag that suits smaller rooms. Wider planks, 5 to 6 inches, read bolder and install faster. For tile, rectangular pieces such as 2 by 8, 3 by 12, or 4 by 16 inches are common; the length should be at least three times the width for a clean pattern.
Choose the orientation. A vertical herringbone, with the points running up the wall, draws the eye toward the ceiling and makes rooms feel taller. A horizontal layout, with the points running side to side, widens a narrow space. Vertical is the more common choice for accent walls.
Wood or Tile: Which Material Fits
Wood is lighter, cheaper, and faster for a living area or bedroom. Options include pre-primed MDF strips, pine or poplar boards, reclaimed wood, and thin wood or laminate planks. MDF paints beautifully and stays flat; stained solid wood shows grain and color variation, which adds character to the zigzag.
Tile belongs anywhere moisture or heat is a factor: showers, tub surrounds, laundry rooms, and fireplace surrounds (use noncombustible materials and follow the fireplace maker’s clearances). Porcelain and ceramic are the usual choices, and wood-look porcelain gives you the timber appearance with full water resistance. Natural stone works too but needs sealing.
- Wood boards: lower cost, quick installation, paint or stain, dry areas only.
- Ceramic or porcelain tile: waterproof when installed over proper backer, higher labor, requires grout.
- Peel-and-stick panels: fastest and renter-friendly, but less depth and texture.
Tools and Materials
For a Wood Herringbone Wall
- Miter saw for repeatable 45 degree cuts, plus a stop block or simple jig
- Brad nailer with 1.5 to 2 inch nails and construction adhesive
- 4 foot level, laser level, tape measure, chalk line, stud finder
- Spacers if you want reveal gaps between boards
- Wood filler, caulk, sandpaper, primer, and paint or stain
For a Tile Herringbone Wall
- Wet tile saw, plus a manual tile cutter for straight cuts
- Thinset mortar suited to the tile size and location, notched trowel, mixing paddle
- Tile spacers, leveling clips for long pieces, grout, grout float, sponges
- Cement board or a waterproofing membrane for wet areas
- Edge trim or bullnose pieces for exposed ends
If you are buying one tool for this project, a miter saw makes the biggest difference for wood. Its detents lock onto 45 degrees repeatedly, so every board matches and the joints close tight.
Laying Out the Center Line
Measure the wall width and mark the exact center at the floor and ceiling. Snap a plumb line between them with a laser level or a long level and chalk line. Do not trust the corners; most are slightly out of plumb.
Next, mark a horizontal reference line near the bottom, a few inches above the floor or baseboard, using the level. This is where your first full V will sit. Starting with the lowest point of the zigzag above the floor keeps you from cutting tiny slivers at the base.
Before fastening anything, dry-lay a few rows on the floor in front of the wall. This shows you the true width of the zigzag, lets you check how boards meet at the center line, and helps you plan where cut pieces will land at the edges. Aim for edge pieces at least a third of a board wide where possible; shifting the start slightly left or right can save you from skinny cuts on one side.
Locate studs and mark them, and note where outlets and switches sit. Before nailing or drilling into a wall, check for hidden wiring and pipes, and keep fasteners away from areas directly above and below outlets and switches.
Cutting Jigs and Repeatable Angles
Herringbone is all about identical pieces. Cut a test board with 45 degree ends (or square ends for the classic offset herringbone), confirm it fits, and use it as a template. For wood, clamp a stop block to the miter saw fence so every piece comes out the same length without measuring each one.
There are two common styles:
- Classic herringbone: rectangular boards with square ends, laid at 45 degrees so the end of one butts against the side of the next.
- Chevron: boards with both ends mitered at an angle so they meet in a clean point along the center line.
For tile, a wet saw with a sliding table and an angle guide does the same job. Mark cuts with a grease pencil, wear eye and hearing protection, and keep the water reservoir full; wet cutting also controls the fine silica dust that dry-cutting ceramic or stone produces. If you must dry-cut or grind, wear an N95 or better respirator and clean up with a HEPA vacuum rather than sweeping.
Step-by-Step Installation
- Prep the wall. Remove baseboards if you want the pattern to run behind them. For wood, paint the wall a dark color if you plan reveal gaps so drywall does not show through. For tile in wet areas, install backer board and waterproofing first.
- Set the first piece. Align the first board or tile with its edge on the center line and its bottom resting on the horizontal reference. Check the angle with a speed square or angle finder.
- Add the mating piece. Place the second piece on the opposite side of the center line to form the first V. Fasten wood with adhesive and brad nails into studs where possible; set tile into thinset with consistent spacers.
- Work upward in rows. Build the zigzag up the center line, checking plumb every three or four rows. Small errors compound fast.
- Fill out toward the edges. Once the center column is up, extend each side, cutting edge pieces as you reach the corners and ceiling.
- Cut around outlets and switches. Turn off the breaker and confirm power is off with a non-contact voltage tester before removing cover plates. Use box extenders so devices sit flush with the new surface.
Finishing the Ends and Edges
The edges are where a herringbone wall looks either custom or homemade. For wood, frame the field with a flat border board along the sides and top, which hides uneven cuts and gives the pattern a crisp outline. Caulk inside corners, fill nail holes, sand lightly, then prime and paint or apply stain and a clear coat.
For tile, finish exposed edges with metal or matching edge trim, bullnose pieces, or a mitered outside corner. Let thinset cure per the bag, then grout, tool the joints, and clean haze promptly. Seal grout in showers and kitchens. A contrasting grout color highlights the zigzag; a matching grout makes it subtle.
Troubleshooting Common Problems
- Pattern drifting off plumb: stop and recheck against the center line. Shave or reshim the next few pieces to bring it back gradually.
- Open joints in wood: your saw angle is slightly off. Recalibrate, recut, and fill small gaps with paintable caulk before painting.
- Lippage on tile: use leveling clips with long tile and back-butter each piece for full coverage.
- Slivers at the edges: shift the center line a half board to one side before you begin.
Cost Ranges and When to Call a Pro
A painted MDF or pine herringbone accent wall is one of the most affordable statement projects you can tackle, often a few hundred dollars in materials for a typical bedroom wall. Stained hardwood or reclaimed wood runs higher. Tile varies widely by material, and professional tile labor for herringbone costs more than straight-lay patterns because of the extra cuts and layout time.
Hire a tile setter for shower walls and any wet area where waterproofing has to be done correctly, and a licensed electrician if you need to move outlets or add lighting to highlight the wall. If you are working above 8 feet on a tall feature wall, use a stable platform or scaffold, or let a pro handle the upper section. A well-planned herringbone pattern wall rewards patience at the layout stage more than speed at the saw.
Frequently Asked Questions
Where should I start a herringbone accent wall?
Start at a plumb center line in the middle of the wall, not in a corner. Working outward from the center keeps the pattern straight and gives balanced cuts on both edges.
What saw do I need for a wood herringbone wall?
A miter saw is the best tool because it locks onto 45 degrees repeatedly. Add a clamped stop block so every board is cut to the same length.
Can I put a herringbone tile wall in a shower?
Yes. Use porcelain or ceramic tile over cement board or a waterproofing membrane, and finish with sealed grout. Rectangular tile at least three times longer than wide gives the cleanest look.
What is the difference between herringbone and chevron?
Herringbone uses square-ended pieces where the end of one butts against the side of the next. Chevron uses pieces with angled ends that meet in a clean point along the center line.
How long does a herringbone wood accent wall take?
Most DIYers finish an average bedroom wall in a weekend, including layout, cutting, installation, and painting. Tile walls take longer because of thinset cure time and grouting.
Prefer to explore on your own?
See how new flooring looks in your actual room in seconds — free, no signup.
Try the free Floor Studio →