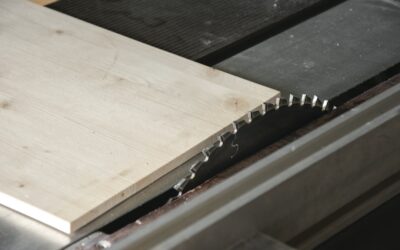
If you have ever tried to snap a porcelain tile by hand and watched it crack diagonally across your fresh layout, you already understand the problem. A wet tile saw solves it by spinning a diamond blade through a stream of water, cooling the blade and carrying away the dust so you get clean, square cuts in even the hardest tile. For any tiling project bigger than a small backsplash, it is the single tool that separates frustrating results from professional-looking ones.
Part of our Tile & Grout guide — explore the full guide →
This guide walks through how a wet saw works, what to look for when you buy or rent one, and the technique that keeps your cuts straight and your fingers safe.
How a Wet Tile Saw Works
A wet saw is essentially a small table saw built for masonry. Instead of a toothed wood blade, it uses a continuous-rim diamond blade that grinds through the tile rather than slicing it. Water is the key ingredient. A pump pulls water from a reservoir and feeds it onto the blade, which prevents overheating, reduces chipping, and almost eliminates airborne silica dust.
Most homeowner models use a sliding tray or a fixed blade with a movable fence. You push the tile slowly into the spinning blade, let the diamond grit do the work, and ease off near the end of the cut to avoid blowing out the back edge.
Wet Saw vs. Manual Tile Cutter
A manual snap cutter scores the glaze and breaks the tile along the line. It is fast and cheap for straight cuts in standard ceramic, but it struggles with thick porcelain, natural stone, and anything requiring an L-shape or notch. A wet saw handles all of those, plus it can cut delicate mosaic sheets and dense materials a snap cutter would shatter.
- Choose a snap cutter for a few straight cuts in soft ceramic wall tile.
- Choose a wet saw for porcelain, stone, large-format tile, floor projects, or any job with notches and angles.
Types of Wet Tile Saws
Tabletop Saws
The most common homeowner choice. They sit on a workbench or stand, cost roughly $80 to $250, and handle tiles up to about 12 inches. They are light enough to carry and store, which makes them ideal for a one-time kitchen or bathroom job.
Rail or Bridge Saws
On these the motor rides on an overhead rail while the tile stays put. They cut large-format tile, 24-inch planks, and heavy stone with excellent accuracy. Prices run from $400 to well over $1,000, so most homeowners rent one for a single big job at $50 to $90 per day.
What to Look for When Buying
- Motor power: Look for at least a 0.5 to 1 horsepower direct-drive motor for porcelain and stone.
- Cutting capacity: Check both the maximum tile length and the diagonal capacity, which is always smaller.
- Water delivery: A reliable pump and an adjustable nozzle keep the blade cool and the mess contained.
- Table accuracy: A flat table, a square fence, and a built-in miter guide for 45-degree cuts matter more than horsepower for clean results.
- Blade size: Most homeowner saws take a 7-inch blade. A continuous-rim diamond blade gives the smoothest edge on glazed tile.
Setting Up and Using a Wet Saw Safely
Set the saw on a stable, level surface outdoors or in a garage where overspray will not damage anything. Fill the reservoir with clean water until the pump is fully submerged, and confirm water reaches the blade before you cut. Plug the saw into a GFCI-protected outlet, since you are mixing water and electricity.
Mark your cut line with a pencil or a grease marker. Hold the tile flat against the fence with both hands, keeping fingers at least a few inches from the blade, and feed it slowly. Let the blade reach the line rather than forcing the tile. Wear safety glasses and hearing protection, and keep loose clothing and sleeves clear of the moving parts.
Getting Clean, Chip-Free Cuts
Speed is the enemy of a clean edge. Push too fast and the blade chips the glaze or wanders off the line. A few habits make a noticeable difference:
- Cut with the finished face up on most tabletop saws, since the blade enters from the top.
- Slow down dramatically in the last inch to prevent back-edge blowout.
- For L-cuts and notches, make the relief cuts first, then nibble the corner with short passes.
- Keep the blade fed with water at all times; a dry pass burns the tile and dulls the diamond.
- Replace a glazed or worn blade rather than fighting it, since a fresh diamond blade is inexpensive.
Maintenance and Cleanup
The slurry left in the reservoir is fine grit suspended in water, and it should never go down a household drain where it can harden and clog the pipe. Let the bucket settle, pour off the clear water outside, and dispose of the sludge in the trash. Rinse the tray, wipe down the rails, and dry the metal parts to prevent rust. Store the blade flat or hung so it stays true.
Choosing the Right Diamond Blade
The blade matters as much as the saw itself, and the wrong one ruins good tile. A continuous-rim diamond blade gives the cleanest edge on glazed ceramic and porcelain because it has no gaps to chip the surface. Segmented and turbo blades cut faster and stay cooler on a dry saw, but they leave a rougher edge that you would not want on a finished countertop or backsplash. For natural stone like marble and travertine, a soft-bond continuous blade prevents chipping along the cut.
Match the blade arbor to your saw, which is typically 5/8 inch on a 7-inch homeowner model. A quality 7-inch blade costs roughly $20 to $50 and lasts through several hundred linear feet of tile. When cuts start to slow, smoke, or chip more than usual, the diamonds have worn smooth. You can sometimes resharpen a glazed blade by running it through a dressing stone or a soft brick, but a fresh blade is cheap enough that most people simply replace it.
Common Mistakes to Avoid
Even with the right gear, a few habits trip up first-time users. Forcing the tile through the blade is the most common error, and it leads to chipped edges, a wandering cut, and a stalled motor. Running the saw without enough water in the reservoir is almost as damaging, since a dry blade overheats, glazes over, and scorches the tile. Skipping the GFCI outlet is a genuine safety hazard given the combination of water and electricity.
Other pitfalls include cutting freehand without a fence, which produces crooked lines, and rushing the final inch of a cut, which blows out the back corner. Take a few practice cuts on scrap tile before touching your good pieces, especially if you are new to the tool. Five minutes of practice saves a box of wasted tile.
Renting vs. Buying
For a single backsplash or a small bathroom floor, a $100 tabletop saw often costs about the same as a few days of rental and saves you the round trips to the store. For a one-off project with large-format tile or thick stone, renting a bridge saw makes more sense than buying a tool you may never use again. If you tackle tile projects regularly, owning a quality saw pays for itself within a couple of jobs.
Whatever you choose, the wet saw is the tool that lets you cut around outlets, doorways, and tricky corners with confidence. Take your time, keep the water flowing, and your tile job will look like a pro handled it.
Prefer to explore on your own?
See how new flooring looks in your actual room in seconds — free, no signup.
Try the free Floor Studio →