The tile pattern you choose for your bathroom floor affects the room’s visual size, style, and even the installation cost. Two bathrooms with identical tiles can look completely different based on layout alone — a straight grid reads as modern and clean, while a herringbone pattern adds movement and high-end character. These bathroom floor tile patterns cover the most popular layouts along with the practical details installers consider when recommending one over another.
Part of our Bathroom Remodeling & Flooring guide — explore the full guide →
Straight Lay (Grid Pattern)
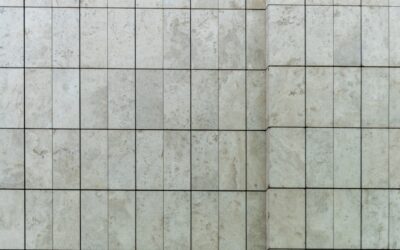
Straight lay is the simplest and most cost-effective tile pattern. Tiles align in a uniform grid with joints running in straight horizontal and vertical lines. This pattern works with every tile shape — square, rectangular, and large-format — and produces a clean, contemporary look.
Installation cost is the lowest of any pattern because cuts are minimal and layout is straightforward. Waste factor sits at 5-7%, compared to 10-15% for angled patterns. Straight lay looks best with rectified (precision-cut) tiles and thin grout lines (1/16 to 1/8 inch), which create a nearly seamless surface.
The drawback is that perfectly aligned grout lines reveal every imperfection in the subfloor. Any lippage — where one tile edge sits higher than its neighbor — is immediately obvious. A flat, well-prepared substrate is essential for a clean straight lay installation.
Brick Lay (Running Bond)
Running bond offsets each row by half the tile length, mimicking a brick wall laid on its side. It is the most popular pattern for rectangular tiles, particularly the classic 3×6 subway tile and larger formats like 12×24. The offset breaks up long sight lines and hides slight size variations between tiles.
A standard 50% offset produces the traditional staggered look. A 33% offset (one-third stagger) creates a more subtle, contemporary feel and works especially well with wood-look porcelain planks. Avoid random offsets on bathroom floors — they look busy at small scale and can create awkward grout line intersections.
- Best tile sizes: 3×6, 4×12, 6×24, 12×24
- Waste factor: 7-10%
- Difficulty: Easy — suitable for confident DIYers
- Cost premium over straight lay: 0-5%
Herringbone Pattern
Herringbone arranges rectangular tiles in a V-shaped zigzag where each tile meets the next at a 90-degree angle. The pattern creates strong visual movement and instantly reads as high-end. On bathroom floors, herringbone draws the eye along the length of the room, which can make narrow bathrooms feel wider.
Installation requires more skill and time than straight or brick lay. Every tile meets at a precise 45-degree cut against walls, which increases labor costs by 15-25% and pushes the waste factor to 12-15%. Use tiles with a 2:1 or 3:1 length-to-width ratio for the clearest herringbone effect — 2×4, 3×6, or 4×12 work well.
A variation called chevron uses parallelogram-shaped tiles instead of rectangles, creating a cleaner V-point without the staggered ends. Chevron tiles cost more because of the angled cuts made at the factory, but the finished look is sharper and more geometric.
Hexagon Tile
Hexagonal tiles bring a distinctive character that no rectangular layout can match. Small hex tiles (1-2 inches) are a classic choice for vintage and Craftsman-style bathrooms — the same pattern used in homes built from 1900-1940. Larger hex formats (6-8 inches) create a modern, bold statement.
Mosaic hex tiles typically come on mesh-backed sheets, which speeds installation significantly. A skilled installer can lay 30-40 square feet of mosaic hex per hour compared to 15-20 square feet of individual tile. Material costs range from $5-$15 per square foot for porcelain hex, with installation at $8-$15 per square foot.
The increased grout surface area is something to consider. Small hex tiles have 30-40% more grout than a comparable area of 12×12 tiles, which means more maintenance and a greater chance of staining. Epoxy grout ($40-$60 per box) resists stains far better than cement grout and is worth the premium on hex floors.
Basketweave Pattern
Basketweave uses pairs of rectangular tiles arranged in alternating horizontal and vertical orientations, creating the look of woven fabric. It shares the vintage appeal of hexagonal tile and pairs beautifully with pedestal sinks, clawfoot tubs, and subway tile wainscoting.
Traditional basketweave uses 1×2 or 2×4 tiles on mesh sheets, with a small square dot tile at each intersection. Modern interpretations scale up to 3×6 or 4×8 tiles laid individually. The pattern is busier than herringbone but more structured, giving it a formal, tailored quality.
- Best for: Traditional, cottage, and transitional bathroom styles
- Waste factor: 10-12%
- Difficulty: Moderate — alignment must be consistent across the entire floor
- Pro tip: Use a contrasting dot color (black dots on white tile) for maximum visual impact
Diagonal Lay (Diamond Pattern)
Rotating square tiles 45 degrees transforms a basic grid into a diamond pattern that adds visual interest without the complexity of herringbone. Diagonal lay is particularly effective in small bathrooms because the angled lines draw the eye to the corners, making the room feel larger.
The trade-off is waste. Every tile along the walls needs a triangular cut, pushing waste to 15-20% — the highest of any standard pattern. Use this layout with affordable tiles ($2-$5 per square foot) so the extra material cost stays manageable. Large-format tiles (12×12 or larger) reduce the number of cuts and look more proportional on bathroom floors than small tiles set diagonally.
Choosing the Right Pattern for Your Bathroom Size
Small bathrooms (under 50 square feet) benefit from patterns that elongate the space or draw the eye diagonally. Herringbone, diagonal lay, and large-format straight lay (using 12×24 or larger tiles) all create the illusion of more square footage. Avoid small mosaic patterns in tiny bathrooms — the busy grout lines can make the space feel cluttered.
Medium bathrooms (50-80 square feet) have enough floor area to support any pattern. This is where basketweave and hexagon layouts shine, because the pattern has room to establish its rhythm without being cut short by walls.
Large bathrooms (80+ square feet) can handle large-format tiles in straight or brick lay without looking sparse. A bordered layout — where a simple straight-lay field tile is framed by a contrasting border strip 6-12 inches from the walls — adds definition to expansive floors.
Practical Installation Considerations
Always dry-lay your chosen pattern before mixing any thinset. Arrange tiles across the entire floor without adhesive, starting from the center point of the room and working toward walls. This reveals how the pattern meets walls, doorways, and fixtures — and prevents ending up with tiny sliver cuts that look unprofessional.
Grout color has almost as much impact as the pattern itself. Matching grout to tile color creates a seamless, monolithic look that emphasizes the tile surface. Contrasting grout highlights the pattern geometry but shows every imperfection in tile spacing and grout line width. For most bathroom floor tile patterns, a grout color one shade darker than the tile offers the best balance of pattern definition and forgiveness.
Budget 10-15% extra material for patterned layouts beyond what the square footage calculation requires. Running short mid-project and ordering a second batch risks color variation between production lots. Order everything at once, keep the extras for future repairs, and return unopened boxes if your retailer allows it.
Prefer to explore on your own?
See how new flooring looks in your actual room in seconds — free, no signup.
Try the free Floor Studio →