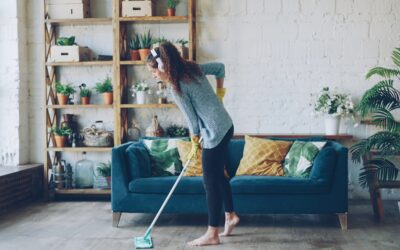
Luxury vinyl plank is sold as the easiest floor to maintain, and that is mostly true — until someone uses the wrong cleaner, drags a sofa across it, or steam mops it into early failure. Knowing how to maintain vinyl flooring properly is the difference between a surface that looks new at year 15 and one that needs replacement at year 6. After installing and servicing LVP in hundreds of homes, I have boiled the care routine down to a daily, weekly, monthly, and annual checklist that keeps the floor looking factory-fresh.
Daily Habits That Prevent 90 Percent of Wear
The single most important maintenance step is preventing grit from getting underfoot. Sand, dirt, and small rocks act like sandpaper between your shoe and the wear layer. The fix is simple: put walk-off mats inside and outside every exterior door, and enforce a no-shoes rule in the entry zones. Microfiber mats with rubber backing catch the worst of the debris before it travels onto the floor.
Sweep or vacuum high-traffic areas daily. Use a soft-bristle broom or a hard-floor-rated vacuum like the Bissell HardFloor Expert or the Shark Navigator (with the brush roll off). Beater bars rated for carpet will scuff vinyl over time, so engage the hard-floor mode every single time.
The Right Weekly Mopping Routine
Mop LVP once a week in normal residential use, twice a week in households with kids or pets. The cleaning solution matters as much as the technique. Use:
- 1 gallon of warm water
- 1 cup of distilled white vinegar OR a few drops of pH-neutral floor cleaner (Bona Hard-Surface or Method Squirt and Mop)
- Optional: 2 drops of dish soap for greasy kitchen areas
Wring the mop until it is barely damp — vinyl is waterproof at the surface but standing water seeps through the seams and damages the subfloor over time. Use a microfiber flat mop like the O-Cedar ProMist Max or a wrung-out string mop. Avoid sponge mops that leave a slick film.
What You Should Never Use
Several common cleaning products destroy vinyl flooring faster than you would expect:
- Steam mops — heat and moisture force water into seams and warp the planks
- Bleach — strips the wear layer and lightens color over time
- Ammonia — eats away at the protective coating
- Pine-Sol, Murphy’s Oil Soap, and other oily cleaners — leave a residue that traps dirt
- Wax and polish — vinyl already has a factory wear layer; wax creates a sticky build-up
- Abrasive scrub pads — scratch the surface permanently
If your floor’s manufacturer specifies a cleaner — Shaw, Mohawk, Mannington, and COREtec each have their own recommendation — use that product or a pH-neutral equivalent.
Monthly Deep Cleaning
Once a month, do a more thorough clean. Move furniture aside, vacuum the perimeter and under area rugs, and mop the entire floor with a slightly stronger solution: 1 cup vinegar plus 1 tablespoon Bona cleaner per gallon of warm water. Rinse with a fresh microfiber mop dampened in clean water to lift any cleaner residue.
Inspect transitions, baseboards, and the joints around appliances for any cracking or lifting. Small issues caught early — a corner that has started to peel or a seam beginning to separate — are easy to glue back down with a tube of LVP-rated adhesive. Wait too long and you will need full plank replacement.
Furniture Protection That Matters
Vinyl is softer than tile or hardwood, which means furniture legs leave dents. Use felt pads under every chair, table, and sofa leg. Replace pads every six months because they collect grit and start acting like sandpaper themselves.
For rolling office chairs, switch from hard plastic casters to soft polyurethane casters or use a glass chair mat. Standard plastic casters carve permanent ruts in vinyl within a year. Heavy furniture — pianos, large bookshelves, refrigerators — needs furniture coasters that distribute weight. A single piano leg can dent vinyl below the wear layer if it sits on a quarter-sized contact patch.
Dealing With Specific Stains and Spills
Most spills clean up with the standard weekly solution. The exceptions:
Red wine and coffee — wipe immediately, then spot-clean with diluted dish soap. If the stain set, use isopropyl alcohol on a microfiber cloth, working from the outside in.
Grease and oil — sprinkle baking soda, let it sit for 10 minutes, sweep up, then mop with dish soap solution.
Crayon and marker — non-acetone nail polish remover on a cotton swab. Test in an inconspicuous spot first.
Pet urine — clean immediately with enzyme cleaner like Nature’s Miracle. Vinyl is waterproof at the surface, but urine that sits more than a few hours can stain the wear layer and seep into seams.
Rubber-back rugs and floor mats — these are the silent killer of vinyl floors. Rubber backing reacts with vinyl plasticizers and creates permanent yellow staining within months. Use only natural fiber rugs with felt or jute backing.
Sun Damage and Color Fading
UV light fades vinyl over years, particularly in south-facing rooms with no window coverings. Premium LVP includes UV stabilizers but no product is immune. Use UV-filtering window film, close blinds during peak sun hours, or move area rugs every six months so fading is uniform across the floor.
If you notice fading, you cannot reverse it. The only solution is replacement. Catching it early — and rotating rugs and furniture quarterly — prevents the worst of the contrast.
Annual Inspection Checklist
Once a year, walk the floor with a flashlight at low angle. Look for:
Lifting edges or seams that need re-gluing. Dents under furniture that signal pad replacement. Scratches in the wear layer that suggest grit issues. Discoloration under rugs (rotate or replace). Gaps at expansion joints that may indicate humidity issues. Cracks in transitions or quarter round that need caulking.
Knowing how to maintain vinyl flooring annually catches problems while they are still cheap to fix. Most installations that fail prematurely had warning signs the homeowner ignored for years.
When to Call a Pro
If you have significant lifting, water damage under planks, or large sections of fading you cannot live with, call your installer before attempting repairs. Most LVP is click-lock or glue-down, and removing a damaged plank in the middle of a room requires either disassembling from the wall or carefully cutting out the affected piece. A pro can swap individual planks for the cost of a service call and replacement product.
With this maintenance routine in place, a quality LVP installation will look essentially new at year 10 and serviceable at year 20. The product is genuinely low-maintenance — but low-maintenance is not no-maintenance, and the homes I see with sad-looking vinyl always skipped one of the steps above.
Prefer to explore on your own?
See how new flooring looks in your actual room in seconds — free, no signup.
Try the free Floor Studio →