Corners take more abuse than any other part of a wall. Vacuum cleaners, furniture, and kids all hit outside corners, while inside corners crack as houses settle. Learning how to patch drywall corners is a skill that pays off repeatedly, and it is simpler than it looks once you know which repair fits which damage.
Part of our Paint & Walls guide — explore the full guide →
The quick answer: for an outside corner, cut away any damaged or bent metal corner bead, install new corner bead (metal or paper-faced), and apply three thin coats of joint compound, feathering each coat wider. For an inside corner, scrape out loose tape and compound, embed new paper tape folded along its crease into a bed of compound, and finish with two light coats applied one side at a time. Sand lightly between coats and prime before painting.
- How to Patch Drywall Corners: Assess the Damage First
- Tools and Materials
- How to Patch Drywall Corners: Outside Corner Repairs
- Inside Corner Repairs
- Choosing the Right Compound
- Sanding, Priming, and Painting
- Dust Safety and When to Call a Professional
- Tips for Crisp, Durable Corners
- Chipped Wall Corners: Fixing Bullnose, Rusted, and Off-Angle Corner Bead
- Frequently Asked Questions
Below, we cover each repair in full detail, from minor dings that need only filler to complete bead replacement, plus tips on getting crisp, straight lines.
How to Patch Drywall Corners: Assess the Damage First
The first step in how to patch drywall corners is figuring out what you are dealing with. Different damage calls for different repairs.
- Small dings or chips on an outside corner: the bead is intact and straight. Fill with compound only.
- Dented or bent metal bead: the bead is deformed. It usually needs to be cut out and replaced.
- Cracked or peeling tape on an inside corner: the joint has moved. Remove loose tape and retape.
- Hairline cracks in an inside corner: often seasonal movement. Consider flexible caulk or retaping depending on severity.
- Crushed or soft drywall behind the corner: the gypsum core is damaged. Cut out and replace a section of drywall.
If the damage keeps returning in the same spot, look for a root cause such as a door that hits the wall, a missing doorstop, or structural movement.
Tools and Materials
- Joint compound: lightweight all-purpose premix for most coats, or a setting-type powder (such as a 20- or 45-minute mix) for faster, harder repairs
- Corner bead: metal, vinyl, or paper-faced metal for outside corners
- Paper drywall tape for inside corners
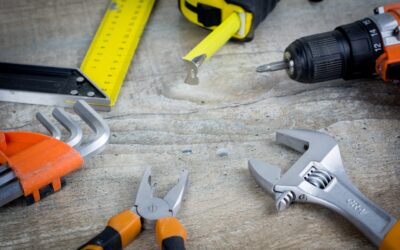
- Taping knives: 4-inch, 6-inch, and 10-inch
- Inside corner trowel (optional but helpful)
- Utility knife and tin snips
- Sanding sponge or 120- to 150-grit sandpaper
- Drywall screws or nails, spray adhesive, or a bead crimper if using metal bead
- Dust mask and eye protection
- Primer formulated for drywall
How to Patch Drywall Corners: Outside Corner Repairs
Minor chip with intact bead
- Knock off loose compound with a utility knife.
- Run a 6-inch knife along the bead to check straightness. If the knife rides smoothly, the bead is fine.
- Apply compound to one side of the corner, using the bead as a guide. Let one edge of the knife ride on the bead and the other on the wall.
- Let it dry, then repeat on the other side. Doing one side at a time prevents you from dragging wet compound off the opposite face.
- Apply a second and, if needed, a third thin coat, each wider than the last, feathering edges 6 to 8 inches onto the wall.
- Sand lightly, being careful not to sand into the metal bead.
Replacing damaged corner bead
- Cut out the bad section. Score the compound at the top and bottom of the damage with a utility knife. Cut through the bead with tin snips or a hacksaw. Pry out screws or nails and pull the damaged piece away.
- Clean up the edges. Scrape off loose compound and paper. Check that the drywall edges are firm. If the core is crushed, cut it back to sound material.
- Cut new bead to length. Measure the gap and cut the bead so it fits tightly between the existing sections, butting the ends together.
- Install the bead. For metal bead, fasten with drywall nails or screws about every 8 to 10 inches, alternating sides. Keep fastener heads below the bead surface. Paper-faced bead is embedded in compound like tape and resists cracking better.
- Check alignment. Hold a straightedge or level along the corner to confirm the new bead lines up with the old sections.
- Apply compound. Coat one side at a time, using the bead nose as a screed. Build up three coats, sanding lightly between them.
Inside Corner Repairs
Inside corners are finished with paper tape rather than bead because the joint needs to handle some movement. Cracks usually happen where tape was poorly embedded or the framing shifted.
- Remove loose material. Cut along the crack and peel away any bubbling or loose tape. Scrape off crumbling compound.
- Prep the joint. Wipe away dust with a damp sponge. If you are working on painted drywall, scuff the surface lightly for better adhesion.
- Fold the tape. Cut paper tape to length and fold it along its center crease.
- Bed the tape. Apply a layer of compound about 1/8 inch thick to both sides of the corner. Press the folded tape into the corner.
- Embed the tape. Run a 4-inch knife or inside corner trowel along each side to squeeze out excess compound and remove air pockets. The tape should be flat with no bubbles.
- Apply finish coats. Once dry, coat one side, let it dry, then coat the other side. This keeps the corner crisp. A third light coat may be needed for a seamless look.
- Sand gently. Use a sanding sponge with an angled edge to avoid scuffing the opposite side.
Using caulk for recurring cracks
Where inside corners crack repeatedly due to seasonal movement, such as where walls meet a vaulted ceiling, some pros use a paintable acrylic latex caulk instead of rigid compound. Caulk flexes, so it can hide movement longer. It works best for hairline cracks and should not replace proper taping on larger failures.
Choosing the Right Compound
Premixed all-purpose compound is easy to use and works for embedding tape and finish coats. Lightweight versions sand more easily. Setting-type compound hardens by chemical reaction rather than drying, so it is stronger, shrinks less, and allows multiple coats in one day. It is a good choice for the first coat on corner bead repairs, especially in high-traffic spots. Setting compound is harder to sand, so many DIYers use it for the base coat and switch to premix for the final coats.
| Compound | Best Use | Sanding |
|---|---|---|
| All-purpose premix | Taping and all coats | Moderate |
| Lightweight premix | Finish coats | Easy |
| Setting-type powder | Base coats, deep fills | Hard |
Sanding, Priming, and Painting
Sanding is where most corner repairs go wrong. Over-sanding exposes tape or bead and creates dips. Use light pressure and check your progress often by running your hand across the surface or shining a flashlight at a low angle. A damp sponge can smooth small ridges with far less dust.
Always prime the patch before painting. Joint compound absorbs paint differently than the surrounding wall, which causes flashing, a dull or shiny patch visible under certain light. A drywall primer seals the surface so the paint finish matches.
Dust Safety and When to Call a Professional
Sanding joint compound creates fine dust that can irritate the lungs, and some compounds contain crystalline silica. Wear an N95 or better respirator, use eye protection, and cover floors and vents. A shop vacuum with a HEPA filter helps limit dust spread. If your home was built before 1978, the paint on existing walls may contain lead. Do not sand old painted surfaces without testing first. Lead testing kits are available at hardware stores, or you can hire a certified lead-safe contractor.
Call a licensed professional if you notice structural cracks that widen over time, sagging ceilings, water stains indicating leaks behind the wall, or suspected asbestos in older textured finishes. Drywall contractors can also handle large areas where a seamless finish matters, such as long hallway corners under bright lighting.
Tips for Crisp, Durable Corners
- Work one side of the corner at a time and let it dry before doing the other.
- Keep compound coats thin. Thick coats shrink and crack.
- Use paper-faced metal bead for outside corners in high-traffic areas; it resists cracking better than bare metal bead.
- Install a doorstop or corner guard where corners take repeated impacts.
- Wipe knives clean between coats to avoid dragging dried bits into fresh compound.
Chipped Wall Corners: Fixing Bullnose, Rusted, and Off-Angle Corner Bead
Most chipped wall corners are square outside corners over standard metal bead, but a surprising number are not. Rounded corners, rusty bead, and corners that are not a true 90 degrees each need a slightly different repair, and using standard bead on them leaves a patch that never looks right.
Rounded (Bullnose) Corners
Many newer homes use bullnose bead, which gives the corner a soft curve. Square bead will not blend with it. Bullnose bead comes in more than one radius, so cut a small piece from the damaged section and match it at the store. Vinyl bullnose is often installed with spray adhesive and staples or nails, then coated with compound like standard bead. Feather the compound onto both walls and along the curve so the new section disappears into the old.
Chips That Expose Rusty Metal
When a chip reveals orange rust on the bead, moisture has reached it at some point. Rust will bleed through compound and paint as a brown stain. Find and fix any moisture source first, such as a leaky window, shower splash, or exterior wall condensation. Then wire-brush loose rust, and if the bead is sound, seal the spot with a stain-blocking primer before applying compound. If the rust has eaten through or the bead crumbles, replace that section, and consider vinyl or paper-faced bead in damp rooms because it will not rust.
Off-Angle Corners
Corners at 135 degrees, common on bay windows and angled hallways, need an adjustable or flexible bead that can be set to the angle. Paper-faced flexible bead is embedded in compound like tape and handles unusual angles and gentle curves well.
Preventing the Next Chip
- Install clear or paintable corner guards on corners that take regular hits from carts, vacuums, or luggage.
- Use setting-type compound for the first fill on high-traffic corners; it cures harder than premix.
- Add a doorstop if a door handle is doing the chipping.
In homes built before 1978, test the existing paint for lead before sanding around the corner, and wear a respirator while sanding any compound.
Frequently Asked Questions
Can I use mesh tape on inside corners?
Paper tape is preferred for inside corners because it folds along a crease and forms a crisp angle. Mesh tape is harder to fold neatly and is better suited to flat seams when used with setting-type compound.
How long does joint compound take to dry between coats?
Premixed compound typically needs several hours to overnight, depending on thickness, humidity, and temperature. Setting-type compound hardens in the time listed on the bag, such as 20, 45, or 90 minutes.
Do I need to replace dented corner bead?
Minor dents can sometimes be filled with compound if the bead edge is still straight. If the bead is bent outward or flattened, replace that section for a straight corner.
Why do my drywall corners keep cracking?
Recurring cracks usually come from framing movement, poor tape embedding, or seasonal humidity changes. Retaping with properly embedded paper tape, or using flexible caulk on hairline cracks, can help.
With the right materials and patience between coats, how to patch drywall corners becomes a repeatable repair. Assess the damage, choose bead or tape accordingly, and build up thin coats for a finish that disappears under paint.