Removing laminate flooring is one of the more accessible demolition projects for a homeowner. Click-lock laminate — the most common type installed in the last 20 years — is designed to disassemble relatively easily since it was installed without adhesive. Glued laminate is more labor-intensive but still manageable with the right tools and approach.
This guide provides a complete step-by-step walkthrough of how to remove laminate flooring, covering tools, baseboard removal, disassembling click-lock planks, removing glued laminate, dealing with underlayment, subfloor preparation for your new floor, disposal options, time estimates, and professional costs if you would rather hire out the work.
Tools Needed
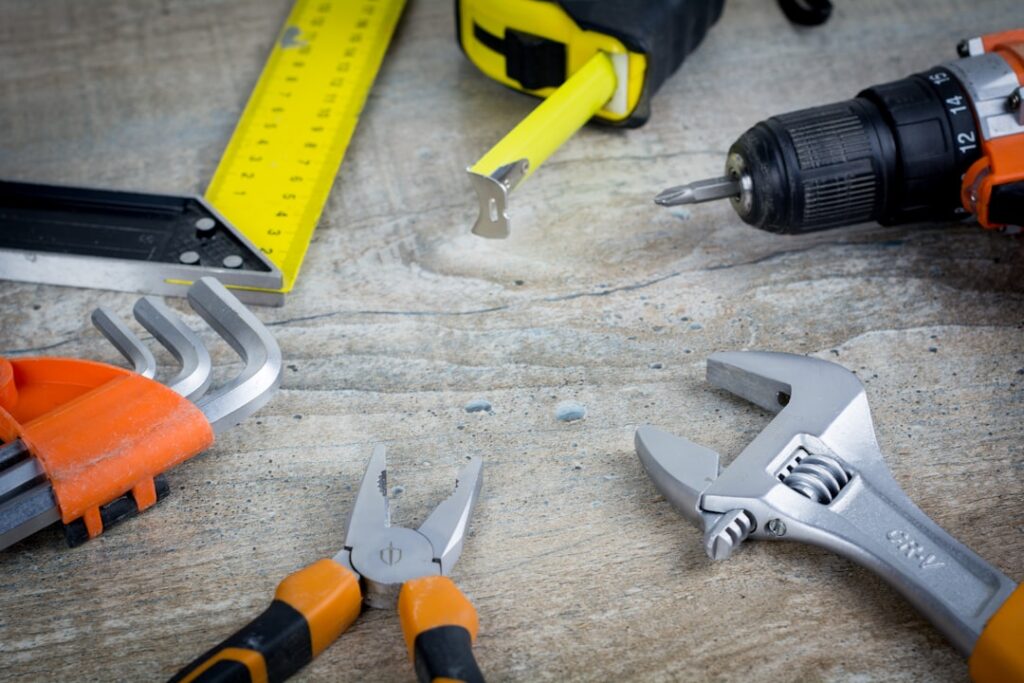
Gathering your tools before starting makes the process significantly smoother. Here is everything you need for how to remove laminate flooring.
| Tool | Purpose | Cost (if purchasing) |
|---|---|---|
| Pry bar (flat, 12 – 18 in.) | Removing baseboards and prying up planks | $8 – $15 |
| Putty knife (3 – 4 in.) | Separating planks from underlayment | $3 – $6 |
| Utility knife | Cutting underlayment, trimming | $5 – $10 |
| Hammer | Tapping pry bar, removing nails | $10 – $15 |
| Pliers / nail puller | Removing nails from baseboards | $6 – $12 |
| Floor scraper (long-handled) | Removing glued laminate and adhesive residue | $15 – $30 |
| Oscillating multi-tool | Cutting laminate at doorways and tight spots | $30 – $80 (or rent) |
| Shop vacuum | Cleaning debris during and after removal | $50 – $100 (or rent) |
| Knee pads | Comfort — you will be on your knees a lot | $15 – $25 |
| Work gloves | Hand protection from sharp edges | $8 – $15 |
| Trash bags (heavy duty) | Bagging removed planks for disposal | $10 – $15 per box |
Preparation
Before touching the floor, take care of these prep steps.
- Clear the room completely. Remove all furniture, appliances, and rugs. For kitchens, disconnect and remove the refrigerator, stove, and dishwasher if the laminate runs underneath them.
- Remove floor vents and transition strips. Unscrew or pry up any metal or wood transition strips at doorways. Pop out any floor register covers.
- Identify your laminate type. Determine whether your laminate is click-lock (floating) or glued down. Lift a corner near a wall — if it comes up easily with no adhesive, it is click-lock. If it resists and you see adhesive residue, it is glued.
- Check for asbestos (older homes). If your home was built before 1980 and the laminate was installed over old vinyl or tile, the original flooring underneath may contain asbestos. Do not disturb it — have it tested before proceeding.
Step 1: Remove Baseboards
Baseboards (and quarter-round molding, if present) must come off before removing the laminate because they overlap the floor’s expansion gap.
- Score the caulk line. Run a utility knife along the top edge of the baseboard where it meets the wall. This prevents the paint or drywall from tearing when you pry the baseboard away.
- Insert a putty knife behind the baseboard. Place it between the baseboard and the wall to protect the drywall.
- Pry gently with a flat pry bar. Start at one end and work along the length, prying a little at a time to avoid snapping the baseboard. Use slow, even pressure.
- Remove nails from the baseboard. Pull finishing nails through the back of the baseboard with pliers (rather than pushing them back through the face) to avoid splitting or damaging the painted surface.
- Number each piece. Write a number on the back of each baseboard section and a corresponding number on the wall with painter’s tape. This makes reinstallation much faster — each piece goes back exactly where it came from.
Tip: If you plan to install new baseboards, you can skip the careful removal and simply pry them off aggressively, then discard. This saves significant time.
Step 2: Remove Click-Lock Laminate
Click-lock (floating) laminate is the easiest flooring to remove because it is not attached to the subfloor. The planks click together at the seams and float over an underlayment.
Disassembly Process
- Start at the wall opposite where the last row was installed. Laminate is typically installed left to right, starting from the left wall — so start removal from the right wall. If you are not sure, try both sides and see which disengages more easily.
- Pry up the first plank. Insert a flat pry bar or putty knife under the end of a plank near the wall and lift. The plank should come up with moderate effort. Once the first plank is out, the rest become easier.
- Disengage the long edges. Lift each plank at a 20 to 30 degree angle to disengage the click-lock tongue from the adjacent plank’s groove. Pull the plank toward you while lifting.
- Disengage the short ends. Some click-lock systems require a slight lateral slide to disconnect the end joints before lifting. If a plank resists lifting, try sliding it lengthwise first.
- Work row by row. Remove entire rows at a time, working backward across the room. Stack removed planks in bundles of 5 to 10 for easy transport.
- Handle stubborn planks. If planks have been in place for many years, the joints may be tight. A gentle tap with a rubber mallet on the lifted edge can help disengage stuck joints. Do not force it — broken tongues create sharp edges.
At Doorways and Transitions
Laminate that runs under door casings was likely slid into place during installation. To remove it, you may need to cut the plank with an oscillating multi-tool to create clearance, or lift the casing trim first.
Removing Glued Laminate
Glued laminate is more labor-intensive because the adhesive bonds the planks to the subfloor (or to each other at the joints).
- Start at an edge or damaged area. Find a spot where you can get a pry bar or floor scraper under a plank. Corners and areas near walls are usually easiest.
- Pry and scrape. Use a long-handled floor scraper to work under the planks, breaking the adhesive bond. The planks will likely come up in pieces rather than intact.
- Apply heat for stubborn adhesive. A heat gun softens many flooring adhesives, making them easier to scrape. Hold the heat gun 3 to 4 inches from the surface and move it slowly. Test a small area first to avoid scorching.
- Remove adhesive residue. After the planks are up, adhesive residue remains on the subfloor. Use a floor scraper, adhesive remover (like Sentinel 747), or a rented floor buffer with an abrasive pad to clean the subfloor.
- Expect more time and effort. Glued laminate removal takes 2 to 3 times longer than click-lock removal. Budget accordingly.
Can You Reuse Laminate Planks?
This is one of the most common questions about how to remove laminate flooring.
| Scenario | Reusable? | Notes |
|---|---|---|
| Click-lock, carefully removed | Yes (most planks) | Expect 10 – 20% loss from broken tongues and damaged edges |
| Click-lock, old (10+ years) | Maybe | Older click systems are more brittle; higher breakage rate |
| Glue-down | No | Planks break during removal and have adhesive residue on the back |
| Water-damaged | No | Swollen HDF core will not lay flat or lock properly |
If you plan to reuse your laminate (for example, relocating it to another room), remove it as carefully as possible, stack planks flat with the finished side facing the same direction, and store them in a dry location. Reinstallation of reused laminate typically requires 15 to 25 percent more material than the original installation due to breakage and edge damage.
Dealing with Underlayment
Once the laminate planks are removed, you will encounter the underlayment layer — the thin foam, cork, or rubber sheet between the laminate and the subfloor.
Attached Underlayment
Some laminate has underlayment pre-attached to the back of each plank. In this case, the underlayment comes up with the planks and no separate removal is needed.
Separate Underlayment
- Roll it up. Foam underlayment is typically laid in rolls and taped at the seams. Pull up the tape, roll up each section, and bag it for disposal.
- Remove any vapor barrier. If a polyethylene sheet was installed over a concrete slab, roll it up and remove it. Inspect the concrete for moisture (condensation, stains, or odor) before installing new flooring.
- Scrape any adhesive. Some underlayment is adhered to the subfloor with double-sided tape or spray adhesive. Scrape residue with a floor scraper.
Can you reuse underlayment? Generally no. Foam underlayment compresses over time and loses its cushioning and sound-dampening properties. Install fresh underlayment under your new floor — it costs only $0.20 to $0.75 per square foot and makes a significant difference in comfort and sound.
Subfloor Prep After Removal
With the laminate and underlayment removed, the subfloor needs to be prepared for whatever new flooring you are installing.
Plywood Subfloor
- Remove all staples, nails, and tack strips left from the old installation
- Fill any holes or gouges with floor-leveling compound
- Sand down any high spots or adhesive residue
- Check for squeaks and secure loose areas with screws (not nails)
- Verify the subfloor is flat: no more than 3/16 inch variation over 10 feet for most new flooring
Concrete Subfloor
- Scrape all adhesive residue — a rented concrete grinder handles stubborn adhesive quickly
- Fill cracks and holes with concrete patching compound
- Check for moisture: tape a 2 x 2 foot sheet of plastic to the concrete, wait 48 hours, and check for condensation. If moisture is present, you may need a moisture barrier or moisture-mitigating primer before installing new flooring
- Verify flatness and apply self-leveling compound to any low spots
Thorough subfloor prep is essential for any new flooring installation. Cutting corners here leads to problems — squeaks, unevenness, or premature failure — with your new floor.
Disposal Options
Laminate flooring is not recyclable through standard curbside programs because it is a composite of wood fiber, resin, and melamine. Here are your disposal options.
- Regular trash (small quantities): If you have a standard waste collection service, you can often bag small amounts of laminate and include it with regular trash. Check your local guidelines for construction waste limits.
- Bulk pickup / curbside collection: Many municipalities offer periodic bulk pickup for construction debris. Schedule a pickup date.
- Dumpster rental: For whole-room or whole-home removal, a 10-yard dumpster ($250 to $400 for 3 to 7 days) is the most efficient option. A 10-yard dumpster holds the laminate, underlayment, and debris from a typical 500 to 1,000 square foot removal.
- Transfer station / landfill: Load removed materials into your vehicle and take them to a local transfer station. Fees range from $20 to $80 per load depending on weight and location.
- Donate (if reusable): If the laminate is in good condition and you removed click-lock planks carefully, Habitat for Humanity ReStore and similar organizations may accept the donation.
Time Estimate
| Task | Time (200 sq ft room) |
|---|---|
| Clear room and remove furniture | 30 – 60 minutes |
| Remove baseboards | 30 – 60 minutes |
| Remove click-lock laminate | 1 – 2 hours |
| Remove glued laminate | 3 – 6 hours |
| Remove underlayment | 15 – 30 minutes |
| Clean and prep subfloor | 1 – 2 hours |
| Bag and haul debris | 30 – 60 minutes |
| Total (click-lock) | 3 – 5 hours |
| Total (glued) | 6 – 10 hours |
For a full day’s work, one person can remove click-lock laminate from approximately 400 to 600 square feet. Two people working together can handle 600 to 1,000 square feet. Glued laminate cuts these numbers roughly in half.
Professional Removal Cost
| Service | Cost |
|---|---|
| Click-lock laminate removal | $1 – $2 per sq ft |
| Glued laminate removal | $2 – $4 per sq ft |
| Baseboard removal and reinstall | $1 – $2 per linear foot |
| Subfloor prep (after removal) | $1 – $3 per sq ft |
| Haul-away / disposal | $50 – $200 per room |
| Minimum service charge | $150 – $300 |
For a 300-square-foot room, professional click-lock removal with subfloor prep and disposal runs $500 to $1,200. Many flooring contractors offer removal as part of a new flooring installation package — often at a discounted rate of $0.50 to $1.50 per square foot when bundled with a new floor purchase.
Frequently Asked Questions
How hard is it to remove laminate flooring?
Click-lock laminate is one of the easiest flooring types to remove — it is a straightforward DIY project requiring basic tools and moderate physical effort. Most homeowners can remove a room’s worth in an afternoon. Glued laminate is significantly harder and more time-consuming, requiring a floor scraper and potentially a heat gun. Neither type requires professional help, though glued removal is labor-intensive enough that some homeowners prefer to hire it out.
Can you remove laminate flooring and reuse it?
Click-lock laminate can often be reused if removed carefully. Lift each plank at a shallow angle (20 to 30 degrees) to disengage the click mechanism without snapping the tongue. Expect 10 to 20 percent of planks to sustain edge damage during removal. Glued laminate cannot be reused — it breaks during removal and retains adhesive on the back surface.
What is under laminate flooring?
Under laminate flooring you will typically find a thin foam, cork, or IXPE underlayment (1 to 3mm thick) and then the subfloor — either plywood/OSB (in upper floors) or concrete (in basements and slab-on-grade homes). Some laminates have underlayment pre-attached, in which case you will see the subfloor directly after lifting the planks.
Do I need to remove laminate before installing new flooring?
It depends on the new flooring. LVP (luxury vinyl plank) can often be installed directly over existing laminate if the laminate is flat, firmly attached, and in good condition. New laminate should not be installed over old laminate — the combined thickness and floating-on-floating construction creates instability. Tile and hardwood always require removal of the old laminate first.
How do I remove laminate flooring that is glued down?
Start at an edge or seam and use a long-handled floor scraper to work under the planks, breaking the adhesive bond. Apply heat with a heat gun to soften stubborn adhesive. The planks will come up in pieces. After all planks are removed, scrape remaining adhesive from the subfloor with a floor scraper or adhesive remover. Expect this to take 2 to 3 times longer than click-lock removal.
How much does it cost to have laminate flooring removed?
Professional laminate removal costs $1 to $2 per square foot for click-lock and $2 to $4 per square foot for glued laminate. Add $1 to $3 per square foot for subfloor prep and $50 to $200 for debris disposal. For a 300-square-foot room, total professional removal costs $500 to $1,200. Many contractors discount removal when you hire them to install new flooring.
Prefer to explore on your own?
See how new flooring looks in your actual room in seconds — free, no signup.
Try the free Floor Studio →