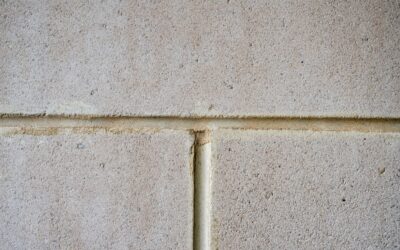
Silicone is the best wet-area sealant we have and the single most annoying one to get rid of, and those two facts are related: the same chemistry that shrugs off water for a decade also shrugs off solvents, scrapers, and your patience. I strip silicone weekly on bathroom and kitchen jobs, and the method that works is not force, it is sequence. Knowing how to remove silicone caulk without gouging a fiberglass tub or scratching polished stone comes down to three stages: cut and peel the bulk, dry-scrape the clingers, then defeat the invisible residue film, which is the stage that separates a lasting recaulk from a peeling one. Here is the whole process, surface by surface.
Part of our Paint & Walls guide — explore the full guide →
Why Silicone Is Its Own Problem
Two properties drive the entire method. First, cured silicone is chemically inert: unlike latex caulk, it does not soften with water, and no common solvent truly dissolves it. Mineral spirits and isopropyl alcohol swell it and break its grip, and commercial digesters slowly attack it, but there is no product that melts it away, whatever the label art implies; mechanical removal always does the main work. Second, silicone contaminates: it leaves a molecularly thin oil-like film on surfaces, and nothing bonds to that film, not paint, not new caulk, not even fresh silicone. That is why “remove the caulk” and “remove the silicone” are two different finish lines, and why beads applied over ghost residue peel off in the first year. Plan for the film stage from the start and the job goes right.
Tools That Remove Silicone, Not Finishes
| Tool/Material | Cost | Safe On |
|---|---|---|
| Fresh utility knife blades (buy a 10-pack) | $5-$8 | Careful use on glass, glazed tile; caution on plastics |
| Plastic razor blades and scraper | $6-$10 | Everything: fiberglass, acrylic, stone, painted surfaces |
| Caulk removal pick tool | $5-$10 | Grout lines, corners, textured tile |
| Needle-nose pliers | on hand | – |
| Isopropyl alcohol (90%+) and/or mineral spirits | $4-$10 | Check spirits on plastics/stone in a hidden spot first |
| Abrasive white nylon pads | $3-$5 | Most surfaces; skip green pads on polished stone and acrylic |
The surface decides the blade. Steel razors are fine riding flat on glass and glazed ceramic. On fiberglass and acrylic tubs and shower pans, on plastic trim, and on honed or polished natural stone, steel scratches faster than you can react; plastic blades and pads do the same job a few minutes slower and leave no evidence. When a client has a $4,000 stone-composite tub, everything that touches it is plastic, full stop.
Stage 1: Score and Peel the Bulk
- Dry the joint. Wet silicone is slippery and hides its edges. Work on a dry surface with good light raking along the bead.
- Score both adhesion lines. Slice along the top edge and bottom edge of the bead where silicone meets each surface, blade held at a low angle, shallow controlled strokes. You are cutting the two bonded seams, not carving the joint.
- Free an end and pull. Lift a corner of the bead with the knife tip or pick tool, grip it with needle-nose pliers, and pull steadily along the joint, keeping the pulling angle low and re-scoring wherever it resists. Good silicone comes off in long rubbery ropes, and this peel is 70 percent of the whole job when the scoring was thorough.
- Pick the corners and gaps. Tub corners, fixture penetrations, and the tile-to-tile verticals hold plugs of silicone that the pull leaves behind; the triangular pick tool hooks them out.
If the bead is old, brittle, and breaking into crumbs instead of ropes, warm it first: a hair dryer on high, 30 seconds per foot, moving constantly, restores enough elasticity to peel. Keep heat modest around acrylic and fiberglass, which distort, and around the glass edge seals of shower enclosures.
Stage 2: Dry-Scrape the Clingers
With the rope gone, flecks and smears remain bonded in patches. Scrape them dry first, before any solvent: a steel razor nearly flat on glass and glazed tile, a plastic blade everywhere else, pushed along the surface plane so the blade shears the silicone off rather than digging in. Dry-scraping first matters because solvent-softened silicone smears and rides the blade instead of flaking off. Work methodically, wipe the blade often, and re-light the joint from a low angle to spot survivors; silicone flecks are nearly invisible face-on and obvious in raking light.
Stage 3: Kill the Residue Film
Now the joint looks clean and is lying to you. Run a dry fingertip along it: any slick, waxy glide is residue film. Removal is solvent plus abrasion plus rag discipline:
- Wet a white nylon pad with 90-percent isopropyl alcohol (or mineral spirits on tough patches, tested first on plastics and stone).
- Scrub a section, then immediately wipe it with a clean, dry cotton rag, turning to a fresh face of the rag every pass. The solvent lifts the film into suspension; the rag has to carry it away before it re-deposits, and a dirty rag face just relocates it.
- Repeat until the fingertip test squeaks. Two to three rounds is normal; painted surfaces and porous stone can want more.
For heavy contamination, decades of overlapping beads, or silicone smeared wide of the joint by a previous over-tooled application, a silicone digester gel applied for the label’s dwell time makes this stage far easier; think of it as residue insurance rather than a removal shortcut. On natural stone, skip the solvents-and-hope approach for stains that have penetrated: a poultice of baking soda and a little water (or a stone-safe commercial poultice) drawn over the mark for 24 hours pulls silicone oils back out of the pores without harming the finish.
Surface-Specific Cautions
- Fiberglass and acrylic tubs/surrounds: plastic tools only, low heat only, and no acetone, which attacks acrylic. These finishes scratch white and there is no buffing it away.
- Natural stone (marble, granite, travertine): plastic blades, isopropyl over mineral spirits where possible, nothing acidic, and re-seal the stone after the joint is clean and dry.
- Glass shower panels: steel razor is fine on the glass itself, but respect any coating; coated “easy-clean” glass wants plastic and alcohol.
- Painted wood and drywall: accept some touch-up. Silicone bonded to paint usually takes paint with it, and the repaint must wait until every trace of film is gone or the new paint will crawl and fisheye over it.
Before the New Bead Goes In
Vacuum the joint, do a final alcohol wipe, and give everything real drying time, several hours minimum, overnight for a shower that has been scrubbed and rinsed. If mold lived under the old bead, treat the gap with a 1:10 bleach solution or mold cleaner, rinse, and dry again. Only recaulk a joint that passes both tests: dry to the touch deep in the gap, and squeaky-clean to the fingertip along both bond lines. Skipping the dry time seals moisture in; skipping the film removal guarantees the peel.
How Long It Really Takes
Set honest expectations by joint, because rushing is what causes the damage this article is about avoiding. A standard tub-to-tile joint: 30 to 45 minutes of scoring and peeling, 30 to 60 minutes of scraping and film work, plus drying time. A kitchen sink rim: 20 to 30 minutes total. A framed shower enclosure with silicone at every glass-to-tile line: budget a half day, since the vertical joints and metal channels hide the most old material. If any single section takes three times longer than its neighbors, stop forcing and change methods, warm it, or switch to a digester, because the surface always loses the war before the silicone does.
Realistic budget for a standard tub: about an hour of stripping, an hour of residue work spread over a podcast, and a $20 pile of blades, pads, and alcohol. My honest tips after hundreds of these: buy more blades than you think you need and change them the moment they drag, let the pliers-peel do the work your scraper wants to steal, trust raking light and your fingertip over your eyes, and never, ever caulk over a surface that still glides. Silicone is unforgiving about shortcuts on the way out, but remove it completely once and the new bead will give you ten quiet years before you have to think about this job again.