Drive a screw straight into drywall and it will hold for about a day before it loosens, tears out, and drops your shelf on the floor. That is exactly the problem plastic wall anchors solve. Learning how to use plastic wall anchors correctly lets you hang frames, mirrors, towel bars, and light shelving securely on hollow drywall where there is no stud to grab. The process takes only a few minutes per anchor, but the details, the right drill bit and the right anchor for the load, make the difference between a fixture that stays put and one that fails.
- What Plastic Wall Anchors Are and When to Use Them
- Anchor Weight Limits at a Glance
- Tools and Materials You Need
- How to Use Plastic Wall Anchors Step by Step
- Getting the Drill Bit Size Right
- Self-Drilling Anchors as a Shortcut
- Common Mistakes to Avoid
- When to Choose a Different Anchor
- Removing and Patching Anchors Later
- Anchors in Plaster, Tile, and Other Surfaces
- Final Tips for a Secure Hold
What Plastic Wall Anchors Are and When to Use Them
A plastic wall anchor, sometimes called an expansion anchor or conical anchor, is a small ribbed plastic sleeve that you insert into a drilled hole. When you drive a screw into it, the anchor expands and grips the back of the drywall, spreading the load. These anchors work best for light to medium loads, generally up to 15 to 30 lbs depending on the size and your drywall thickness. For heavier items, you need a different anchor type, which we cover below.
Anchor Weight Limits at a Glance
- Small ribbed plastic anchors: roughly 5 to 15 lbs, good for picture frames and small decor.
- Medium conical anchors: around 15 to 30 lbs, suitable for towel bars and light shelves.
- Self-drilling plastic anchors: similar light-to-medium range but no pre-drilling needed in drywall.
- Heavier loads (30 lbs and up): step up to plastic toggle or metal molly anchors instead.
Tools and Materials You Need
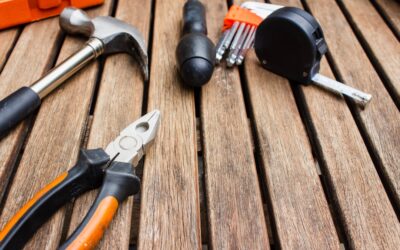
Gather a power drill with the correct masonry or twist bit, the anchors and matching screws (often sold together), a screwdriver or driver bit, a pencil, and a tape measure or level. The single most important detail is bit size. Every anchor package lists a recommended drill bit diameter, and matching it exactly is critical. A hole too big lets the anchor spin uselessly; a hole too small keeps the anchor from seating.
How to Use Plastic Wall Anchors Step by Step
Once you have the right bit, the process for how to use plastic wall anchors is quick and repeatable:
- Mark the spot. Hold up the fixture, level it, and mark each hole with a pencil.
- Check for a stud. If a stud sits behind the mark, skip the anchor and drive the screw directly into the wood instead.
- Drill the hole. Use the bit size on the package. Drill straight in, perpendicular to the wall, to the depth of the anchor.
- Insert the anchor. Push it in by hand. It should slide in snugly. Tap it flush with a hammer if needed so the collar sits flat against the wall.
- Drive the screw. Position your fixture over the anchor and drive the screw in. As it goes, the anchor expands and grips. Stop when the screw is snug; overtightening can strip the plastic.
Getting the Drill Bit Size Right
This deserves its own emphasis because it is where most failures start. The anchor package specifies a bit, often something like 3/16 or 1/4 inch. If you do not have that exact size, use the next smaller bit, never the next larger one. A slightly tight hole still lets you tap the anchor in, and the snug fit improves holding power. A hole even a hair too large is the number one reason anchors pull out or spin.
Self-Drilling Anchors as a Shortcut
If drilling intimidates you, self-drilling plastic anchors skip the bit entirely in drywall. They have a sharp, threaded point you drive straight into the wall with a screwdriver or drill, no pilot hole required. Once the anchor is flush, you drive the screw into its center just like a standard anchor. These are excellent for light fixtures and decor, though they only work in drywall, not in plaster, wood, or masonry.
Common Mistakes to Avoid
- Overloading the anchor. A 10 lb anchor will not hold a 40 lb shelf no matter how well you install it.
- Drilling into a stud, then using an anchor. If you hit wood, just use the screw; the anchor is unnecessary and weaker.
- Using the wrong screw. Match the screw to the anchor; a screw too thin will not expand it, and one too thick can split it.
- Angling the hole. Drill perpendicular to the wall so the anchor sits straight and grips evenly.
When to Choose a Different Anchor
Plastic expansion anchors have limits. For heavier loads like large mirrors, floating shelves with weight on them, or wall-mounted TVs, use a sturdier system. Plastic toggle anchors and metal toggle bolts spread the load across a wider area behind the drywall and hold 30 to 50 lbs or more. For solid concrete or brick, you need masonry anchors and a hammer drill. Always match the anchor to both the load and the wall material.
Removing and Patching Anchors Later
Anchors are not permanent, which is good news for renters and anyone who rearranges. To remove one, back out the screw first, then grip the anchor collar with pliers and pull while twisting gently; many slide right out. If an anchor is stubborn, you can push it through into the wall cavity using a screwdriver, then patch over it. Fill the leftover hole with lightweight spackle, let it dry, sand it smooth, and touch up with paint. A 3/16-inch anchor hole patches in a couple of minutes and disappears completely, leaving no trace for a security deposit inspection.
Anchors in Plaster, Tile, and Other Surfaces
Standard plastic anchors are designed for drywall, but homes have other wall types. In plaster-over-lath walls, common in older houses, drill carefully at low speed to avoid cracking, and use a slightly longer anchor since plaster is thicker. For ceramic tile in a bathroom, use a carbide or diamond tip bit, drill slowly with tape over the spot to prevent the bit from wandering, and pair the anchor with the right screw for the load. Never use plastic expansion anchors in solid concrete or brick; those require masonry anchors and a hammer drill instead.
Final Tips for a Secure Hold
For anything you can mount into a stud, do that instead, since wood always beats an anchor. When you must use anchors, distribute weight across two or more so no single point bears the full load. Test the fixture gently before trusting it with anything valuable. Done right, plastic wall anchors are a fast, reliable way to hang the everyday items in your home, and the whole job for a couple of anchors takes well under ten minutes.