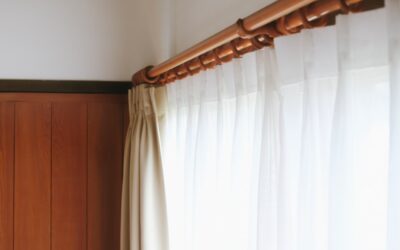
IKEA curtain rods are a favorite for budget-minded decorators because the system is modular — you buy the rod, the brackets, and the finials separately and mix them to fit almost any window. Once you learn how the pieces snap together, IKEA curtain rods let you build a custom-length, custom-finish setup for a fraction of what a hardware store charges, and you can extend or reconfigure them later without buying a whole new kit.
- Ikea Curtain Rods: How IKEA Sells Rods (It’s Modular)
- The Main Rod Lines
- Choosing Rod Length and Diameter
- Mounting Step by Step
- Weight Limits and Heavy Curtains
- Building a Double-Rod Setup
- Finials, Colors, and Customizing
- Ceiling Mounting and the VIDGA System
- Hanging Curtains: Hooks, Rings, and Wave
- Common IKEA Rod Mistakes
- Are IKEA Curtain Rods Worth It?
- Pairing Rods with IKEA Curtains
Ikea Curtain Rods: How IKEA Sells Rods (It’s Modular)
The most confusing thing for first-time buyers is that a “complete” rod isn’t one box. IKEA typically sells the rod itself in one package, the wall brackets in another, and the decorative finials or end caps in a third. That’s a feature, not a flaw — you pick a rod length, choose the bracket depth you need, and finish the ends however you like. Always read the product page to confirm which components are included, and add the matching brackets and finials to your cart so you don’t get home with a rod and nothing to hang it on.
The Main Rod Lines
- RACKA / HUGAD: the core telescoping metal rods, sold in extendable ranges (roughly 47–83 inches and 83–147 inches) so one rod covers a span. RACKA is the lighter-duty single, HUGAD the sturdier option.
- BETYDLIG: the workhorse wall or ceiling bracket, adjustable in depth and able to hold a single or double rod.
- VIDGA: a track-and-rail system for ceiling mounting, panel curtains, and room dividers rather than a traditional rod.
For a standard curtain over a window, the RACKA or HUGAD rod paired with BETYDLIG brackets is the combination most people want. VIDGA is the pick when you want curtains to slide on a low-profile ceiling track or divide a room.
Choosing Rod Length and Diameter
IKEA’s telescoping rods adjust within a range, so pick the range that puts your needed width comfortably in the middle rather than fully extended, where the rod is weakest and most likely to sag. Measure your window, add 4 to 8 inches past each side for stack-back, and match that total to a rod range. Diameters are modest — often around 3/4 inch (19 mm) to 1-1/8 inch (28 mm) — so for heavy drapes, choose the thicker HUGAD and plan on a center bracket.
Mounting Step by Step
- Decide on wall or ceiling mount; BETYDLIG brackets do both.
- Mark bracket positions 4 to 6 inches above the window frame, extending past each side.
- Find studs where you can; the included anchors work in drywall but studs hold far more weight.
- Drill pilot holes, insert anchors if needed, and screw the brackets to the wall, checking level as you go.
- Extend the telescoping rod to length, thread on your curtains, and drop it into the bracket saddles.
- Tighten the small set screw on each bracket so the rod can’t slide or be lifted out.
A basic install takes 20 to 30 minutes with a drill, a level, and a Phillips screwdriver. IKEA includes basic anchors and screws, but for plaster or masonry walls you’ll want your own appropriate anchors.
Weight Limits and Heavy Curtains
IKEA’s lighter rods are fine for sheers and mid-weight cotton, but blackout panels and velvet add real weight over a wide span. Two failures show up most: a thin rod bowing in the middle, and drywall anchors pulling out. Solve the first by choosing the thicker HUGAD rod and adding a third BETYDLIG bracket at the center. Solve the second by hitting studs or upgrading to heavier anchors like toggle bolts rather than the light plastic ones in the box. On a 90-inch-plus window with heavy drapes, three brackets and stud mounting is the reliable setup; two plastic anchors alone is where people see rods crash down.
Building a Double-Rod Setup
The BETYDLIG bracket is designed to hold two rods, so you can run sheers on the inner rod and heavier drapes on the outer one for layered light control. Buy two rods and one set of double-capable brackets, and finish both ends with matching finials. This layered approach costs far less through IKEA’s à la carte parts than a pre-boxed double rod from a home store, which is a big part of the appeal.
Finials, Colors, and Customizing
Finials thread onto the rod ends and are sold separately, letting you swap a plain cap for a ball or decorative end to change the look without replacing the rod. Rods come in finishes like white, black, and metallic tones, so you can match your trim or make a contrast statement. Because the parts are standardized within a line, you can lengthen a run later, move brackets, or restyle the ends whenever your décor changes — the modularity that makes checkout confusing is exactly what makes the system flexible for years.
Ceiling Mounting and the VIDGA System
For a modern, dramatic look — floor-to-ceiling curtains that make a room feel taller — IKEA’s approach is either a ceiling-mounted BETYDLIG bracket or the VIDGA track system. BETYDLIG screws into the ceiling and holds a standard rod, which works well if you can hit ceiling joists or use appropriate anchors rated for a downward pull. VIDGA is a low-profile track that curtains slide along on gliders, ideal for wide spans, room dividers, and closet openings where a bulky rod would look heavy. VIDGA also supports single, double, or triple tracks, so you can layer sheers behind heavier panels on a ceiling mount. Ceiling installs demand solid anchoring, since gravity works against the fasteners more than on a wall mount — always find a joist or use heavy-duty ceiling anchors.
Hanging Curtains: Hooks, Rings, and Wave
How you attach panels to IKEA rods affects the drape. IKEA sells curtain rings with clips (like the RIKTIG hook rings) that slide onto the rod and grip any panel, giving a classic look with soft folds. Many IKEA curtains come with a hidden header tape that accepts RIKTIG hooks for a pleated top, or a rod-pocket channel and built-in loops so you can thread the rod straight through. For the VIDGA track, curtains hang from gliders rather than a rod. The clip-ring method is the most flexible because it works with almost any fabric and slides smoothly, while rod-pocket hanging looks tailored but doesn’t glide well for curtains you open and close daily.
Common IKEA Rod Mistakes
Two errors trip up first-timers. The first is buying only the rod and getting home without brackets or finials — always add all three component types to your cart. The second is mounting too low and too narrow: hang the rod close to the ceiling and extend it well past the window so the room feels larger and the open curtains clear the glass. People also underestimate weight, using the flimsy included plastic anchors for heavy blackout panels; upgrade to toggle bolts or hit studs, and add a center bracket on wide spans. Finally, check the telescoping range so your window sits mid-range, not at the fully extended limit where the rod is weakest.
Are IKEA Curtain Rods Worth It?
For the price, IKEA curtain rods are hard to beat: telescoping rods that fit a wide range of windows, brackets that mount to wall or ceiling and carry single or double rods, and a track system for anyone wanting a modern ceiling-mounted look. The catch is remembering to buy rod, brackets, and finials together, and stepping up to the sturdier rod plus a center bracket for heavy curtains. Handle the weight properly with studs or strong anchors, and an IKEA setup performs like hardware costing several times more while giving you room to reconfigure it down the road.
Pairing Rods with IKEA Curtains
Because IKEA also sells a wide curtain range, it’s easy to build a complete window from one store. Most IKEA panels come extra-long — commonly 98 inches — with a heading that lets you either hem them or fold and use the built-in loops, so they suit both standard and tall ceiling-mount installs. When you buy the rod and panels together, confirm the rod diameter fits through the curtain’s rod-pocket or grommets, and pick up a pack of RIKTIG clip rings if you’d rather clip the panels on for smoother sliding. This à la carte approach — rod, brackets, finials, rings, and curtains chosen separately — is exactly what lets you dial in the look and length precisely rather than settling for a fixed pre-boxed kit.