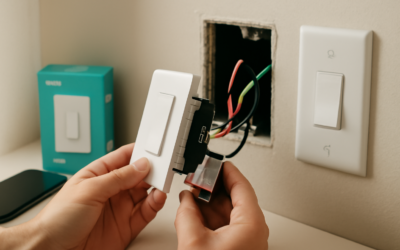
If you have ever stood in front of a wall outlet holding a new smart plug and wondering why it will not connect, you are not alone. Kasa smart plug setup is genuinely one of the easiest smart-home projects out there, but a single overlooked setting sends more people back to the return counter than any hardware defect. The good news: once you know the trick, the whole process takes about five minutes per plug. This guide walks you through unboxing, pairing, naming, scheduling, and linking your TP-Link Kasa plugs to Alexa or Google Assistant.
- What You Get in the Box
- Download the Kasa App First
- The 2.4GHz Wi-Fi Gotcha That Trips Everyone
- Step-by-Step Pairing
- Name Your Plugs So They Make Sense
- Schedules, Timers, and Away Mode
- Linking Alexa and Google Assistant
- Where to Place Your Plugs for Best Results
- Building Simple Automations
- Troubleshooting Common Snags
What You Get in the Box
TP-Link sells several Kasa models, and while the app steps are nearly identical, the hardware differs in useful ways. The EP10 is the compact indoor plug that runs around $8 to $12 in a two-pack. The EP25 adds Matter support and voice control right out of the box for roughly $13 to $18. The KP115 is the one to buy if you care about numbers, because it includes real-time energy monitoring so you can see exactly how many watts your space heater or aquarium pump draws.
Every box contains the plug itself, a quick-start card, and nothing else. There is no hub to buy, no extra bridge, and no batteries. That matters because competing ecosystems like Philips Hue or older Z-Wave gear often require a separate hub that adds $40 or more to the total cost. Kasa plugs talk directly to your home router over Wi-Fi.
Download the Kasa App First
Before you plug anything in, install the Kasa Smart app from the Apple App Store or Google Play. Create a free TP-Link account using an email address you can actually access, because you will need to confirm it. Skipping account creation is not an option here; the app stores your device list and schedules in the cloud so they survive a phone swap.
Grant the app permission to use Bluetooth and local network access when prompted. Newer versions of the app use Bluetooth for the initial handshake, which is faster and more reliable than the old soft-access-point method. If you deny these permissions, pairing will stall at the discovery screen and you will spend ten frustrating minutes wondering why.
The 2.4GHz Wi-Fi Gotcha That Trips Everyone
Here is the single most important thing to know: Kasa smart plugs connect only to the 2.4GHz band, not 5GHz. Almost every modern router broadcasts both bands, and many combine them under one network name using a feature called band steering. When that happens, your phone may be sitting on the 5GHz band while the plug desperately searches for a 2.4GHz signal it can join.
If the plug refuses to pair, do one of these three things. Temporarily disable the 5GHz band in your router settings, or split the two bands into separate network names such as “MyHome” and “MyHome_5G,” or move your phone close to the router so it drops to the shared 2.4GHz signal during setup. Once the plug is paired, you can turn 5GHz back on. The plug remembers its connection and does not care what your phone does afterward.
Step-by-Step Pairing
With the app installed and your Wi-Fi understood, the actual pairing goes quickly. Follow these steps in order:
- Plug the Kasa device into a wall outlet within about 15 feet of your router for the best first connection.
- Wait for the LED indicator to blink amber and green alternately. That blinking pattern means the plug is in pairing mode. If it does not blink, press and hold the button on the side for five seconds to reset it.
- Open the Kasa app, tap the plus icon in the top corner, and choose “Add Device,” then “Smart Plugs.”
- Select your specific model from the list. The app will find the plug over Bluetooth and show it on screen.
- When prompted, enter your 2.4GHz Wi-Fi password. Type it carefully, because a wrong password is the second most common failure point after the band issue.
- Wait about 30 to 60 seconds while the plug joins your network. The LED turns solid green when it succeeds.
That is the whole handshake. If you bought a multi-pack, repeat the process for each plug. The app handles them one at a time, so do not try to pair two at once.
Name Your Plugs So They Make Sense
Naming feels trivial until you own six plugs and cannot remember which one runs the porch lights. Give each device a name tied to what it controls, not where it sits. “Living Room Lamp” beats “Plug 3” every single time, especially once you start using voice commands. Assign each plug to a room in the app as well, because Alexa and Google use those room groupings for commands like “turn off the bedroom.”
The app also lets you pick an icon. It seems cosmetic, but a quick visual cue speeds up the daily open-and-tap routine. Spend the extra 20 seconds here and your future self will thank you.
Schedules, Timers, and Away Mode
The real payoff of a smart plug is automation, and Kasa makes this part painless. Open any device, tap the Schedule tab, and set on and off times. A classic setup turns a living room lamp on at sunset and off at 11:00 p.m., and Kasa can pull your local sunset time automatically so the schedule shifts through the seasons.
The Timer function is handy for things like a curling iron or a slow cooker, letting you set a countdown that shuts the plug off after, say, 45 minutes. Away Mode randomly toggles the plug on and off during hours you choose, mimicking an occupied home while you travel. It is a genuinely useful security touch that costs nothing extra.
If you own a KP115, check the Energy tab. Watching a single old refrigerator pull 120 watts around the clock is often the nudge people need to replace an aging appliance.
Linking Alexa and Google Assistant
Voice control is where the setup pays off daily. In the Alexa app, go to More, then Skills and Games, search for “Kasa,” enable the skill, and sign in with the same TP-Link account. Ask Alexa to discover devices and your plugs appear within a minute. Google Home follows the same pattern under Add, then Works with Google.
Once linked, commands like “Alexa, turn on the coffee maker” work instantly. If a plug does not respond, open the Kasa app first to confirm it is online, then ask Alexa to discover devices again. A stale link is almost always the culprit.
Where to Place Your Plugs for Best Results
Placement affects both signal strength and safety, so give it a moment of thought. Keep plugs within about 30 feet of your router, or fewer walls between them, to avoid dropouts. Kasa plugs are rated for indoor use, so the EP10 and KP115 should stay out of damp bathrooms and garages that flood; if you need outdoor control for string lights, use the weatherproof KP400 instead.
Mind the load rating too. These plugs handle up to 15 amps, which covers lamps, fans, TVs, coffee makers, and small heaters, but do not chain a 1,500-watt space heater through a cheap power strip on the same plug. A single high-draw appliance is fine; a daisy chain of them is asking for trouble. On a standard 120-volt circuit, a 15-amp plug tops out around 1,800 watts, so stay comfortably below that.
Building Simple Automations
Once you have a few plugs paired, the app’s Smart Actions feature lets them work together. You can trigger a group of plugs with one tap, so a “Movie Night” scene dims the lamps and kills the overhead light at once. You can also link plugs to sunrise and sunset so outdoor lighting handles itself year-round without you ever opening the app.
For deeper automation, connect Kasa to a routine in Alexa or Google Home. A morning routine might turn on the coffee maker plug at 6:30 a.m. alongside your alarm and a weather report. These cross-device routines are where a handful of $10 plugs start to feel like a genuinely smart home rather than a collection of gadgets.
Troubleshooting Common Snags
When a plug drops offline, start with the basics before assuming a defect. Confirm your router is broadcasting 2.4GHz and that you have not recently changed the Wi-Fi password. A password change on your router silently disconnects every smart plug you own, and each one needs to be re-paired.
- Plug shows offline: Unplug it for ten seconds, plug it back in, and give it a minute to reconnect.
- Cannot find plug during setup: Move the phone and plug closer to the router and confirm the LED is blinking amber and green.
- Voice commands fail: Re-run device discovery in Alexa or Google Home.
- Nothing works after a router upgrade: Factory reset each plug with a five-second button hold and pair fresh.
Master the 2.4GHz rule and everything else falls into place. A tidy Kasa smart plug setup turns ordinary lamps, fans, and holiday lights into a scheduled, voice-controlled system for less than the price of a nice dinner, and it does it without a hub or a subscription. Start with a single plug, get comfortable with the app, and expand from there.