After a decade of tearing out rotted wood balusters and warped 4×4 posts, I steer most homeowners toward metal the moment budget allows. The KeyLink Outlook Series aluminum deck railing kit is one of the systems I keep coming back to, mostly because the parts show up pre-cut, powder-coated, and squared instead of as a pile of raw stock you have to fight into alignment. It is not the cheapest rail on the shelf, but the finish holds up and the assembly logic makes sense to anyone who has framed a deck. This review covers what you actually get in the box, how it meets code, what it costs, and where it falls short.
Part of our Decks & Outdoor guide — explore the full guide →
What the Outlook Series Actually Is
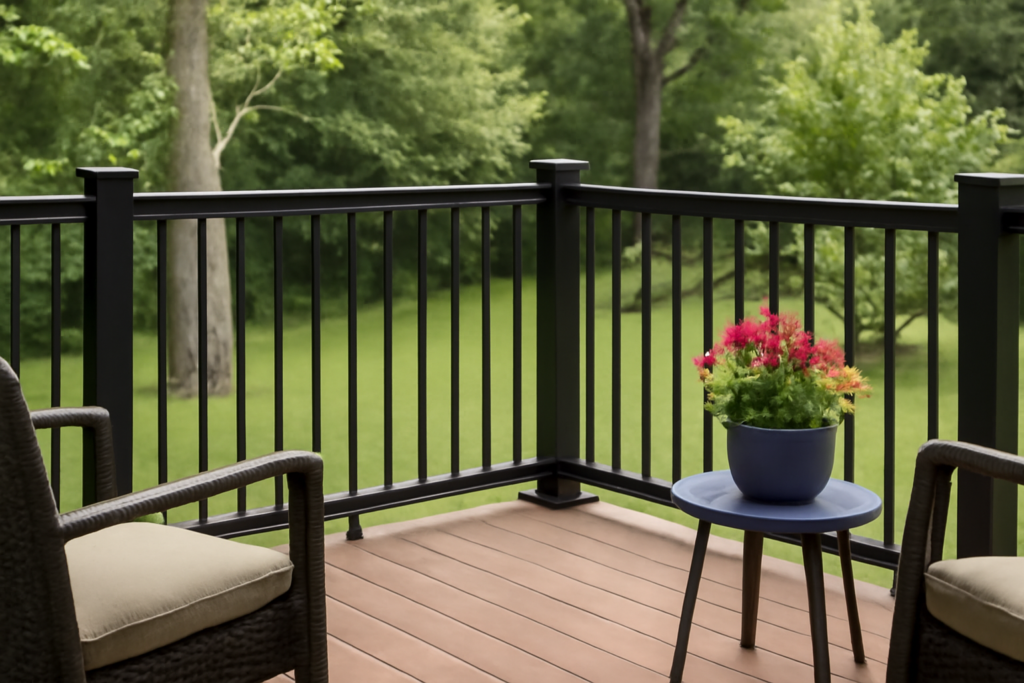
The Outlook line is KeyLink’s entry-level aluminum railing, sitting below the pricier Century and American series. Every piece is extruded aluminum finished with an AAMA 2604-grade powder coat, which is the same durability standard used on commercial storefront framing. That coating is why the black, bronze, and white options still look sharp after five or six seasons of UV and freeze-thaw. Aluminum will not rust, so unlike a galvanized-then-painted steel rail, a scratch on the Outlook does not bleed orange down your fascia.
Kits come as level sections and stair sections, and you buy them in nominal 6-foot and 8-foot lengths. The 6-foot kit covers a post-to-post opening of roughly 67.5 inches after you account for the mounting brackets, and the 8-foot covers about 91.5 inches. That distinction matters more than people expect. If your post spacing lands at 72 inches on center, an 8-foot kit gets cut down; a 6-foot kit will not reach. Measure your post layout before ordering, not after.
What Comes in the Box
A standard level kit is not a full railing run on its own. You get the top rail, the bottom rail, a bag of pre-spaced aluminum balusters, the baluster spacers or connectors, and a set of brackets with screws. Posts and post caps are sold separately, which trips up first-time buyers who assume “railing kit” means everything vertical and horizontal. Plan on buying:
- Rail sections (6 ft or 8 ft, level or stair)
- Aluminum posts, typically 3 in by 3 in, in 39 in or 42 in heights
- Post mounts or post skirts and matching caps
- Bracket kits if not bundled with the rail
The balusters arrive round or square depending on the sub-style, spaced so the assembled panel automatically satisfies the gap rule. That pre-spacing is the single biggest time-saver over building a wood rail baluster by baluster.
Meeting Deck Rail Code
Any guard you install has to satisfy the IRC, and the Outlook system is engineered to hit those numbers when you install it correctly. Residential guards must be at least 36 inches tall measured from the deck surface to the top of the rail. Commercial work jumps to 42 inches, and KeyLink sells posts sized for both. A guard is required any time the walking surface sits more than 30 inches above the grade or surface below, measured within 36 inches horizontally of the edge.
The baluster gaps pass the 4-inch sphere rule, meaning a 4-inch ball cannot pass through anywhere in the assembled guard, including the triangle at the bottom of a stair section. Structurally, a code guard must resist a 200-pound concentrated load applied in any direction at the top rail. The Outlook rail meets that only if your posts are anchored properly, which is where most failures actually happen. The rail is rarely the weak link; the post connection to the framing is.
Installing the Kit
Set your posts first. On a wood-framed deck I through-bolt 3-inch aluminum posts with a hardware kit rated for guard loads, using half-inch carriage bolts into blocking between the joists, never a single lag into fascia. Space posts no more than 6 feet on center for the 6-foot rail and 8 feet for the 8-foot rail. Get them plumb and consistent in height, because the rail brackets have limited adjustment.
Once posts are locked, the panel assembly is fast. Slide the balusters into the top and bottom rails with the supplied spacers, then measure your exact post-to-post opening and cut both rails to length with a miter saw and a fine-tooth non-ferrous blade. Attach the mounting brackets to the posts at your layout height, drop the panel into the brackets, and drive the setscrews. A two-person crew can hang a level section in 15 to 20 minutes once the posts are in.
Stair Sections
Stair kits use swivel brackets so the rail can rack to your stringer angle. Set your two stair posts, hold the panel against them at the correct rake, and mark the bracket locations off the actual slope rather than trusting a printed template. The bottom rail on a stair section must still keep gaps under 4 inches, so the pre-spaced balusters are cut to follow the incline. A common mistake is setting the stair posts before confirming the guard height along the rake; on stairs, guard height is measured vertically from the stair nosing, and 34 to 38 inches is the typical handrail range, so a stair guard and a graspable handrail are two different requirements you may need to satisfy at once.
Post Anchoring in Detail
I will keep hammering this point because it is where inspectors and injuries both show up. A 200-pound load pushed outward at the top of a 36-inch post generates real leverage at the base. If that post is lagged into 3/4-inch fascia board, the connection can pull free long before the aluminum ever bends. The right way is a surface-mount post base or a through-bolted post tied to solid framing: doubled rim joists, blocking between joists, or a post that runs down past the deck boards and bolts to the structure.
KeyLink and most metal-rail makers publish an engineered post-mount detail, and your building department will want to see it. Use the specified fastener count and diameter, typically 1/2-inch bolts, and do not substitute deck screws for structural bolts. Snug every bracket setscrew, then walk the run and lean hard on each post before you call it done. A rail that flexes an inch under your weight will fail a 200-pound code load.
How It Compares to Wood and Composite
Set the Outlook against the two rails homeowners usually weigh it against. A pressure-treated wood rail costs the least to buy, maybe $20 to $35 a foot installed, but you are on the hook for cleaning and re-staining every two to three years, and the balusters cup and split. A premium composite rail with a wide top cap looks substantial and matches composite decking, but installed prices commonly run $60 to $90 a foot, and the bulky components eat your sightlines.
The Outlook lands in the middle on price and near the top on maintenance. Powder-coated aluminum sheds dirt with a hose, never needs paint, and the thin balusters almost disappear against a view. For most decks, that mix of low upkeep and moderate cost is exactly why aluminum has taken so much market share from wood over the last decade.
What It Costs
Budget roughly $30 to $60 per linear foot installed for the Outlook Series, with the spread driven mostly by post count, stair runs, and whether you or a contractor does the labor. In materials alone, expect an 8-foot level kit to run about $90 to $150, posts $40 to $70 each, and caps and mounts another $15 to $30 per post. A straight 40-foot run of level rail on a simple deck lands materials somewhere near $700 to $1,100 depending on post spacing.
Compare that to a wood rail that costs less up front but needs staining every couple of years, or a premium composite rail that can push past $70 a foot installed. Aluminum sits in a sweet spot: near-zero maintenance for meaningfully less than the top-tier composite systems.
Strengths and Weaknesses
The Outlook’s biggest wins are the finish durability and the assembly speed. Pre-spaced balusters, cut-to-fit rails, and a bracket system that forgives small post inconsistencies make this a realistic weekend job for a competent DIYer. The slim aluminum balusters also preserve sightlines better than chunky wood or vinyl, which matters if you bought the view.
The weaknesses are honest ones. Posts and caps sold separately inflate the sticker beyond the kit price, so read the parts list twice. The powder coat, while tough, can chip if you drag a section across concrete during install, and touch-up paint never matches perfectly. And because aluminum is a soft metal, an overtightened setscrew can dimple the rail, so use a hand driver for the final turns rather than an impact.
Who Should Buy It
If you want a clean, code-compliant guard that you install once and stop thinking about, the KeyLink Outlook Series aluminum deck railing kit earns its place. It is the rail I recommend to homeowners who are done sanding and staining wood but are not ready to pay for cable or glass. Order the right kit length for your post spacing, anchor your posts to real blocking, and this system will outlast the deck boards it protects.