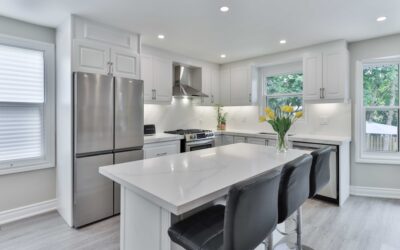
A freestanding trash can in the middle of the kitchen is an eyesore, a smell trap, and a magnet for curious pets. Tucking waste away inside a cabinet solves all three problems at once, which is why a built-in kitchen cabinet bin has become a must-have in modern kitchen design. Whether you are remodeling, upgrading an existing cabinet, or building custom, the right pull-out bin system hides trash and recycling out of sight, keeps countertops clear, and makes disposal a one-hand operation. This guide covers the bin types, sizing, cabinet fit, and installation so you can pick the right setup.
Part of our Kitchen Remodeling guide — explore the full guide →
- Why Build the Trash Into a Cabinet
- Types of Cabinet Bin Systems
- Sizing: How Big a Bin Do You Need?
- Measuring Your Cabinet
- Installation Basics
- Recycling and Compost Integration
- Keeping It Clean and Odor-Free
- Choosing the Right Bin for Your Kitchen
- Where to Locate the Bin Cabinet
- Frequently Asked Questions
- What to Look for in the Hardware
Why Build the Trash Into a Cabinet
- Cleaner look: no visible can breaking up your cabinetry line.
- Odor control: a closed cabinet door contains smells far better than an open can.
- More usable floor space: reclaim the corner the trash can used to occupy.
- Pet and child resistance: a latched cabinet keeps dogs and toddlers out of the garbage.
- Built-in recycling: dual-bin systems make separating waste effortless.
- Hands-free convenience: many pull-outs open with a door tie so the bin slides out as you open the cabinet.
Types of Cabinet Bin Systems
There are several ways to mount a bin inside a cabinet, each suited to different needs.
Pull-Out Slide Systems
The most popular option. A wire or metal frame on full-extension slides holds one or two bins and glides out when you open the cabinet. Better versions include soft-close slides and a door-mount bracket so the frame is tied to the cabinet door — open the door and the bins come to you automatically. These carry substantial weight and feel solid in daily use.
Door-Mounted Bins
A smaller bin bolts to the back of the cabinet door and swings out with it. These are inexpensive and easy to install but hold less and suit small kitchens, narrow cabinets, or a secondary compost bin.
Under-Sink Bins
Designed to fit around the sink plumbing, these use shallow or split bins to work in the awkward space beneath a sink. They are a smart way to use an otherwise cluttered cabinet, though the P-trap limits capacity.
Built-In Tilt-Out and Drawer Bins
High-end cabinetry sometimes integrates bins into a deep drawer that pulls out on heavy-duty slides, hiding one or two large bins behind a drawer front. These look the most seamless and hold the most, but require a dedicated cabinet designed for the purpose.
Sizing: How Big a Bin Do You Need?
Bin capacity is usually given in quarts or liters. As a rough guide:
- Single households: a single 30 to 35 quart bin is often enough.
- Couples and small families: a single 50 quart bin or a dual 30+30 setup.
- Larger families: dual bins totaling 60 to 70 quarts or more, splitting trash and recycling.
Match the bin size to your cabinet width. A door-mount single bin fits a 12-inch cabinet, a single large pull-out suits a 15-inch cabinet, and a dual-bin system needs an 18-inch or wider cabinet. Measure your cabinet’s interior width, depth, and height before buying, and account for the door hinges and any face-frame overhang that narrow the opening.
Measuring Your Cabinet
Accurate measurement prevents the most common return. Check three things:
- Interior width — the clear opening between the cabinet sides, not the outside dimension. Face-frame cabinets have a narrower opening than the box.
- Depth — from the back wall to the inside of the closed door, leaving room for the door to shut over a door-mounted frame.
- Height — enough vertical space for the bin plus the lid mechanism to clear the top rail as it slides.
Manufacturers list a minimum cabinet opening for each system; compare that to your smallest measurement, not the largest.
Installation Basics
Most homeowners can install a pull-out bin system in under an hour with a drill and a screwdriver:
- Empty the cabinet and clean the base so the frame mounts to a flat surface.
- Position the frame centered in the opening, allowing clearance for the door and hinges, and mark the mounting holes.
- Attach the slide base to the cabinet floor with the provided screws, checking that it sits square so the bins glide smoothly.
- Install the door bracket if your system ties to the door, aligning it so the frame pulls out evenly when the door opens.
- Test the action, adjusting the brackets until the bin slides freely and the door closes flush.
- Drop in the bins and confirm the lids and slides clear everything.
For under-sink installs, dry-fit around the plumbing first — the P-trap and disposal often dictate a split or offset bin layout.
Recycling and Compost Integration
A dual-bin system lets you sort trash and recycling at the point of use, which dramatically improves how much actually gets recycled. Color-coded or labeled bins help the whole household sort correctly. For kitchens that compost, a small counter caddy or a third door-mounted bin dedicated to food scraps keeps organics separate without much added space. If you have room, a wider cabinet with three compartments handles trash, recycling, and compost in one pull.
Keeping It Clean and Odor-Free
- Use quality liners sized to the bin so leaks do not reach the cabinet floor.
- Wipe the bins and the cabinet base periodically with a disinfecting cleaner.
- Add a deodorizer — a small activated-charcoal filter or a baking soda puck cuts odor between empties.
- Empty regularly rather than overfilling, which strains the slides and lets smells build.
- Line the cabinet floor with a removable mat to catch drips and simplify cleanup.
Choosing the Right Bin for Your Kitchen
For most kitchens, a soft-close pull-out with a door-mount bracket in a 15- to 18-inch cabinet is the sweet spot — solid, convenient, and roomy enough for a dual trash-and-recycling setup. Tight on space, a door-mounted bin in a narrow cabinet or an under-sink system makes use of otherwise wasted room. If you are building custom and want the most seamless look, a drawer-style integrated bin behind a matching front is worth the premium. Measure carefully, match the capacity to your household, and pick a system with full-extension, soft-close slides for daily durability. A well-chosen kitchen cabinet bin quietly disappears into your cabinetry while making one of the kitchen’s most-used functions cleaner and more pleasant.
Where to Locate the Bin Cabinet
Placement matters as much as the hardware. The most convenient spot is next to the sink and dishwasher, along the natural cleanup path where you scrape plates and prep food. A bin near the prep zone means you are not carrying drippy scraps across the kitchen. Avoid placing it in a corner cabinet, where the swing of the door and the awkward geometry make access frustrating.
If you are designing a new kitchen, reserve a dedicated 15- or 18-inch base cabinet for waste rather than trying to shoehorn a bin into a cabinet also holding pots or cleaning supplies. A purpose-built waste cabinet gives the pull-out room to glide and keeps the space beneath free of clutter that could jam the slides. Think of it as designing the workflow, not just hiding a can.
Frequently Asked Questions
Will a pull-out bin fit any cabinet? Only if the interior opening meets the system’s minimum width. Face-frame cabinets have a narrower opening than the box, so always measure the clear opening, not the outside dimension.
Do I need a plumber for an under-sink bin? Usually no. Under-sink bins are designed to fit around the P-trap and disposal; you just dry-fit the layout first. Only relocating the plumbing would call for a plumber.
How do I stop odors in a closed cabinet? Use quality liners, wipe the bins periodically, add an activated-charcoal filter or baking soda puck, and empty regularly rather than overfilling.
What to Look for in the Hardware
The bin itself matters less than the slide mechanism it rides on, because the slides take the daily abuse. Prioritize full-extension slides so the bins pull all the way out and you can reach the back without digging. Soft-close dampers are worth the small premium — they stop the cabinet from slamming and keep the bins from bouncing, which extends the life of the whole assembly. Check the weight rating too; a loaded dual-bin system holds a surprising amount, and undersized slides sag or bind over time.
Look at the bin material as well. Bins should lift out easily for cleaning and be made of a sturdy plastic that will not crack when dropped or crazed by cleaning chemicals. Removable lids that stay clear of the cabinet top as the frame slides prevent the frustrating catch that plagues cheaper units. Metal frames outlast all-plastic ones, and a frame that ties to the door with an adjustable bracket lets you fine-tune the action so the bins glide out smoothly every time you open the cabinet.