A dripping kitchen faucet wastes up to 3,000 gallons of water a year and slowly stains your sink basin, yet the fix usually costs less than a takeout dinner. A kitchen faucet repair kit bundles the exact wear parts that fail inside your faucet, letting you rebuild the working guts without replacing the whole fixture. For the price of a single plumber visit, which runs $150 to $250 for a faucet repair, you can buy repair kits for every faucet in the house and still have money left over. Understanding what goes in these kits and how to match one to your faucet is the difference between a ten-minute fix and a frustrating trip back to the store.
Part of our Kitchen Remodeling guide — explore the full guide →
What Is Inside a Kitchen Faucet Repair Kit
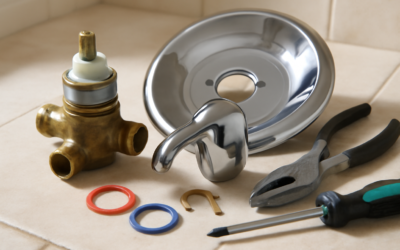
The contents vary by faucet type, but most kits are built around the small components that see the most wear. A typical assortment includes replacement O-rings, rubber seats and springs, a cartridge or ceramic disc, and sometimes a new aerator. These parts are cheap to manufacture but critical to a watertight seal, and they degrade from mineral buildup, grit, and constant pressure cycling.
Manufacturer-specific kits from brands like Moen, Delta, and Kohler contain parts engineered for one product line, so the fit is exact. Universal kits offer an assortment of common sizes for a lower price but require you to identify the correct pieces yourself. For a first-time repair, a brand-matched kit removes the guesswork and is worth the few extra dollars.
Identifying Your Faucet Type
Before buying anything, figure out which of the four faucet mechanisms you have, because a kit for one will not work on another:
- Cartridge: A single lever or two handles that move smoothly; uses a cylindrical cartridge to control flow and temperature.
- Ceramic disc: A single handle with a wide, chunky body; two ceramic discs slide to regulate water and rarely fail.
- Ball type: A single handle sitting on a domed cap; uses a slotted ball, springs, and seats, common on older Delta models.
- Compression: Two separate handles you screw down tight; the oldest design, relying on rubber washers.
Snap a photo of your faucet and look for a model number stamped under the handle or on the original paperwork. The manufacturer’s website will pair that number with the correct repair kit part number in seconds.
Choosing the Right Kit
Match the kit to both the brand and the specific mechanism. A Moen 1225 cartridge kit, for example, fits a huge range of single-handle Moen faucets and costs around $15 to $20. Delta’s RP scripts kits are similarly model-specific. If your faucet is off-brand or unbranded, a universal ceramic disc or O-ring assortment from the hardware store will often carry the size you need for a few dollars.
Check whether the kit includes the tools you need. Some higher-end kits bundle a cartridge puller or a hex wrench sized for the set screw. If yours does not, add a basic faucet tool set to your cart. Buying the right kit up front prevents the classic mistake of tearing the faucet apart only to discover the replacement part is the wrong diameter.
How to Use a Kitchen Faucet Repair Kit
The rebuild follows the same logic regardless of faucet type. Start by shutting off the hot and cold supply valves under the sink and opening the faucet to relieve pressure. Plug the drain with a rag so no small parts vanish down it.
- Remove the handle by loosening the set screw, usually with a small hex key hidden under a decorative cap.
- Lift off the trim and unscrew the retaining nut or clip that holds the cartridge or ball in place.
- Pull the old cartridge straight up. If it is stuck from mineral scale, a cartridge puller or gentle rocking frees it.
- Inspect the seat and springs, swap in the new O-rings coated with plumber’s grease, and drop in the fresh cartridge.
- Reassemble in reverse order, taking care to seat everything squarely so the handle moves freely.
Turn the supply valves back on slowly and test hot and cold. A repair done right restores full pressure and stops the drip immediately. If the leak persists, the culprit is usually an O-ring that was pinched during reassembly or a seat you overlooked.
Pro Tips for a Lasting Fix
Coat every rubber part with silicone-based plumber’s grease, never petroleum jelly, which degrades the rubber over time. Soak scaled parts in white vinegar for 20 minutes to dissolve buildup before reassembly. And while you have the faucet apart, unscrew and clean the aerator, since a clogged aerator often mimics the low pressure people blame on a failing cartridge.
Common Faucet Problems a Repair Kit Solves
Not every faucet complaint calls for a full replacement. A repair kit addresses the most frequent failures directly. A steady drip from the spout points to worn cartridge O-rings or a cracked ceramic disc. Water pooling around the base of the handle signals a failed body O-ring. A handle that has become stiff or grinds usually needs new grease and a fresh cartridge. Reduced flow that a cleaned aerator does not fix often traces back to sediment lodged in the cartridge itself.
If the faucet body is cracked, the finish is peeling badly, or the spout swivel has snapped, a kit cannot help and replacement is the smarter move. Those failures are structural rather than the wear-part issues a kitchen faucet repair kit is designed to solve.
Brand-Specific Repair Kits Worth Knowing
The three biggest faucet brands each have well-supported repair kits, and knowing the right one speeds up your fix. Moen’s most common cartridge is the 1225 for single-handle kitchen faucets, and the company famously ships free replacement cartridges under its lifetime warranty if you call with your model number. Delta uses a distinctive ball-and-spring system on many older single-handle faucets, and its RP-series kits bundle the seats, springs, and O-rings you need for a complete rebuild. Kohler leans on ceramic disc cartridges that rarely fail, but when they do, a model-matched GP kit restores full function.
For any of these, the key is your model or series number. Registering the number on the manufacturer’s website pulls up an exploded parts diagram that shows exactly which kit fits. This is far more reliable than eyeballing a universal assortment at the hardware store, and for Moen in particular it can mean getting the part shipped to your door at no cost.
How Long a Repair Kit Lasts
A properly installed repair kit restores your faucet to like-new performance, and the fresh parts typically last five to ten years before wear sets in again. The lifespan depends heavily on your water quality. In homes with hard water, mineral scale attacks rubber and ceramic components faster, so O-rings may need replacing every few years. A water softener dramatically extends the life of every seal in the faucet.
Using silicone plumber’s grease on every rubber part is the single biggest factor in longevity, since it keeps O-rings pliable and prevents the drying and cracking that causes leaks. Cleaning the aerator and cartridge of scale during the repair also helps the new parts seat properly and last longer. With good water and proper installation, one repair kit can outlive several years of daily heavy use before the faucet needs attention again.
Cost Comparison: Repair vs Replace
The math strongly favors repair for a faucet that is otherwise sound. A repair kit runs $8 to $25, and the labor is your own. A mid-range replacement faucet costs $80 to $250, and professional installation adds another $150 to $300. Unless your faucet is more than 15 years old, badly corroded, or a style you simply dislike, rebuilding it with a kit is the economical choice.
There is a practical exception. If you have already replaced the cartridge once or twice and the leaks keep returning, the valve body itself may be scored beyond what new seals can compensate for. At that point, put the kit money toward a new faucet and enjoy a fresh warranty. For everything short of that, a kitchen faucet repair kit is the fastest, cheapest path to a leak-free sink.