
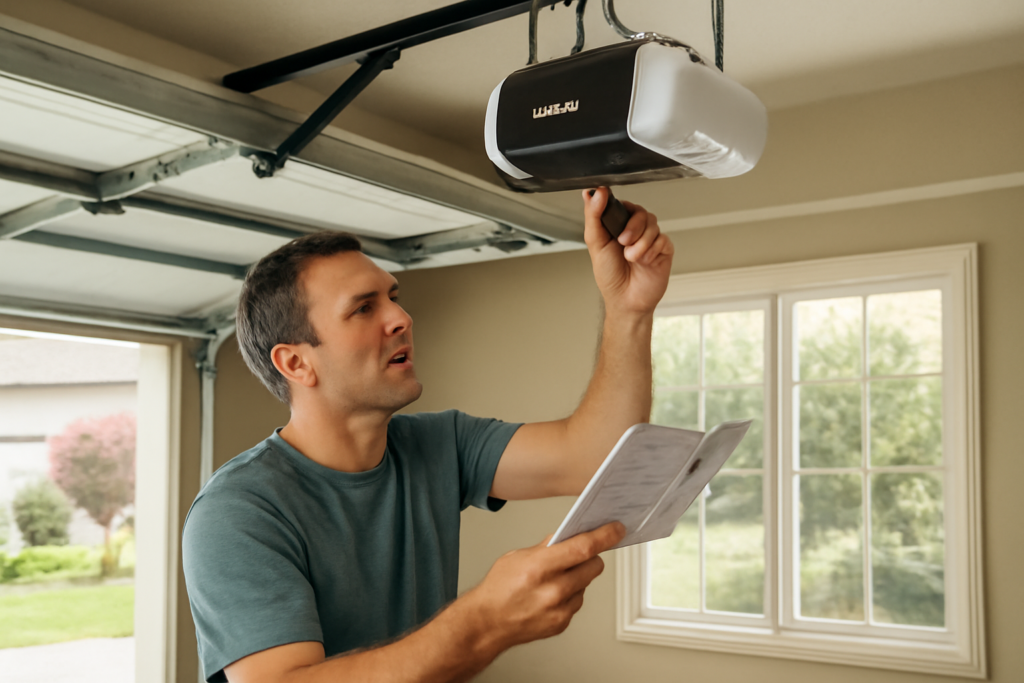
The single most common reason a garage door opener acts up is not a broken part — it is a setting that drifted out of adjustment, and the fix is buried in a booklet nobody can find. If you have lost your LiftMaster garage door opener manual, you can still handle nearly every setup and repair task yourself, because LiftMaster uses a consistent button-and-LED language across its lineup. Whether you are programming a new remote, resetting the travel limits after the door started stopping short, or pairing your car’s built-in HomeLink, the procedures follow the same logic once you know where to look and which button does what.
Part of our Garage Doors guide — explore the full guide →
- First, Identify Your Model and Manual
- Programming a Remote Control
- Programming an Exterior Keypad
- Setting Travel Limits
- Setting the Force Adjustment
- The Safety Sensors (Photo Eyes)
- Pairing HomeLink and myQ
- Common Problems and Quick Fixes
- Routine Maintenance to Keep the Opener Running
- Resetting the Opener to Factory Settings
- When to Call a Professional
First, Identify Your Model and Manual
Before any adjustment, find the model number, usually printed on a label on the side or back of the motor unit near the light socket. LiftMaster models span belt-drive, chain-drive, and screw-drive units, and the newer ones use their myQ smart platform. You can download the exact PDF manual free from the LiftMaster support site by entering that model number, so grab it if you can.
That said, the physical controls are your real reference. Look on the back panel of the motor head for the Learn button — usually yellow, red, purple, or green — along with adjustment controls and status LEDs. The Learn button color actually tells you which security technology your unit uses, and that matters for remote compatibility.
Programming a Remote Control
Pairing a new remote is a 30-second job. The sequence is nearly identical across models:
- Locate the Learn button on the motor unit and press it once. An LED beside it lights up, and you have about 30 seconds to complete the next step.
- Press the button on your remote that you want to control the door. Hold it until the opener lights blink or you hear two clicks.
- Test the remote. The door should respond. If it doesn’t, repeat within the timeout window.
The same process pairs a wireless keypad — you just enter a PIN and press Enter during that 30-second window instead. If you ever sell the home or lose a remote, hold the Learn button for about six seconds until the LED goes out to erase all paired devices, then re-pair the ones you keep.
Programming an Exterior Keypad
Wireless keypads let you open the door with a code, which is handy for kids and service visits. Press the Learn button on the motor, then on the keypad enter your chosen four-digit PIN and press Enter (or the LiftMaster logo button on newer keypads). The opener lights flash to confirm. Choose a code you’ll remember but that isn’t obvious, and you can add a temporary code for guests on many models.
Setting Travel Limits
Travel limits tell the opener exactly how far to move the door to reach fully open and fully closed. When a door stops a foot short of the floor, or reverses right before closing, drifted travel limits are usually to blame. Look for the up and down adjustment controls on the motor head — older units use screws you turn with a screwdriver, newer ones use buttons.
On button-style units, press and hold the up (or down) adjustment button to run the door to the desired position, release, and confirm per your model’s LED prompts. On screw-adjust units, each turn moves the stop point a few inches — turn toward the arrow to increase travel, away to decrease. Adjust in small increments and test after each change. The closed limit should let the door seal against the floor without straining.
Setting the Force Adjustment
Force settings control how much pushing power the opener applies before it decides something is in the way. This is a genuine safety system, so treat it carefully. Too much force and the door won’t reverse when it hits an obstruction; too little and it reverses on its own weight or a cold-weather stiff spring.
To test the down force, place a 2×4 flat on the floor in the door’s path and close the door. When the door hits the board, it must reverse. If it doesn’t, reduce the down force. To test up force, grab the door bottom as it opens — it should stop. After any travel-limit change, always retest both force and the safety reversal, because the two systems interact.
The Safety Sensors (Photo Eyes)
Two small sensors mounted about six inches off the floor on either side of the door send an invisible beam across the opening. Break that beam and the door won’t close — a federally required safety feature since 1993. If your door refuses to close and the opener lights flash or a wall-button LED blinks, the sensors are almost always the cause.
Check that both sensors show steady LEDs. A blinking or dark sensor LED means they’re misaligned or blocked. Wipe the lenses, clear any cobwebs or leaves, and gently adjust the brackets until both LEDs glow solid. Sunlight hitting a lens directly can also blind a sensor at certain times of day.
Pairing HomeLink and myQ
To program a car’s HomeLink or Car2U system, you’ll use the same Learn button on the motor. Newer LiftMaster openers with a yellow Learn button may need a HomeLink Compatibility Bridge if your vehicle is older, because of the rolling-code security. For myQ smart features, download the myQ app, create an account, and follow the in-app pairing, which uses the opener’s Wi-Fi or a myQ hub to let you open, close, and monitor the door from your phone.
Common Problems and Quick Fixes
Most complaints trace to a handful of causes:
- Door reverses before closing: misaligned safety sensors or down force set too high
- Door won’t close, lights flash: blocked or unaligned photo eyes
- Remote works up close only: weak remote battery or antenna wire tucked up instead of hanging down
- Door stops partway: travel limits need resetting, or the door itself is binding on the track
- Nothing responds: check that the wall lock feature isn’t engaged and that the unit has power
Work through these before assuming a part has failed — the vast majority resolve with an adjustment.
Routine Maintenance to Keep the Opener Running
A little seasonal maintenance prevents most of the faults that send people hunting for the manual in the first place. Every few months, lubricate the moving parts of the door and opener — the rollers, hinges, and the chain or screw drive rail — with a garage-door-specific lubricant, not general-purpose oil that attracts grit. A dry, binding door forces the opener to work harder and can throw off force and travel settings over time.
Test the safety reversal system periodically with the 2×4 board test, and clean the photo-eye lenses whenever you notice the door hesitating to close. Check that the mounting bolts on the motor unit and rail are snug, since vibration loosens them over the years. Inspect the chain or belt tension; a chain that sags and slaps needs tightening at the trolley adjustment, while an over-tight chain wears the sprocket.
Replace the remote and keypad batteries before they die completely, and if your opener has a battery backup, know that it too wears out every few years and will beep to signal replacement. Keeping up with these small tasks means the adjustments you set stay accurate and the opener keeps cycling smoothly for its full 10-to-15-year service life.
Resetting the Opener to Factory Settings
Sometimes the fastest fix for a glitchy opener is a full reset. Holding the Learn button for about six seconds clears all programmed remotes, keypads, and HomeLink devices from memory — useful when you move into a home and want to wipe the previous owner’s remotes, or when the opener behaves erratically. After the reset you simply re-pair the devices you want to keep, which often resolves phantom operation and pairing conflicts.
When to Call a Professional
You can handle programming, limits, force, and sensor alignment yourself. But leave the garage door springs alone — the torsion spring above the door holds enormous stored energy and can cause serious injury if it lets go. Cable, spring, and roller work belongs to a trained technician. If the opener motor hums but the door won’t move, or you hear grinding, that also points to hardware needing professional service.
Keep a digital copy of your LiftMaster garage door opener manual saved on your phone for quick reference, and note your model number somewhere handy. With the Learn button, the travel and force adjustments, and the safety sensors demystified, you can program remotes, restore proper door travel, and clear the everyday faults that would otherwise mean an unnecessary service call — while knowing exactly where the DIY line sits.


