
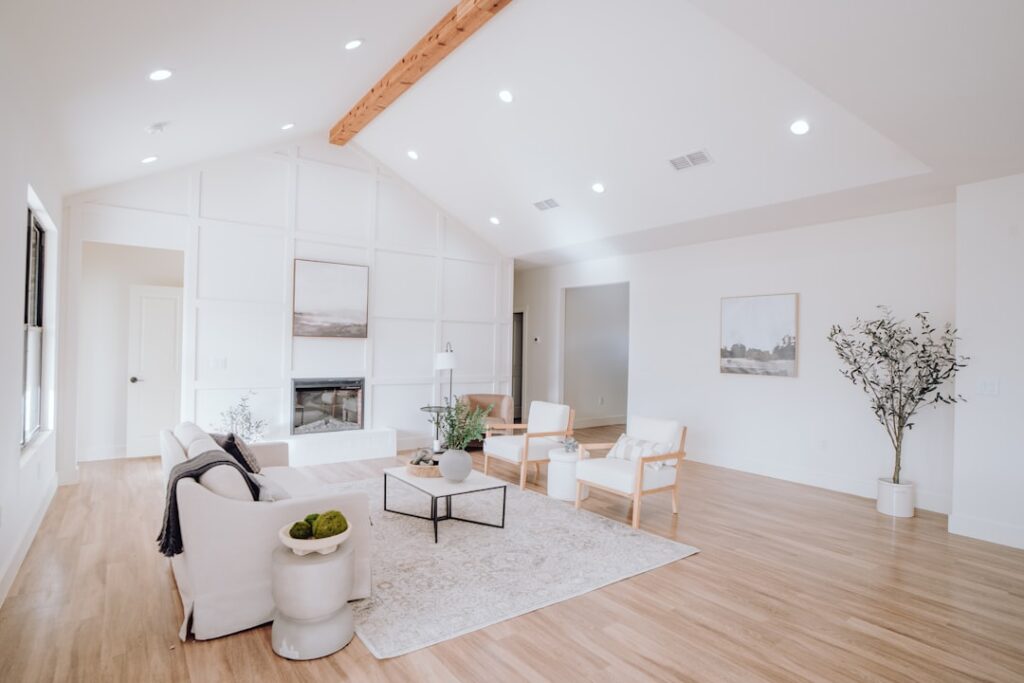
The most common recessed lighting mistake is treating cans like ceiling decoration and spacing them evenly across the room without a plan. A thoughtful living room recessed lighting layout starts with what the light needs to do, general illumination, accenting art, or task light for reading, and works backward to placement and spacing. Get the living room recessed lighting layout right and the room feels bright, even, and inviting with no dark corners or glare. Get it wrong and you end up with a runway of hot spots and shadowy gaps. Here is how the pros plan it.
- Start With the Room’s Purpose
- The Spacing Formula
- Matching Can Size to the Room
- Layering: Don’t Rely on Cans Alone
- Placing Cans for Specific Features
- Color Temperature and Dimming
- Sample Layout for a 14 x 18 Living Room
- Common Mistakes to Avoid
- What It Costs
- Trim Types and How They Change the Look
- Retrofit vs. New Construction
- The Bottom Line
Start With the Room’s Purpose
Lighting designers work in three layers, and a good living room uses all of them. Ambient light provides the overall glow so you can move around safely. Task light serves specific activities, a reading chair, a game table. Accent light highlights features like artwork, a fireplace, or built-in shelving. Recessed cans can serve any of these layers depending on where you place them and what trim you use, so decide the job of each fixture before you pick locations.
Sketch the room to scale, including furniture, the sofa, the TV wall, the fireplace, and any art. Placement follows function, and function follows the furniture. This one step separates a designed layout from randomly scattered holes in the ceiling.
The Spacing Formula
The classic rule of thumb for general ambient spacing is to divide your ceiling height by two, and use that number in feet as the spacing between fixtures.
- 8-foot ceiling: space cans about 4 feet apart.
- 9-foot ceiling: about 4.5 feet apart.
- 10-foot ceiling: about 5 feet apart.
This spacing produces even, overlapping pools of light with no dark valleys between them. For the perimeter, keep the first row of cans about 2 to 3 feet away from the walls. Placing them too close washes the wall harshly and wastes light; too far leaves the edges of the room dim.
Matching Can Size to the Room
Recessed housings come in several diameters, and size affects both the spread of light and the look of the ceiling.
- 4-inch: tighter beam, good for accent light and lower ceilings or as a subtle grid.
- 5-inch: a versatile middle size for general living room lighting.
- 6-inch: the traditional workhorse, broad spread, ideal for general lighting in larger rooms with 9-foot-plus ceilings.
Modern ultra-thin LED wafer lights blur these lines, since a slim 6-inch wafer can be dimmed and aimed to do the work of several sizes. For most living rooms, a mix of 4-inch accents and 5 or 6-inch general lights gives you flexibility. Keep the trim style and finish consistent across the ceiling for a clean look.
Layering: Don’t Rely on Cans Alone
A ceiling full of downlights alone can feel flat and cave-like, bright on the floor but dim on the walls and faces. The best layouts pair recessed lighting with other sources: a floor lamp by the reading chair, wall sconces flanking the fireplace, a statement pendant or two, and LED strips in a cove or behind a media wall. The recessed cans handle even ambient fill while the other layers add warmth and dimension. Think of the cans as the foundation, not the entire building.
Placing Cans for Specific Features
Over the Seating Area
Center a balanced group of cans over the main conversation area so the seating is well lit without a downlight glaring directly into anyone’s eyes. Avoid placing a can directly above where someone’s head will be on the sofa; offset it slightly.
For Wall Art and Accents
To wash a piece of art or a textured accent wall, use adjustable (gimbal) trims and place the can 1.5 to 3 feet out from the wall, then aim the beam at roughly a 30-degree angle onto the feature. This grazes the surface and highlights it without casting your own shadow.
Near the TV
Keep cans off the television itself to avoid screen glare, but add a couple nearby on a separate dimmer so you can lower them during movies while keeping the rest of the room comfortably lit.
Color Temperature and Dimming
For a living room, choose LED trims in the 2700K to 3000K warm white range for a cozy, inviting feel. Cooler 3500K to 4000K light reads as too clinical for a relaxing space. Look for a CRI of 90 or higher so skin tones, wood, and fabrics look true. Put every zone on a dimmer; being able to drop the ambient cans to 20 percent for evening while boosting the reading light is the difference between a good layout and a great one. Group the lighting into at least two or three switched zones rather than running everything off a single switch.
Sample Layout for a 14 x 18 Living Room
Say you have a 14-by-18-foot room with a 9-foot ceiling. Using the ceiling-height-over-two rule, you space cans about 4.5 feet apart. That yields roughly a 3-by-4 grid of general lights, keeping the outer cans about 2.5 feet off the walls. Then you add a pair of adjustable accents aimed at the fireplace wall on their own dimmer, and one more pair washing the art on the opposite wall. Layer in a floor lamp by the reading chair, and the room reads bright, balanced, and layered, with no single fixture doing all the work.
Common Mistakes to Avoid
- Spacing cans too far apart, leaving scalloped dark bands across the ceiling.
- Placing the perimeter row too close to the walls, creating harsh scallops of light.
- Using only downlights with no wall or lamp layers, which makes the room feel flat.
- Mixing color temperatures between fixtures, which looks disjointed.
- Wiring the whole room to one switch instead of zoning for flexibility.
What It Costs
Recessed LED fixtures run $15 to $50 each for quality units. Professional installation adds $100 to $250 per fixture depending on attic access and whether it is new construction or a retrofit into a finished ceiling. A full living room of 10 to 12 cans typically costs $1,200 to $3,000 installed. Retrofit LED wafer lights that clip into an existing junction box are the most DIY-friendly and can cut labor significantly if wiring already exists.
Trim Types and How They Change the Look
The housing hides in the ceiling, but the trim is what you see, and it shapes both the appearance and the light. A few common types serve different purposes:
- Baffle trim: the ridged interior reduces glare and gives a soft, finished look, the default choice for general living room lighting.
- Reflector trim: a smooth, shiny interior maximizes light output, useful in larger rooms that need more punch.
- Adjustable (gimbal) trim: tilts and rotates so you can aim the beam at art, a fireplace, or a feature wall.
- Wall-wash trim: directs light toward a wall to graze it evenly, ideal for highlighting texture or a gallery.
Keep the trim finish consistent across the ceiling, usually white to blend in, so the fixtures recede and the light, not the hardware, is what you notice. Reserve the adjustable and wall-wash trims for your accent locations while using baffle trims for the general grid.
Retrofit vs. New Construction
How you install depends on whether the ceiling is open or already finished. In new construction or a gut remodel, you use new-construction housings that mount to the joists before the drywall goes up, giving you total freedom in placement. In a finished ceiling, remodel-rated housings clip into a hole cut with a hole saw and grip the drywall from behind, no attic access required. The newest and easiest option is the ultra-thin LED wafer, which is barely thicker than the drywall itself; it connects to a small junction box and clips into the cut hole, making it the most DIY-friendly retrofit available.
If you are retrofitting, spend time locating ceiling joists and any hidden wiring, ductwork, or plumbing before you cut. A stud finder and a careful probe save you from cutting a hole exactly where a joist or an HVAC run sits. Plan the full grid on paper, mark every location on the ceiling with a pencil, and step back to check the spacing looks even before you make the first cut. Measure twice here, because a can placed in the wrong spot leaves a patch to repair and repaint.
The Bottom Line
A successful living room recessed lighting layout begins with the room’s function and furniture, uses the ceiling-height-over-two spacing rule, keeps the perimeter row 2 to 3 feet off the walls, and layers cans with lamps, sconces, and accents. Pick warm 2700K to 3000K trims with high CRI, zone everything on dimmers, and aim adjustable fixtures at your art and fireplace. Plan it on paper first, and the finished room will feel effortlessly bright and inviting instead of dotted with random downlights.


