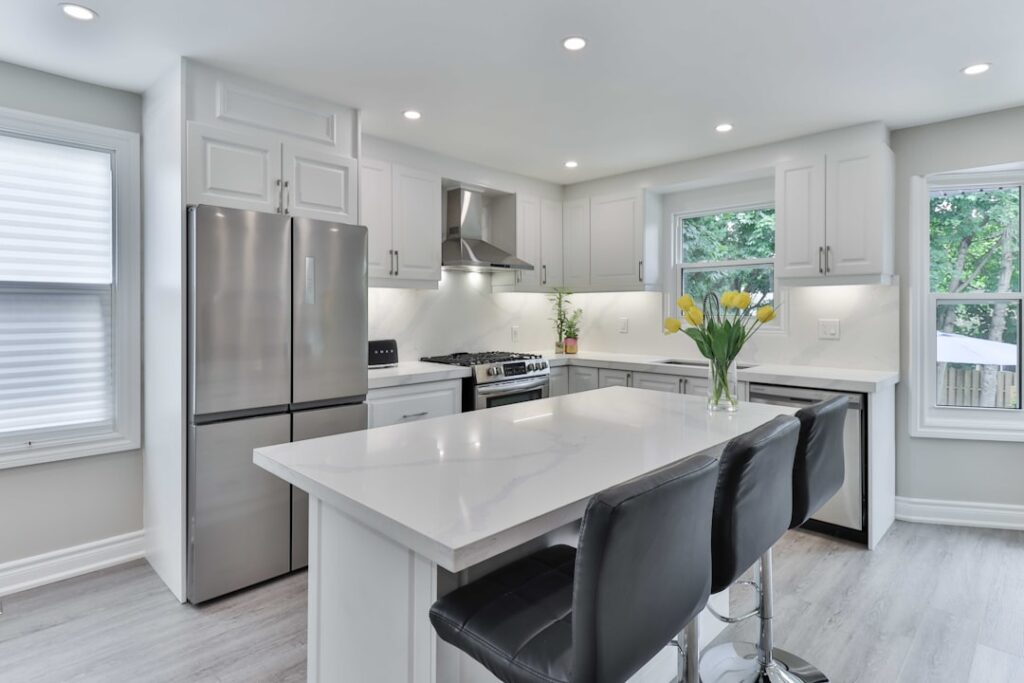
A generous island can become the hardworking heart of an open-plan kitchen, offering prep space, seating, storage, and a gathering spot all in one. Designing a long kitchen island well means balancing dimensions, clearances, and function so the extra length works for you rather than crowding the room. This guide walks through everything you need to plan yours.
- What Counts as a Long Kitchen Island?
- Ideal Dimensions and Clearances
- Seating Layouts for a Long Island
- Zoning a Long Island
- Storage Opportunities
- Choosing Countertop Materials
- Lighting a Long Island
- Electrical and Plumbing Considerations
- Ventilation for Island Cooktops
- Cost Expectations
- Shape and Configuration Options
- Structural Support for Long Spans
- Flooring and the Island
- Timeline and Planning
- Common Mistakes to Avoid
- Final Thoughts
What Counts as a Long Kitchen Island?
While a standard island runs roughly 4 to 7 feet, a long island typically stretches 8 feet or more, sometimes reaching 10, 12, or even 15 feet in large kitchens. The extra length lets you combine multiple zones, such as a prep sink at one end, seating in the middle, and a cooktop or landing space at the other. Long islands shine in open floor plans where the kitchen flows into a living or dining area.
Ideal Dimensions and Clearances
Length is only part of the equation. Getting the surrounding space right is what makes a long island livable:
- Width — 24 to 42 inches is common; wider islands can host seating on one side and prep on the other.
- Height — standard counter height is 36 inches; raised bar seating sits at 42 inches.
- Aisle clearance — leave at least 36 inches around the island, and 42 to 48 inches on the working side where you open appliances and cabinets.
These clearances prevent a long island from turning the kitchen into an obstacle course. If two cooks share the space, favor the wider 42 to 48 inch aisles.
Seating Layouts for a Long Island
One of the biggest perks of extra length is more stools. Plan roughly 24 inches of width per seat so diners are not bumping elbows. A 10-foot island can comfortably seat four to five people. Consider:
- Single-side seating — stools along one long side, prep on the other.
- Wrap-around seating — stools on one long side plus one end for a banquette feel.
- Split-level design — a raised bar section for eating and a lower section for prep.
Allow 12 to 18 inches of knee overhang under the counter so legs have room. If the overhang exceeds 12 inches, add corbels or steel brackets for support.
Zoning a Long Island
The real power of length is the ability to create distinct functional zones. A well-zoned long island might include:
- A prep zone with a secondary sink and cutting surface.
- A cooking zone with a cooktop and nearby ventilation.
- A serving and seating zone at the far end.
- Deep storage below for pots, small appliances, and pantry overflow.
Keep the classic work triangle in mind so the island does not force awkward trips between the range, sink, and refrigerator.
Storage Opportunities
A long island offers a huge amount of concealed storage. Options include deep pot drawers, pull-out trash and recycling bins, a microwave drawer, open shelving on the seating side for cookbooks, and even a built-in wine rack or beverage fridge. Mixing drawers and cabinet doors lets you store everything from sheet pans to serving dishes within arm’s reach of where you cook.
Choosing Countertop Materials
Because a long island has so much surface area, the countertop choice is both a design statement and a budget driver:
- Quartz — durable, nonporous, and low maintenance; a top choice for busy kitchens.
- Granite — natural stone with unique patterning; needs periodic sealing.
- Butcher block — warm and inviting, ideal for a prep zone, but requires oiling.
- Marble — luxurious but soft and stain-prone; best for lower-traffic islands.
Long spans may require a seam in natural stone slabs, since slabs typically max out around 10 feet. Discuss seam placement with your fabricator so it lands in an inconspicuous spot.
Lighting a Long Island
A single pendant looks lost over a long island. Plan for two or three pendants spaced evenly, or a linear fixture that spans the length. A common rule is to center lights over the island with roughly 24 to 30 inches between pendants and to hang them 30 to 36 inches above the countertop. Balanced lighting keeps the whole surface usable and anchors the island visually.
Electrical and Plumbing Considerations
Adding a sink or cooktop means running plumbing and gas or electrical lines through the floor, which is a significant part of the budget. Building codes require receptacles on islands, and they must be placed to avoid tripping hazards, often in the sides or a pop-up unit. Always confirm local code and use a licensed electrician and plumber for these connections, especially where gas is involved.
Ventilation for Island Cooktops
If your long island houses a cooktop, you need ventilation. Because there is no wall behind it, options are an island-mount range hood suspended from the ceiling or a downdraft vent that rises from the countertop. Island hoods should extend a few inches beyond the cooktop on each side and move enough air, typically 300 to 600 CFM depending on the burners, to clear smoke and steam effectively.
Cost Expectations
A long island is a major investment. Budget ranges look roughly like this:
- Basic cabinetry and countertop: 3,000 to 6,000 dollars.
- Mid-range with quartz and quality cabinets: 6,000 to 12,000 dollars.
- High-end with a sink, cooktop, seating, and premium stone: 12,000 to 25,000 dollars or more.
Plumbing, gas, and electrical runs add several thousand dollars if utilities are not already nearby. Getting multiple quotes helps you understand where your kitchen falls.
Shape and Configuration Options
A long island does not have to be a simple rectangle. Depending on your kitchen, you might consider:
- Single-level rectangle — the most versatile and easiest to fabricate, with one continuous work surface.
- Two-tier design — a lower prep counter and a raised bar, which hides prep mess from seated guests.
- L-shaped or angled — an island that turns a corner to create distinct zones and better flow.
- Island with a waterfall edge — countertop material that cascades down the sides for a dramatic, modern statement.
Two-tier designs remain popular for entertaining because guests can sit at the raised bar while the cook works below, but a single flush surface offers more usable prep space and a cleaner contemporary look.
Structural Support for Long Spans
Length introduces engineering considerations that a small island never faces. A long stretch of stone countertop can crack if it is not fully supported, so the cabinet base must be level and continuous, and any seams should fall over a cabinet wall rather than an open span. Where you have a seating overhang beyond 12 inches, add steel brackets, corbels, or support legs to carry the weight. For very long islands, the base is sometimes built as two or three cabinet runs joined together, which must be shimmed and fastened so the whole assembly reads as one solid unit.
Flooring and the Island
Because a long island covers a large footprint, think about how it interacts with your flooring. Install flooring before setting a permanent island, or plan the flooring layout so the island lands cleanly on it. Heavy islands can concentrate load on the subfloor, so verify the floor is level and sound before installation. If you ever plan to change the flooring later, a movable or freestanding island offers flexibility, while a plumbed-in built-in island commits you to the current layout.
Timeline and Planning
A long island with utilities is not a weekend project. Expect the process to include design and measurement, ordering cabinets, running any plumbing, gas, or electrical lines, installing the base, templating and fabricating the countertop, and finally setting the top and connecting fixtures. From design to completion, a fully plumbed island often takes several weeks, much of it waiting on custom countertop fabrication. Building this timeline into your remodel prevents the kitchen from being unusable longer than you expect.
Common Mistakes to Avoid
- Making the island so long that clearances shrink below 36 inches.
- Underestimating the seating width needed per stool.
- Placing a single pendant over a long surface.
- Forgetting knee-space support brackets for deep overhangs.
- Skipping ventilation for an island cooktop.
Final Thoughts
A well-designed long kitchen island can transform how your kitchen looks and functions, combining prep space, storage, seating, and gathering room in a single striking centerpiece. Respect the clearances, zone the length into purposeful areas, plan lighting and ventilation early, and choose durable surfaces. Do that, and your island will earn its place as the busiest and most beloved spot in the home.