Fencing a yard the conventional way can cost thousands, which is why reclaimed pallets are such an appealing shortcut. A low budget DIY pallet fence turns free or nearly free shipping pallets into a sturdy, rustic barrier for a fraction of the price of new lumber. The catch is that not all pallets are safe to use, and a fence built carelessly will sag or rot within a season. Done right, with the proper wood and a little prep, a pallet fence is a genuinely practical, wallet-friendly project.
- Why Pallets Make a Cheap Fence
- Source Safe, Heat-Treated Pallets
- Tools and Extra Materials
- Plan and Set the Posts
- Attach the Pallet Panels
- Sand and Seal for Longevity
- Honest Limitations
- Design Ideas on a Budget
- Where to Find Free Pallets
- Privacy vs Open Designs
- Maintenance Over the Years
- The Bottom Line
Why Pallets Make a Cheap Fence
Pallets are everywhere. Hardware stores, garden centers, warehouses, and online marketplaces often give them away free or sell them for a few dollars. Each pallet is essentially a pre-built panel of slats and stringers, so much of the assembly is already done. Stand them on end or lay them out and you have ready-made fence sections. For homeowners on a tight budget, that head start in both material cost and labor is the whole appeal.
Source Safe, Heat-Treated Pallets
This is the most important step, and the one people skip. Some pallets are chemically treated, which you do not want around a garden, pets, or kids. Look for the IPPC stamp on the side of the pallet and check the treatment code:
- HT means heat-treated. These are safe; the wood was treated with heat alone, not chemicals.
- MB means methyl bromide, a chemical fumigant. Avoid these entirely.
- No stamp or unmarked pallets are a gamble; their origin and treatment are unknown, so pass them by.
Only use HT-stamped pallets. Inspect each one for damage, mold, chemical stains, or spilled cargo, and reject anything questionable. Safe sourcing is what separates a smart budget fence from a health hazard.
Tools and Extra Materials
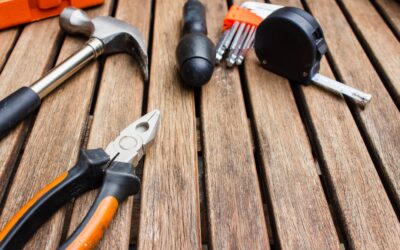
Beyond the pallets, you will need a modest kit: fence posts (4×4 pressure-treated lumber or metal T-posts), quick-set concrete or a post driver, exterior screws or lag bolts, a drill, a level, a saw, a measuring tape, and a post-hole digger. You will also want sandpaper or a power sander, plus exterior wood stain or sealer for the finish. Even with these purchases, the total stays far below a contractor-installed fence.
Plan and Set the Posts
Map your fence line and mark post locations, spacing them to match your pallet width so each section spans neatly between two posts. Dig post holes below your frost line for stability, set the 4×4 posts in concrete, and check each for plumb with your level. Let the concrete cure fully before hanging any weight. Solid, properly set posts are the backbone of the fence; skimp here and the whole run will lean over time.
Attach the Pallet Panels
With cured posts in place, fasten the pallets between them:
- Stand each pallet upright (or in your chosen orientation) and position it against the posts.
- Check that it sits level, then screw or bolt the pallet’s stringers securely to the posts.
- Use exterior-rated screws or lag bolts; ordinary indoor fasteners will rust and fail outdoors.
- Add cross-bracing or extra slats where gaps are too wide, depending on whether you want privacy or an open rustic look.
Keep the bottom of the pallets a couple of inches off the ground to slow rot from soil contact and moisture.
Sand and Seal for Longevity
Raw pallet wood weathers fast and is splintery, so finishing matters. Sand the surfaces to knock down rough spots and splinters, then apply an exterior wood stain or sealer. Sealing is not optional for a fence that has to survive rain, sun, and snow; it blocks moisture, slows rot, and dramatically extends the life of the wood. Plan to reseal every couple of years to keep the fence sound. A coat of color also unifies the mismatched look of reclaimed pallets.
Honest Limitations
Be realistic about what a pallet fence is and is not. It is a budget, rustic, often somewhat irregular fence, not a polished privacy fence that will impress an HOA. The wood quality varies, panels may not line up perfectly, and even sealed pallet wood will not last as long as new pressure-treated lumber. For a garden boundary, a backyard divider, a dog run, or a rustic accent, it is ideal. For a formal front-yard fence with strict appearance requirements, it may fall short.
Design Ideas on a Budget
You can dress up a pallet fence cheaply. Paint or stain it a consistent color for a more finished look, mount planter boxes on the slats for a living wall, or weave in solar string lights for evening ambiance. Mixing pallet sections with a few rows of horizontal slats can fill gaps and add visual rhythm. Small touches like these make an inexpensive build look intentional rather than improvised.
Where to Find Free Pallets
Sourcing is half the savings, and free pallets are everywhere if you know where to look. Hardware and home-improvement stores, garden centers, furniture retailers, and pet-supply shops often have stacks they will happily give away. Online marketplaces and community boards regularly list free pallets from businesses clearing space. Always ask permission rather than taking pallets from behind a store, since some are part of a paid return program. When you collect them, sort on the spot: keep the sturdy HT-stamped ones in good condition and leave behind anything cracked, stained, or unmarked.
Privacy vs Open Designs
Decide early how much privacy you need, because it changes how you build. Pallets used as-is leave gaps between the slats, giving an open, rustic boundary that suits gardens and dog runs. For more privacy, you can face the pallets with extra reclaimed boards to close the gaps, or back them with privacy slats and fabric. Orienting pallets so the closely spaced slats face outward also increases coverage. Just remember that a fully solid fence catches more wind, so your posts and bracing need to be even stronger to keep it from leaning.
Maintenance Over the Years
A pallet fence is not a build-it-and-forget-it project. Inspect it each spring for loose fasteners, rotting boards, and posts that have shifted, and make small repairs before they grow. Reapply sealer or stain every couple of years to keep moisture out and the wood sound. Replacing an individual weathered slat is easy and cheap, which is one of the advantages of building from modular pallets. With this light, regular attention, even a budget fence can serve reliably for several seasons before the wood finally needs more significant replacement.
The Bottom Line
A low budget DIY pallet fence is one of the most cost-effective ways to enclose a yard, provided you do it right. Use only HT heat-treated, undamaged pallets, set your posts solidly in concrete, fasten panels with exterior-rated hardware, and sand and seal the wood to fight rot. Manage your expectations on appearance and longevity, maintain the seal, and you will have a rustic, functional fence built for a tiny fraction of the usual cost.