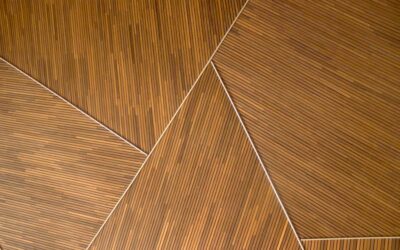
Two homes can install the exact same LVT product and end up with rooms that look completely different — all because of pattern. LVT flooring patterns determine the rhythm and feel of your floor as much as the color does. A wide plank in a random offset reads casual and modern. The same plank in a herringbone reads classic and dressy. The product is the same. The pattern changes everything.
I have spec’d LVT for projects ranging from beach rentals to luxury master suites. Pattern choice usually decides whether a floor feels generic or genuinely upscale.
The Main LVT Flooring Patterns
Six core patterns dominate residential LVT installations. Each has its place.
- Random offset (1/3 stagger): the standard plank layout — casual, modern, fast to install
- Herringbone: classic 90-degree zigzag — dressy, formal, time-intensive
- Chevron: angled herringbone forming a V pattern — bold and contemporary
- Brick pattern (1/2 stagger): traditional — uniform and clean
- Versailles/parquet: intricate squares with varied plank inserts — luxury feel
- Tile patterns: for stone-look LVT — straight lay or diagonal
The right pattern depends on room size, ceiling height, foot traffic, and how dressy you want the space to feel.
Random Offset: The Default Pattern
About 70 percent of residential LVT installs use a random offset pattern, where each plank shifts by 1/3 of its length from the one above. This breaks up the seams and looks natural — closest to how real hardwood would have been installed by a careful carpenter.
Best for:
- Open-plan kitchens and great rooms
- Bedrooms and hallways
- DIY installs (forgiving of small misalignments)
- Wide planks 7 inches or wider
Avoid the temptation to stagger every plank by exactly 1/3 — randomize within a 30 to 50 percent stagger range to keep the pattern from looking mechanical.
Herringbone LVT Pattern
Herringbone has surged in popularity in the last 5 years. The pattern uses planks at 90 degrees to each other, alternating direction in a zigzag. The look is dressier and more architectural than standard plank — perfect for entryways, formal dining rooms, and any space where you want a statement floor.
Pros and cons:
- Pro: high-end look at LVT prices
- Pro: visually expands narrow spaces (laid lengthwise) or grounds wide ones (laid widthwise)
- Con: longer install time — 30 to 50 percent more labor
- Con: more cuts mean more waste — order 15 percent over instead of standard 10 percent
- Con: some click-lock LVT does not herringbone well — buy planks specifically designed for it
Karndean Korlok and Mannington Adura Max both make herringbone-specific LVT planks at $5 to $8 per square foot.
Chevron LVT Pattern
Chevron looks similar to herringbone at a glance but uses planks cut at 45-degree angles meeting in a clean V. The result is sharper and more contemporary. It is harder to install than herringbone and requires planks specifically pre-cut for the angle.
Chevron works best in:
- Modern entries and foyers
- Master bathrooms with luxe finishes
- Long narrow rooms (the V points down the room length)
- Smaller statement spaces (under 200 square feet)
Most chevron LVT runs $6 to $10 per square foot — a premium over standard plank, but worth it in the right space.
Brick Pattern: Underrated Choice
The 1/2 brick pattern stagger creates uniform horizontal lines across a floor. It looks slightly more formal than random offset but does not require the labor of herringbone. For traditional homes and farmhouse styles, brick pattern LVT often outperforms random offset.
Use brick pattern with planks 6 inches or narrower. With wide planks, the uniform staggers can make the floor look striped. Best with classic oak or maple visuals rather than contemporary gray-washed planks.
Tile and Stone-Look LVT Patterns
For stone-look and tile-look LVT, pattern options shift. Diagonal layouts at 45 degrees enlarge a room visually but waste 20 percent more material in cuts. Straight-lay patterns are simpler and cheaper. Versailles patterns mix multiple sizes for a parquet-style look that works well in foyers and formal spaces.
Stone-look LVT in 18-by-36-inch slabs laid in a 1/3 offset reads as authentic poured stone. The same slabs in a brick pattern read more traditional.
Pattern Direction and Room Layout
The direction you run LVT flooring patterns matters as much as the pattern itself. General rules:
- Run planks parallel to the longest wall in most rooms
- For narrow rooms, run planks the long way to enhance length
- For square rooms, run planks parallel to the main view from the entry
- For open-plan layouts, pick one direction and continue it through every adjoining space
- Run planks perpendicular to floor joists if installing over wood subfloor (extra stability)
Mixing directions across rooms breaks up open spaces visually — usually a mistake unless you intentionally want zoned areas.
Working With Plank Variation
LVT flooring patterns benefit from intentional plank variation. Open at least 4 cartons before installing and mix planks across all cartons to randomize the pattern. Skipping this step concentrates similar-looking planks in clusters and ruins the natural look.
For best results, lay out 8 to 10 rows on the floor before clicking anything together. Walk through, photograph from above, and shuffle planks to break up obvious matches. Spend 30 minutes on layout — save yourself 10 years of looking at a stripe.
Choosing the Right Pattern for Your Home
The pattern decision usually comes down to three factors. Budget — herringbone and chevron cost 30 to 60 percent more in labor and material waste. Style — random offset reads casual, herringbone reads formal, tile patterns read classic. Skill level — DIYers should stick to random offset or brick.
For a kitchen and great room remodel, random offset wide-plank in a 7-inch width hits the sweet spot of style, cost, and ease. For a foyer or master bath that deserves drama, chevron or herringbone earns the upgrade. Pick the pattern first, then choose the LVT product that supports it — not the other way around.
Prefer to explore on your own?
See how new flooring looks in your actual room in seconds — free, no signup.
Try the free Floor Studio →