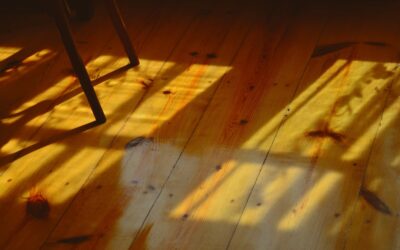
Walk into a newly finished room with a high-gloss floor and the first thing you notice is the reflection of the windows. Walk into one finished with matte polyurethane and you notice the wood instead. A matte finish reflects very little light, usually somewhere around 5 to 20 percent on a gloss meter, so the grain, color and texture of the boards read as if they were barely coated at all. Yet the film on top is still real polyurethane, with the same abrasion resistance and moisture protection you would get from a shinier product.
That combination explains why flat and ultra-flat finishes have become the default look in many new homes and refinishing jobs. Matte poly hides fine scratches, dust and pet hair far better than gloss, it photographs well, and it suits the wide-plank, white oak and natural-tone floors that dominate current design. The tradeoffs are subtle: a slightly softer look of clarity on dark or highly figured wood, a need for careful stirring, and a finish that can show burnish marks if you scrub one spot too hard.
- What Matte Polyurethane Actually Is
- Why Choose a Low-Sheen Finish
- Water-Based vs Oil-Based Matte Options
- Tools and Materials
- How to Apply a Matte Finish Step by Step
- Safety and Ventilation
- Troubleshooting a Matte Poly Finish
- Cleaning and Long-Term Care
- Cost Ranges and When to Hire a Pro
- Frequently Asked Questions
If you want a floor that looks oiled or raw but cleans like a sealed surface, a matte finish is usually the right call. The sections that follow cover how the sheen is created, which product type to choose, how to apply it without streaks, and how to keep it looking even for years.
What Matte Polyurethane Actually Is
Every clear floor finish starts life as a glossy resin. Manufacturers lower the sheen by adding flatting agents, which are microscopic particles (most often fine silica) that stay suspended in the liquid. As the film dries, those particles rise toward the surface and create a microscopically rough texture. Light hitting that texture scatters in many directions instead of bouncing straight back to your eye, and the result looks flat.
So matte polyurethane is not a different chemistry from satin or gloss. It is the same resin with a higher load of flatting agent. That detail matters in three practical ways. First, the particles settle to the bottom of the can, so you must stir thoroughly before and during the job (never shake, which whips in bubbles). Second, the more flatting agent a product carries, the more it slightly diffuses the view into the wood, which is why an ultra-flat coat can make dark walnut or deeply figured maple look a touch cloudy. Third, because only the top coat sets the final sheen, many pros build the lower coats in gloss for maximum clarity and switch to a flat polyurethane matte finish only for the last coat.
You will see sheen names used loosely across product labels. As a rough guide, ultra-flat or “nude” finishes sit at the bottom of the range, matte or flat comes next, then satin, semi-gloss and gloss. A clear matte polyurethane labeled for floors will typically fall in the 10 to 20 sheen range, and true ultra-flat products dip below 10.
Why Choose a Low-Sheen Finish
The biggest selling point is forgiveness. A glossy floor acts like a mirror, so every scratch, scuff, footprint and speck of dust shows up as a break in the reflection. A matte poly finish scatters light so evenly that small blemishes blend into the surface. In a busy household with kids, dogs and chairs sliding across the kitchen, that alone can make a floor look good for years longer between screen-and-recoat jobs.
Appearance is the other reason. Low sheen polyurethane keeps the “just sanded” look that many people want from white oak, hickory or reclaimed boards. It pairs well with natural or lightly tinted stains, and it reduces glare in rooms with big windows or strong overhead lighting. On wide planks with visible character, such as knots and mineral streaks, a flat finish lets the texture lead instead of the coating.
There are a few situations where a matte finish is less ideal:
- Very dark stains: flatting agents can create a faint haze over ebony or espresso tones, so a satin top coat may look richer.
- Highly figured exotic woods: curly or quartersawn grain often shows more depth under a satin or semi-gloss finish.
- Uneven sanding: ironically, flat finishes can reveal swirl marks and sander chatter at low angles, because there is no glare to hide them. Sand carefully.
Water-Based vs Oil-Based Matte Options
Most matte products on the market are waterborne, and for good reason. A water based polyurethane matte finish dries clear, stays clear instead of yellowing over time, and supports the pale, natural look that drives most people to a flat sheen in the first place. Dry times are short (often 2 to 3 hours between coats), odor is mild, and cleanup uses soap and water. Two-component waterborne finishes, which add a crosslinker just before application, are the toughest option and the usual choice for kitchens and high-traffic halls.
Oil-based matte finishes exist too. It adds an amber warmth that deepens over time, which can be attractive on red oak or older homes, but it fights the cool, raw-wood look that most matte buyers want. It also needs 8 to 24 hours between coats and has strong solvent odor. Oil-modified waterborne products sit in between: they offer some warmth with water cleanup and are worth considering if you want a low sheen without the stark, bleached appearance a pure waterborne finish can give red oak.
Tools and Materials
- Clear matte polyurethane rated for floors (plan roughly 1 gallon per 400 to 500 sq ft per coat; check the label)
- Waterborne sealer or the finish maker’s recommended base coat
- Applicator suited to the product: a T-bar with synthetic pad for waterborne, a lambswool applicator or natural bristle for oil-based
- 2 to 3 inch angled brush for edges and corners
- Drum or orbital floor sander, edger, and abrasives through 100 or 120 grit
- Buffer with 220 grit screen or abrasive pads for intercoat abrasion
- Shop vacuum, tack cloths or microfiber mop
- Painter’s tape, knee pads, and paint stir sticks
- Respirator rated for organic vapors, nitrile gloves and safety glasses
How to Apply a Matte Finish Step by Step
- Sand and clean thoroughly. Finish sanding at 100 or 120 grit and blend the edges with the field. Vacuum the floor, walls, sills and vents, then wipe with a dry microfiber mop. Dust left behind will show up as specks in a flat coat.
- Stir, do not shake. Stir the can for a full two minutes, scraping the bottom where flatting agent settles. Re-stir every 15 to 20 minutes during application. Uneven mixing is the main cause of patchy sheen.
- Seal the wood. Apply a sealer or first coat as the label directs. On species prone to tannin reactions or side bonding, a dedicated sealer improves results.
- Consider gloss build coats. For the clearest film, many installers apply the first one or two coats in gloss and finish with matte. If you go this route, use products from the same system.
- Cut in the edges. Brush a band 4 to 6 inches wide along the walls, working one section at a time so the edge stays wet when the pad reaches it.
- Roll or pad the field. Pour a bead of finish along the grain and pull it with the applicator in long, overlapping passes. Keep a wet edge and work toward the exit door. Avoid going back over areas that have started to set.
- Abrade between coats. After the recommended dry time, buff lightly with a 220 grit screen or pad, vacuum and tack. This removes raised grain and dust nibs and helps the next coat bond.
- Apply the final matte coat. Use the same careful technique. The top coat alone determines the sheen, so even coverage here is what you see.
- Cure before use. Light sock traffic is usually fine after 24 hours. Wait about 3 to 7 days before replacing furniture and 2 to 4 weeks before laying rugs, depending on the product.
Safety and Ventilation
Floor finishes release vapors as they dry, and solvent-based products are flammable. Open windows and run fans that exhaust air outdoors, and wear a respirator with organic vapor cartridges as the label recommends, plus gloves and eye protection. Turn off pilot lights on water heaters, furnaces and gas ranges in or near the work area when using solvent-based products, and keep sparks and open flames away. Never mix finishes or cleaning chemicals that are not designed to be combined. Rags soaked in oil-based finish can spontaneously combust: lay them flat outdoors to dry or store them in a sealed metal can filled with water. If the house was built before 1978 and you are sanding painted surfaces such as trim, test for lead first, and older resilient flooring or adhesive under the wood should be tested for asbestos before you disturb it.
Troubleshooting a Matte Poly Finish
Uneven or blotchy sheen
Patches that look shinier than surrounding areas usually come from poor stirring, inconsistent film thickness or lap marks where the finish was worked after it began to set. Let the coat cure, screen it lightly and apply one more even coat.
Cloudy or milky look
A hazy appearance over dark wood often means too many coats of a heavily flatted product. The fix next time is to build in gloss and switch to matte only for the final coat. Cold, humid conditions can also cause clouding; work at roughly 65 to 80°F with moderate humidity.
Shiny traffic lanes
Over months, foot traffic and aggressive cleaning can burnish a low-sheen film so main pathways look glossier. A screen and fresh top coat restores uniformity. Using felt pads and avoiding scrubbing one spot hard both slow this down.
Dust nibs and bubbles
Specks are dust that settled during drying, and bubbles come from shaking the can or overworking the applicator. Light abrasion between coats takes care of both.
Cleaning and Long-Term Care
Day-to-day care for a matte floor is simple: sweep or vacuum with a hard-floor setting, then damp-mop with a pH-neutral cleaner made for finished wood. Avoid oil soaps, wax, acrylic “shine” restorers and steam mops. Polishes in particular are a problem, because they add gloss and leave a blotchy surface that blocks future recoats. Put walk-off mats at entries, felt pads on furniture legs and keep pet nails trimmed.
When the finish starts to look dull or worn in traffic areas, usually every 3 to 7 years in a typical home, schedule a screen and recoat rather than a full sanding. As long as wear has not reached bare wood, one fresh top coat of matte polyurethane renews protection and evens out the sheen.
Cost Ranges and When to Hire a Pro
Quality waterborne matte finishes generally run from moderate prices for one-part products up to premium prices for two-component systems, so materials for a 300 sq ft room with three coats often land between a few hundred dollars and around $600. Professional sand-and-finish work commonly falls in the range of $3 to $8 per sq ft depending on region, floor condition and number of coats, while a screen and recoat costs far less.
DIY is realistic for a single room if you are comfortable with a rented sander. Hire a flooring contractor for large open areas, where keeping a wet edge is difficult, for floors with deep damage or cupping, for homes with possible lead paint or asbestos materials, or when you want a two-component commercial-grade system applied with professional dust control.
Frequently Asked Questions
Does matte polyurethane protect as well as gloss?
Yes. The resin is the same, so abrasion and moisture resistance are comparable. The flatting agent only changes how light reflects off the surface.
How many coats of matte poly do floors need?
Most floors need a sealer plus two or three top coats. Many installers build the lower coats in gloss for clarity and apply matte only as the final coat.
Will a matte floor finish yellow over time?
Waterborne matte finishes stay clear and resist yellowing. Oil-based versions develop an amber tone that deepens with age.
Can you put matte poly over an existing satin finish?
Yes, after cleaning, removing any polish residue and abrading the old finish with a fine screen. Test a small area first to confirm good adhesion.
Why does my matte floor look shiny in some spots?
Uneven stirring, lap marks or burnishing from traffic can raise the sheen in spots. A light screen and a fresh, well-stirred top coat usually fixes it.
Prefer to explore on your own?
See how new flooring looks in your actual room in seconds — free, no signup.
Try the free Floor Studio →