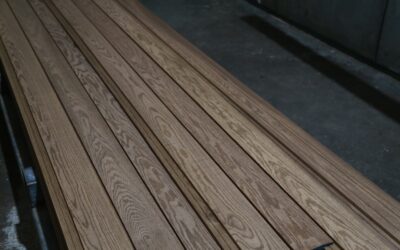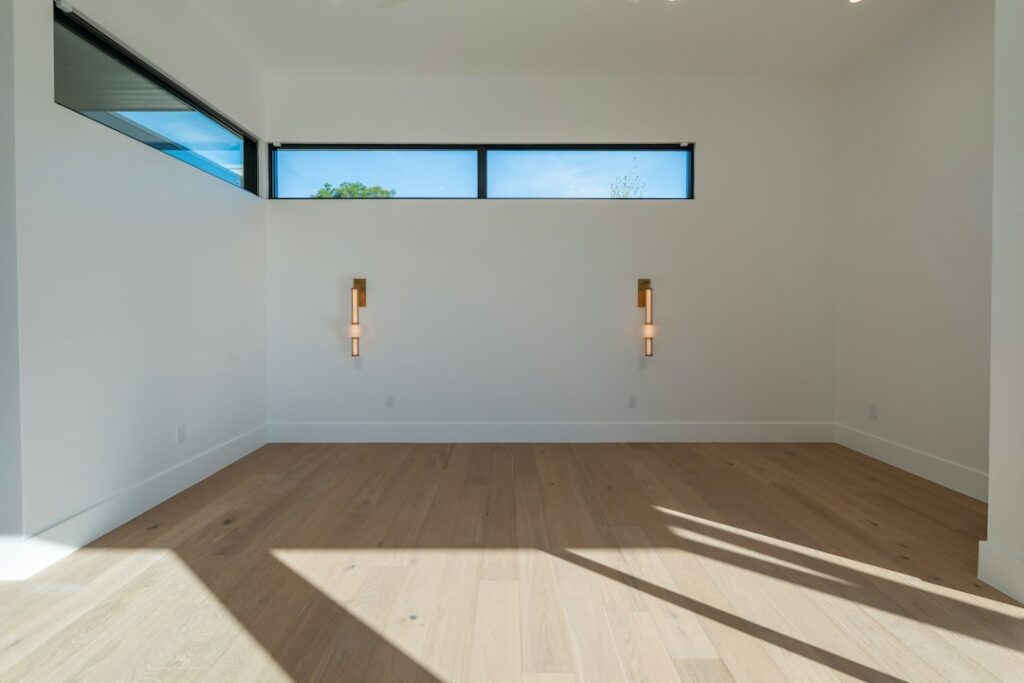
Refinishers have used oil-based polyurethane for floors for decades because it builds a thick, warm, forgiving finish with very little fuss. It gives wood a rich amber glow, levels out brush marks well, and holds up to years of family traffic. The tradeoffs are real, though: strong fumes, long dry times between coats, and a color that keeps deepening toward yellow over the years. If you love a classic honey tone on oak and can clear the house for a few days, it is still one of the best finishes you can choose.
Most products sold for this job are technically oil-modified urethanes: alkyd resins built with urethane links and thinned with mineral spirits. You will see them labeled as floor finishes, often in gloss, semi-gloss and satin.
- What Oil-Based Polyurethane for Floors Looks Like
- Durability: How It Compares
- How Many Coats and How Long Between Them
- Tools and Materials
- Step-by-Step Application
- Ventilation, VOCs and Fire Safety
- Yellowing Over Time
- When to Choose Oil Over Water-Based
- Troubleshooting Common Issues
- Cost Considerations
- When to Call a Pro
- Frequently Asked Questions
What Oil-Based Polyurethane for Floors Looks Like
The first thing you notice is color. An oil based polyurethane wood finish carries an amber tint right out of the can, and it wets the grain deeply. Red oak turns golden, white oak goes warm tan, and pine moves toward orange. Maple and birch pick up a creamy yellow that some people love and others find dated. Over 5 to 10 years, the film keeps ambering, especially in rooms with strong sunlight.
If you want a pale, natural or gray-toned floor, this finish will fight you. Water-based polyurethane stays clear and lets those cool tones read true. If you are matching an older floor that was finished with oil poly decades ago, an oil product will blend far better than a water-based one.
Sheen also reads differently. Satin oil poly tends to look a touch glossier than satin water-based finish because the film is thicker and more amber. Ask for a sample board, or test on a closet floor, before you commit.
Durability: How It Compares
A properly applied oil finish builds roughly two to three times the film thickness per coat compared with many water-based products. That thicker film fills grain, hides minor imperfections and gives good resistance to scuffs and spills. Three coats of oil poly usually equal or beat four coats of a mid-range water-based finish in total film build.
Abrasion resistance varies more by product quality than by chemistry. Premium two-part water-based finishes can outwear oil poly in commercial settings. For a typical home, though, a quality oil-modified finish is plenty tough for kitchens, halls and living rooms. It is also softer and more flexible than many water-based films, which means small dents tend to look less chalky and scratches blend in more easily.
When people ask about the best polyurethane for wood floors, the honest answer depends on look and lifestyle. Choose oil for warmth, easy application and lower cost. Choose water-based for clarity, low odor and fast return to service.
How Many Coats and How Long Between Them
For bare, sanded wood, plan on three coats total: a first coat (sometimes a sealer or thinned coat) and two topcoats. High-traffic floors or soft woods may justify a fourth coat. For a screen-and-recoat on an existing oil finish, one coat is usually enough.
- Recoat window: generally 8 to 12 hours at about 70°F and moderate humidity; some products want 24 hours
- Light foot traffic (socks): about 24 hours after the final coat
- Furniture back: about 3 to 4 days, with felt pads
- Area rugs: wait 2 to 3 weeks
- Full cure: roughly 30 days
Cold, humid or poorly ventilated rooms stretch all of these. Below about 60°F the finish may stay soft and tacky much longer. If the surface still feels tacky or gummy, wait; recoating too soon traps solvent and causes wrinkling or a soft, easily marked film.
Tools and Materials
- Oil-based floor polyurethane (one gallon typically covers about 500 sq ft per coat)
- Lambswool applicator on a pole or a high-quality natural-bristle brush for edges
- Paint tray or a clean bucket for pouring
- Pole sander or buffer with 220-grit screen for between coats
- Shop vacuum with brush attachment and tack cloths dampened with mineral spirits
- Organic vapor respirator, nitrile gloves and safety glasses
- Box fans for exhaust ventilation and painter’s tape
- Metal can with a lid for oily rags
Step-by-Step Application
- Prep the floor. Sand to bare wood through your grit sequence (often 36 or 40, then 60, then 80 or 100). Vacuum thoroughly, including walls, window sills and vents.
- Tack the surface. Wipe with a cloth lightly dampened with mineral spirits and let it flash off.
- Cut in the edges. Brush a band 4 to 6 inches wide along the walls in one section at a time.
- Apply the first coat. Pour a bead and pull it with the lambswool applicator along the grain, keeping a wet edge. Work toward an exit so you never step back into wet finish.
- Let it dry. Give it the full recoat time on the label, usually overnight.
- Screen between coats. Lightly abrade with a 220-grit screen to knock down raised grain and dust nibs. Vacuum and tack again.
- Apply the second and third coats. Repeat, screening between them but not after the last coat.
- Protect during cure. Keep traffic light, skip rugs, and avoid wet mopping for at least a month.
A tip from the field: thin, even coats always beat thick ones when you brush or pad on oil-based polyurethane for floors. Puddles stay soft for days, wrinkle, and trap bubbles.
Ventilation, VOCs and Fire Safety
Oil-based floor finishes release a lot of solvent vapor, and the VOC content is far higher than water-based products. Plan for the household, including pets, to stay elsewhere during application and for at least a day or two after. Set a box fan in a window blowing out and open another window across the house to pull fresh air through. Wear an organic vapor respirator, gloves and eye protection while you work. Some states and air districts restrict high-VOC finishes, so check what is sold locally.
The vapors are flammable. Turn off pilot lights on gas water heaters, furnaces and ranges, and shut down anything that sparks or glows, including space heaters and fans that are not rated for the job. Do not smoke nearby. Never mix finishes, strippers or cleaners. The biggest hidden danger is the rags: cloths and applicator pads soaked in oil-based finish can heat up on their own as they dry and burst into flame. Lay them flat outside to dry fully, or store them submerged in water in a sealed metal container, then dispose of them according to local rules. Never leave a pile of used rags in a trash bag or a corner of the garage.
Yellowing Over Time
Ambering is a feature on red oak and a problem on light floors. The film darkens most where sun hits it, so patches under rugs can show a lighter shape when the rug moves. Rotating rugs and furniture now and then, plus UV-filtering window film or shades, slows the effect. If you sand back to bare wood later, the color resets, but you cannot “bleach out” yellowing in the finish itself without removing it.
When to Choose Oil Over Water-Based
Oil-based polyurethane for floors still makes sense in plenty of homes. It tends to be the right call when:
- You want a warm, traditional amber color, especially on red oak or heart pine.
- You are blending into an existing oil-finished floor.
- You are a DIYer who values long open time and forgiving leveling.
- Budget matters and you can wait several days before moving back in.
Choose water-based instead if you want a natural, gray or white look, need the room back within a day, or have household members who are sensitive to odors. Water-based also suits maple and other light species that look orange under oil.
Troubleshooting Common Issues
Bubbles
Usually caused by shaking the can, overworking the applicator, or applying in hot, dry conditions. Stir gently and pull the finish in long strokes.
Dust Nibs
Screen them out between coats. For the final coat, turn off HVAC fans, vacuum again, and keep traffic out of the room.
Slow Drying or Tackiness
Low temperature, high humidity, or coats applied too thick. Raise heat to about 70°F, add ventilation and wait. Contamination from old wax can also prevent drying, which means sanding back.
Poor Adhesion on a Recoat
If the existing finish has wax, polish or silicone products on it, the new coat may peel. Use a proper cleaning and abrasion step, and test a small area first.
Cost Considerations
Oil-based floor poly is usually less expensive per gallon than premium water-based finishes, and because each coat builds more film, you need fewer coats. A typical 300 sq ft room might need two to three gallons for three coats. Professional sanding and finishing generally runs a few dollars per sq ft, with oil finishes often at the lower end of a contractor’s range and two-part water-based systems at the higher end. Screen-and-recoat jobs cost much less than full sanding.
When to Call a Pro
Hire a flooring contractor for large open areas, deep sanding with a drum sander, cupped or water-damaged boards, or any floor with a thin wear layer such as engineered wood. Pros also have dust containment and the experience to keep a wet edge across big rooms. If you suspect old flooring adhesive or finish in a pre-1980s home may contain hazardous materials, have it tested before sanding.
Frequently Asked Questions
How long does oil-based polyurethane take to dry on floors?
Most coats are ready to recoat in 8 to 12 hours, allow sock traffic in about 24 hours, and reach full cure in about 30 days.
How many coats of oil-based poly should a hardwood floor get?
Three coats on bare wood is standard. Busy kitchens and soft woods may benefit from a fourth coat.
Can I put water-based poly over oil-based poly?
Yes, once the oil finish has fully cured and has been cleaned and abraded, and as long as the product label approves it. Test a small area first.
Does oil-based polyurethane turn yellow?
Yes. It starts amber and continues to deepen over years, especially in sunlit rooms.
Is it safe to sleep in the house after applying oil poly?
It is best to stay elsewhere for at least one to two nights and keep the space well ventilated until the odor fades.
Prefer to explore on your own?
See how new flooring looks in your actual room in seconds — free, no signup.
Try the free Floor Studio →