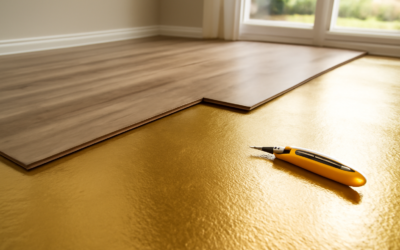
Choosing the best water-based polyurethane for floor refinishing usually comes down to balancing dry time, durability, and how much amber tint you’re willing to accept — because unlike oil-based finishes, water-based formulas dry crystal clear and stay that way, which is exactly why so many homeowners and flooring contractors have switched over the last decade. The trade-off is that water-based finishes typically cost more per gallon and, depending on the product, may need an extra coat to match the film build of a traditional oil-based polyurethane.
- Why Water-Based Polyurethane Has Become the Default Choice
- What Separates a Premium Product From a Budget One
- Sheen Options and How They Perform
- How Many Coats You Actually Need
- Dry Time, Recoat Windows, and Full Cure
- Coverage Rates and What a Project Actually Costs
- Application Tips That Improve the Result
This guide breaks down what actually separates a premium water-based finish from a budget one, how sheens and coat counts affect the final look, realistic dry and cure timelines, coverage you should plan for, and where the money goes when you compare products side by side. None of the guidance here is brand-specific pricing — Ahrefs data and manufacturer spec sheets both show price ranges shift constantly by region and retailer, so treat the numbers as planning ranges, not quotes.
Why Water-Based Polyurethane Has Become the Default Choice
Oil-based polyurethane was the standard for generations because it was cheap, forgiving to apply, and built a thick, durable film. It also ambered noticeably over time, took 8 to 24 hours between coats, and off-gassed strong solvent fumes that could linger in a house for days. Water-based polyurethane solves most of those problems: it dries to a clear, non-yellowing finish, recoats in as little as 2 to 4 hours, and has a much lower odor profile, which matters enormously if you are refinishing floors in an occupied home.
The durability gap that used to favor oil-based finishes has largely closed. Modern water-based formulas use urethane and acrylic resin blends that, in independent abrasion testing, hold up comparably to oil-based finishes on foot traffic, though oil-based products still tend to edge out water-based ones slightly on raw impact resistance. For most residential floors, that difference is not noticeable in daily use, and the faster dry time means a room is back in service in one to two days instead of a full week.
The other reason water-based has taken over is color fidelity. If you have ever refinished a floor and wanted the wood’s natural, pale tone to stay pale — white oak, ash, or a gray-stained floor are the classic examples — an oil-based topcoat will amber it toward yellow within months. Water-based polyurethane keeps that cool, true-to-wood color indefinitely, which is why so many modern and Scandinavian-style interiors specifically call for it.
What Separates a Premium Product From a Budget One
The biggest practical difference between a $35-a-gallon home center polyurethane and a $70-plus professional-grade product is solids content — the percentage of actual resin left behind once the water evaporates. Budget formulas often run 20 to 25 percent solids, meaning you need more coats to build the same film thickness a premium 30-to-35-percent-solids product achieves in fewer passes. That directly affects both labor time and how many coats a gallon will actually cover.
Premium products also tend to include better cross-linking additives, which improve chemical resistance to things like rubbing alcohol, nail polish remover, and pet urine — a meaningful consideration if you have dogs or kids. Cheaper formulas can show water spotting or white haze under prolonged moisture exposure, something you will notice near entryways or under a dog’s water bowl within the first year.
Application forgiveness is the other differentiator experienced refinishers pay for. Higher-end water-based polyurethanes have a longer “open time” before they start to tack up, which reduces lap marks and bubbling when you are coating a large room and can’t work infinitely fast with a T-bar applicator. Budget products can flash off within a couple of minutes in a warm, dry room, which is unforgiving for anyone without a lot of practice.
Sheen Options and How They Perform
Gloss finishes reflect the most light and show off wood grain dramatically, but they also show every scuff, dust particle, and footprint, which is why gloss has fallen out of favor for whole-room floors and is mostly reserved for accent pieces or stair treads where the reflective look is intentional. Semi-gloss splits the difference, offering more shine than satin while hiding a bit more daily wear than full gloss.
Satin has become the most popular residential sheen by a wide margin because it hides scratches, dust, and foot traffic far better than glossier options while still giving the wood a healthy, not-flat appearance. Most professional refinishers now default to satin unless a client specifically asks for something shinier.
Matte finishes have grown in popularity for a more natural, “raw wood” aesthetic, particularly in wide-plank and rustic-style floors. Matte hides wear exceptionally well but can look slightly cloudy or flat in rooms with a lot of natural light if applied too heavily, so most manufacturers recommend keeping the final coat at a moderate build rather than piling on extra layers chasing a deeper matte look.
How Many Coats You Actually Need
For a typical residential refinish, three coats of water-based polyurethane is the standard recommendation, and it is not a place to cut corners. Two coats will look fine on the day you finish, but the thinner film wears through to bare wood in high-traffic areas — hallways, in front of the kitchen sink, at the base of stairs — much faster, often within two to three years instead of the seven-plus years a proper three-coat system delivers.
Commercial spaces or floors expecting heavy traffic sometimes go to four coats, particularly with lower-solids budget products where each individual coat builds less film. If you are using a premium, higher-solids finish, three coats usually matches the film thickness that four coats of a bargain product would achieve, which is part of why the pricier can per gallon isn’t necessarily the more expensive overall project once you count labor and material for the extra coat.
Between coats, a light screening or buffing with a fine abrasive pad knocks down any raised grain or dust nibs and gives the next coat something to mechanically key into. Skipping this step is one of the most common reasons a finish delaminates or peels within the first year, especially on the final coat where adhesion matters most.
Dry Time, Recoat Windows, and Full Cure
Water-based polyurethane typically feels dry to a light touch within 1 to 2 hours and is safe to recoat in 2 to 4 hours under normal indoor conditions — roughly 70 degrees and moderate humidity. Cold rooms or high humidity can stretch that recoat window to 6 hours or more, so it pays to check the room’s actual temperature rather than assuming the label’s ideal conditions apply.
Foot traffic in socks is usually fine within 24 hours of the final coat, and furniture can typically go back in the room after 3 to 5 days. Full chemical cure — the point at which the finish reaches its maximum hardness and chemical resistance — takes considerably longer, commonly 14 to 30 days depending on the product. This is why manufacturers recommend holding off on area rugs and rubber-backed mats for at least two weeks; trapping moisture and solvents against a still-curing finish is a common cause of cloudy patches.
Ventilation speeds the process meaningfully. Running a fan or dehumidifier in the room for the first 48 hours, without blowing directly on the wet finish, helps water evaporate evenly and reduces the risk of a soft or tacky finish lingering longer than expected.
Coverage Rates and What a Project Actually Costs
Most water-based polyurethanes cover 500 to 600 square feet per gallon per coat on a properly sanded floor, though tighter-grained woods like maple can push coverage slightly higher while open-grained woods like oak absorb a bit more of the first coat. For a typical 1,000-square-foot floor at three coats, plan on roughly 5 to 6 gallons total, accounting for the first coat sealing into open grain more heavily than subsequent coats.
Material cost for that same 1,000-square-foot job typically runs $250 to $500 depending on whether you choose a budget or premium product, plus applicators, edgers, and screening pads that add another $40 to $80 if you’re not already equipped. Hiring a professional to sand and finish a floor of that size typically runs $3 to $8 per square foot depending on region and condition, which usually includes the material cost bundled into the labor quote.
If you are refinishing yourself to save money, budget extra time rather than cutting coats — the labor is genuinely the larger cost in a professional quote, so a careful DIY three-coat job done over a long weekend can save several thousand dollars on an average-sized home, provided the sanding and prep work underneath the finish is done correctly.
Application Tips That Improve the Result
Strain the polyurethane through a paint strainer before each coat, even from a brand-new can, to catch any skin or debris that can leave a permanent bump under the finish. Work with the grain in long, overlapping strokes using a lambswool or microfiber T-bar applicator, and maintain a wet edge so you are never re-coating a spot that has already started to tack up.
Room temperature and humidity matter more with water-based products than with oil-based ones. Applying below 60 degrees or above 80 percent humidity can cause the finish to dry unevenly, trap moisture, or take dramatically longer to cure, so most manufacturers recommend conditioning the room to a stable 65-to-75-degree range for at least 24 hours before starting.
Finally, resist the temptation to over-brush a coat that is starting to set. Water-based finishes tack up faster than oil-based ones, and going back over a partially dried section to “fix” a spot usually pulls the finish and leaves a worse mark than whatever imperfection prompted the touch-up in the first place. Let each coat dry fully, screen it lightly, and let the next coat do the correcting.
Prefer to explore on your own?
See how new flooring looks in your actual room in seconds — free, no signup.
Try the free Floor Studio →