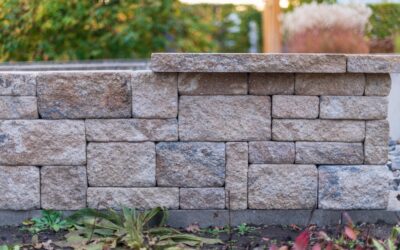
A leaning, cracked retaining wall almost always traces back to two things the builder skipped: a proper compacted base and drainage behind the block. A modular block retaining wall built the right way, by contrast, can hold back tons of soil for 40 years without moving. These interlocking concrete units, sold under names like Versa-Lok, Allan Block, and Pavestone, need no mortar and rely on their own weight plus clever engineering to stay put. This guide covers everything a homeowner needs to plan a durable modular block retaining wall, from base prep to when you legally must call an engineer.
- How Modular Blocks Actually Hold Back Soil
- Know the Height Rules Before You Dig
- Materials and Tools You'll Need
- Step-by-Step Construction
- Drainage: The Difference Between 5 Years and 50
- Understanding Geogrid Reinforcement
- Compaction: The Step Everyone Rushes
- What It Costs
- Choosing the Right Block
- Building Curves, Corners, and Steps
- Mistakes That Sink a Wall
How Modular Blocks Actually Hold Back Soil
Each block weighs 20 to 80 pounds and interlocks with the course below using a molded lip, a pin, or a setback ledge. Stacked with a slight backward lean called batter, the wall’s mass and the friction between courses resist the constant push of soil and water behind it. For low walls, that gravity system alone is enough.
Taller walls add geogrid, a plastic mesh that extends horizontally back into the retained soil at set intervals. The soil weight sitting on the grid anchors the wall face, turning the whole hillside into a reinforced mass. This is why a 3-foot wall and a 6-foot wall are fundamentally different projects, not just taller versions of the same thing.
Know the Height Rules Before You Dig
Most jurisdictions let homeowners build a wall up to 4 feet tall, measured from the bottom of the buried base block to the top, without an engineered plan or permit. Above that threshold you almost always need a permit and a stamped design from a licensed engineer. Never assume; call your building department first.
- Under 4 feet: usually DIY-friendly, no permit in many areas.
- Over 4 feet: permit and engineered drawings required in most codes.
- Surcharge loads: if a driveway, pool, or slope sits above the wall, engineering may be required even under 4 feet.
Materials and Tools You’ll Need
Gather everything before day one, because a wall build stalls fast if you run out of base rock halfway through. For a typical 20-foot-long, 3-foot-tall wall, plan on the following.
- Modular blocks: roughly 180 to 220 units depending on block size.
- Capstones: to finish the top course.
- Crushed stone base: 3/4-inch minus, about 3 to 4 tons.
- Drainage gravel: clean 3/4-inch stone for behind the wall, 2 to 3 tons.
- Perforated drain pipe: 4-inch corrugated with sock, plus landscape fabric.
- Tools: plate compactor (rentable at $60 to $90 per day), torpedo level, rubber mallet, and a masonry saw or splitter for cuts.
Step-by-Step Construction
The base course determines everything. Spend half your total time here and the rest goes smoothly.
- Excavate the trench. Dig 6 inches below grade plus enough to bury the entire first course. For a 3-foot wall, a trench roughly 24 inches wide gives room for drainage stone.
- Build the base. Add 6 inches of crushed stone, then compact in 2-to-3-inch lifts with the plate compactor until rock-hard.
- Set the first course. Level each block front-to-back and side-to-side. This course must be dead level; every error here multiplies as you go up.
- Backfill and drain. Lay the perforated pipe behind the base course, sloped to daylight, and cover it with clean drainage gravel wrapped in fabric.
- Stack and stagger. Offset the vertical seams like brickwork, sweep debris off each course, and check level often.
- Add geogrid if needed. For walls over 3 to 4 feet, roll grid between courses at the intervals your block manufacturer specifies.
- Cap it. Secure capstones with concrete adhesive and finish grading so surface water sheds away from the wall.
Drainage: The Difference Between 5 Years and 50
Water is the enemy of every retaining wall. Saturated soil weighs far more than dry soil and exerts hydrostatic pressure the wall was never designed to hold. That is why the drainage layer behind the block is non-negotiable.
Run a minimum 12-inch-wide column of clean gravel up the back of the wall, place the perforated drain pipe at the base sloped at least a quarter inch per foot to a daylight outlet, and wrap everything in landscape fabric so silt cannot clog the stone. Skipping this step is the single most common reason walls bulge and fail, and it is the hardest to fix after the fact.
Understanding Geogrid Reinforcement
For walls taller than about 3 to 4 feet, or any wall with a load above it, gravity alone is not enough and geogrid becomes essential. Geogrid is a high-strength plastic mesh that rolls out horizontally from between two courses of block back into the retained soil, typically 4 to 6 feet deep depending on wall height.
The way it works is elegant: the weight of the soil sitting on top of the grid anchors it firmly, and because the grid is mechanically locked into the block face, the entire mass of reinforced soil now resists the wall from tipping or sliding. Your block manufacturer’s specifications dictate the grid strength, the vertical spacing between grid layers, and how far back each layer must extend. Following those numbers exactly is critical, which is precisely why walls in this range require an engineered design in most jurisdictions. Never guess at geogrid placement on a tall wall; the consequences of getting it wrong are a sudden, dangerous failure.
Compaction: The Step Everyone Rushes
If there is one place amateurs cut corners, it is compaction, and it is the place that punishes them most. Both the base gravel and the backfill behind the wall must be compacted in thin lifts, meaning 2 to 3 inches at a time, not dumped in one deep pour and tamped from the top.
A plate compactor makes several passes over each lift until the material stops moving underfoot. Skipping lifts or under-compacting leaves voids that settle later, and settlement behind a retaining wall pulls the block backward and downward, opening cracks and gaps you cannot fix without tearing the wall apart. Rent the compactor, work in shallow lifts, and give this unglamorous step the patience it deserves.
What It Costs
Pricing swings with block choice and whether you DIY. Standard concrete modular blocks run $2 to $6 each, while premium tumbled or large-format units cost more.
- DIY materials: roughly $15 to $30 per face square foot.
- Professional installation: $30 to $60 per face square foot installed.
- A 20-by-3-foot wall (60 face sq ft): around $900 to $1,800 DIY, or $1,800 to $3,600 installed.
Choosing the Right Block
Not all modular blocks are the same, and the style you pick affects both cost and how the finished wall looks. Manufacturers offer several connection methods and face textures.
- Lip or hook systems (like Pavestone’s Retaining Wall block) rely on a molded rear lip that catches the course below, automatically setting the setback. Fast and beginner-friendly.
- Pin systems (like Versa-Lok) use fiberglass or nylon pins for a stronger mechanical connection and adjustable setback, favored on taller or engineered walls.
- Face texture ranges from smooth split-face to tumbled, weathered looks. Tumbled blocks cost more but read as natural stone.
For a low garden wall, an inexpensive lip-style block is perfectly adequate. Step up to a pin system or a large-format unit when the wall is taller, longer, or a prominent feature of the yard.
Building Curves, Corners, and Steps
One of the quiet advantages of modular block is how easily it handles shapes that would be a nightmare in poured concrete. Gentle curves come naturally because the blocks are slightly trapezoidal or can be set with small gaps at the back that fan the wall around a radius. Tighter curves may require splitting the occasional block to close the gap.
For corners, most systems sell dedicated corner units with two finished faces, or you can alternate the direction of standard blocks to lock the corner together like woven fingers. When your yard slopes along the wall’s length, step the base course up in increments, keeping each section level and burying the step so the transition disappears below grade. Planning these details before you order lets you buy the right corner and cap pieces up front instead of mid-project.
Mistakes That Sink a Wall
Avoid the errors that turn a weekend project into a rebuild. The most damaging are a poorly compacted base, backfilling with the same clay soil you excavated instead of gravel, and forgetting the batter that leans the wall into the hill. Also resist the urge to build past 4 feet without engineering; a failing tall wall is a genuine safety hazard, not just an eyesore.
Do the base right, keep water moving away from the block, respect the height limits, and your modular block retaining wall will still be holding firm long after the rest of the yard has been redone twice.