
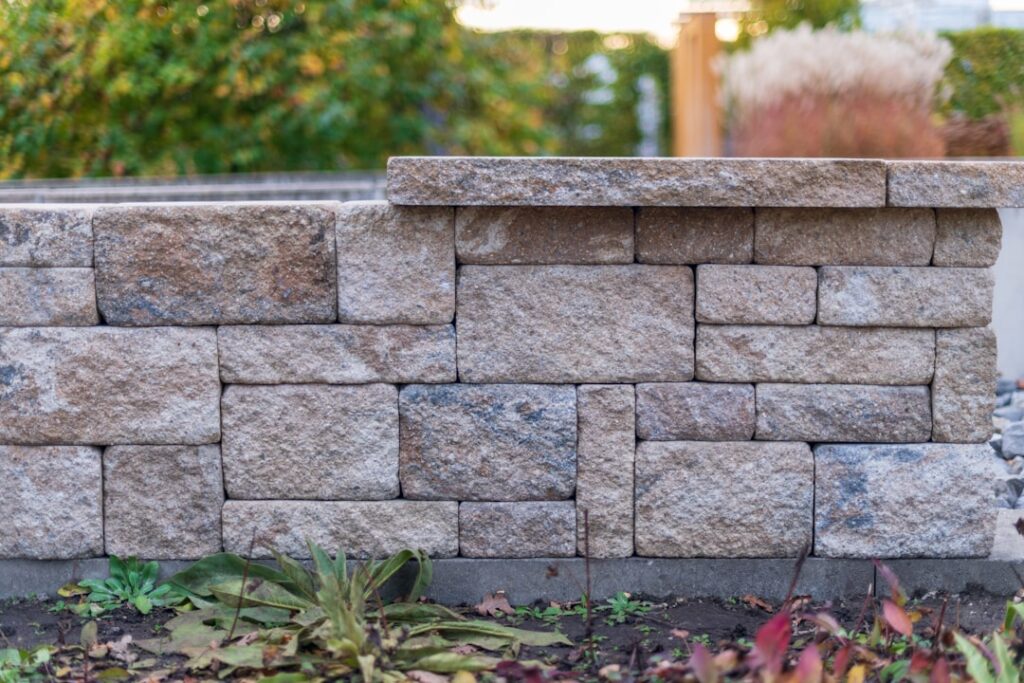
Walk any home improvement store’s outdoor aisle and you will find a dozen kinds of landscape retaining wall blocks, from small pin-connected garden units to hefty engineered blocks that hold back a hillside. Choosing the right one is not about looks alone; it is about matching the block to the height and job of your wall, because the block that builds a pretty 18-inch garden border will fail badly if you try to hold back a 5-foot slope with it. Get the selection right and installation becomes straightforward and the wall lasts for decades. Here is how to sort through the options and pick the block that fits your project.
- How Retaining Wall Blocks Work
- Main Types of Landscape Blocks
- Match the Block to the Wall Height
- Size, Weight, and Handling
- The Base and Drainage Still Rule Everything
- Installing Block: The Basic Steps
- What Blocks Cost
- Choosing a Style and Color
- Blocks for Curves and Raised Beds
- Reinforcing With Geogrid
- Final Thoughts
How Retaining Wall Blocks Work
Most modern landscape blocks are dry-stacked, meaning they interlock and rely on their weight and geometry rather than mortar to hold soil in place. Many have a built-in lip on the back, or use pins or clips, that automatically sets each course slightly behind the one below, creating the backward lean, called batter, that gives the wall its strength against the soil pushing outward.
This design is what makes block walls so DIY-friendly for smaller projects: you are essentially stacking heavy, self-aligning pieces on a solid gravel base. The trick is choosing a block rated for your wall’s height and doing the base and drainage right, which we will get to.
Main Types of Landscape Blocks
Blocks fall into a few broad categories, and knowing them narrows your choice fast.
- Lightweight garden blocks: Small, often lipped or pinless units around 4 inches tall, made for low decorative walls, raised beds, and garden borders under 2 feet. Easy to handle one-handed and inexpensive.
- Interlocking segmental blocks: Medium units, roughly 6 to 8 inches tall, with a rear lip or pin system that sets the batter automatically. The workhorse for walls up to about 3 to 4 feet, from brands like Allan Block and Versa-Lok.
- Large engineered blocks: Big, heavy units for taller walls, often used with geogrid reinforcement and engineered designs above 4 feet.
- Natural stone and dry-stack stone: Irregular or cut stone for a rustic, high-end look, more labor-intensive and pricier to install.
Match the category to your wall height first, then choose the style and color within it. A garden block is perfect for a flower bed edge and hopeless for a hillside; a large engineered block is overkill for a border and essential for a tall slope.
Match the Block to the Wall Height
Height is the single most important factor, because it determines both the block you need and whether you need a permit and an engineer.
- Under 2 feet: Lightweight garden or small interlocking blocks handle decorative borders and raised beds easily, and this is squarely DIY territory.
- 2 to 4 feet: Interlocking segmental blocks with a good gravel base and drainage. Still DIY-friendly for a careful homeowner, but base prep and drainage become critical.
- Over 4 feet: Most codes require a permit and an engineered design, usually with geogrid soil reinforcement laid between courses. This is professional territory.
Never try to build a tall wall out of small garden blocks by simply stacking more courses. The block must be rated for the load, and above 4 feet the wall needs buried reinforcement that only larger engineered systems and proper engineering provide. Check your local code for the exact height that triggers a permit, often 3 or 4 feet.
Size, Weight, and Handling
Block dimensions affect both the look and the labor. Larger blocks cover more wall per piece, so a wall goes up faster with fewer units, but each block can weigh 20 to 80 pounds, which is real work to move and set. Smaller blocks are easier on your back but mean more pieces and more time.
Consider how you will get the pallets to the wall site, too. A pallet of blocks can weigh a ton or more, literally, and you will be moving them by hand from wherever the delivery drops them. Factor delivery placement, a wheelbarrow or hand truck, and a helper into your plan, especially for the heavier engineered blocks.
The Base and Drainage Still Rule Everything
No matter which block you choose, the wall’s survival depends on two things beneath and behind it: a compacted base and proper drainage. Skip either and even the best block will fail.
The base is a leveled, compacted layer of 4 to 6 inches of crushed stone that the first course sits on, and that first course must be dead level in every direction, since every course above inherits its errors. Drainage means a zone of clean crushed gravel behind the blocks and a perforated drain pipe at the base that carries water away, so saturated soil never builds up the pressure that shoves walls over. Landscape fabric between the gravel and native soil keeps silt from clogging the drainage over time.
These fundamentals are identical across every block type, and they matter more than the block you pick. A cheap block on a great base and drainage outlasts a premium block on bad prep.
Installing Block: The Basic Steps
For a wall within DIY range, the sequence is consistent regardless of block type.
- Call 811 to mark underground utilities before digging.
- Excavate a level trench and compact 4 to 6 inches of crushed stone as the base.
- Set the first course dead level, checking each block front-to-back and side-to-side.
- Backfill behind with drainage gravel and lay the perforated drain pipe sloped to daylight.
- Stack the following courses, staggering the joints and letting the block’s lip or pins set the batter.
- Add geogrid layers if the design calls for them, and continue backfilling with gravel as you go.
- Cap the top course with capstones secured by construction adhesive.
Stagger the vertical seams like brickwork so no joint runs straight up two courses, which locks the wall together and prevents cracks from climbing.
What Blocks Cost
Prices vary widely by type. Small garden blocks run $1.50 to $4 each, medium interlocking segmental blocks $2.50 to $6 each, and large engineered blocks more. By the wall, expect $10 to $25 per square face foot in materials for a DIY project and $20 to $50 per square foot installed by a pro. Do not forget the base stone, drainage gravel, pipe, fabric, and caps, which add up quickly and are easy to underestimate. For a 30-foot, 3-foot-tall wall, a DIY material bill often lands between $900 and $2,000.
Choosing a Style and Color
Once you have the right block category for your height, style is the fun part. Blocks come in tumbled and smooth textures and a range of earth-tone color blends, and many lines offer a straight face for a formal look or a rougher split face for a natural stone appearance. Pick a color that complements your home’s siding and hardscape, and buy a little extra from the same production batch so future repairs match, since colors can shift between runs.
Blocks for Curves and Raised Beds
One reason landscape blocks beat poured walls for garden projects is how easily they curve. Most small and medium blocks are tapered slightly at the back so you can fan them into gentle arcs simply by adjusting the spacing, letting you build serpentine borders and rounded raised beds with no cutting. For a raised planting bed, you can build a freestanding ring of blocks two or three courses high without the heavy drainage requirements of a true retaining wall, since a bed holds only its own loose soil rather than a hillside.
When a design does call for cutting blocks, to close a curve or fit a corner, a masonry blade on a circular saw or an angle grinder splits them cleanly, though a block splitter or a chisel and hammer also works for a rougher edge. Wear eye and lung protection when cutting concrete, since the dust is hazardous.
Reinforcing With Geogrid
For walls in the taller DIY range and above, geogrid reinforcement is what turns a stack of blocks into a structure that can hold a real slope. Geogrid is a strong synthetic mesh laid horizontally between courses at intervals specified by the engineer, extending back into the retained soil. As the soil settles and pushes, it presses down on the grid, and that weight anchors the wall, effectively tying a large mass of earth and block together so they resist the pressure as one unit. If your wall needs geogrid, follow the engineered spacing exactly, since the layers must land at specific courses and extend a specific distance back to work.
Final Thoughts
Choosing landscape retaining wall blocks starts with one question: how tall is the wall? Match the block category to that height, keep anything over 4 feet in the hands of an engineer and the permit office, and never substitute stacked garden blocks for a job that needs engineered units. Then put your real effort into the compacted base and the drainage, because those unglamorous steps decide whether the wall stands for decades or bulges after the first wet spring. Get the block choice and the prep right, and the stacking is the easy, satisfying part.


