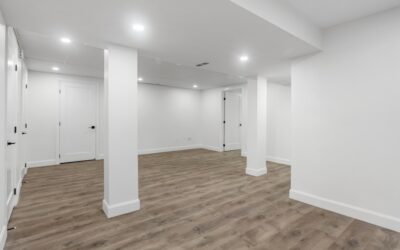
The most common mistake in basement finishing is stapling a sheet of plastic behind the drywall and calling it waterproofing. A moisture barrier for basement walls can protect your finished space, but the wrong one in the wrong place traps water vapor against wood studs, and the mold only shows up when you tear the wall apart years later. Concrete foundations are damp by nature. They wick moisture from the soil, and that moisture has to go somewhere.
Here is the short answer. For most basements across the US, the best approach is rigid foam insulation board glued or fastened directly to the concrete, with seams taped, followed by a stud wall and drywall with no plastic sheeting. Polyethylene sheeting against the concrete, or behind the drywall on the warm side, often causes more problems than it solves. The exception is a very cold climate where local code specifically calls for a vapor retarder, and even there, modern codes lean toward foam or “smart” retarders rather than plain poly.
- How to Choose a Moisture Barrier for Basement Walls
- Why Poly Behind Drywall Can Trap Moisture
- Climate Zone and Code Guidance
- Fix Moisture First
- Tools and Materials
- Step-by-Step: Installing Rigid Foam on Basement Walls
- Troubleshooting and Common Mistakes
- Cost Ranges
- When to Call a Pro
- Frequently Asked Questions
Below you will find how each option behaves, what climate zones change, a step-by-step installation, and what to fix before any basement wall vapor barrier goes up.
How to Choose a Moisture Barrier for Basement Walls
Think about which way moisture moves. In summer, warm humid indoor air hits the cool concrete and condenses. Year-round, the concrete itself releases moisture from the ground. A wall assembly works when it keeps warm, moist air away from cold surfaces and still lets the concrete dry in at least one direction.
Rigid foam board
Extruded polystyrene (XPS), expanded polystyrene (EPS), or foil-faced polyisocyanurate installed tight to the concrete is the approach building scientists recommend most often. The foam keeps the interior face of the assembly warm, so condensation does not form on the studs. One inch of XPS is roughly R-5, and it is semi-permeable, so it slows vapor without making a perfect trap. Foil-faced polyiso is a true vapor barrier, which works because it sits on the concrete side where it cannot trap interior moisture against wood.
Polyethylene sheeting
Six-mil poly is cheap and familiar, which is why it shows up in so many basements. The trouble is placement. Poly stapled against bare concrete collects condensation on its back face and keeps it pinned against the wall. Poly on the room side of fiberglass batts traps any moisture that gets into the stud cavity from the concrete. Either way, the wall cannot dry.
No separate barrier
Some assemblies skip sheeting entirely: closed-cell spray foam sprayed directly on the concrete, or rigid foam with taped seams, already acts as the vapor control layer. Adding poly on top creates a double barrier, which is exactly what you want to avoid.
Why Poly Behind Drywall Can Trap Moisture
Picture a finished basement in July. The air conditioner is running upstairs, but the basement is humid. Vapor moves through the drywall into the wall cavity, meets a cold sheet of plastic or concrete, and turns to liquid. With poly on both sides, that water has no escape route. Fiberglass holds it like a sponge, the bottom plate absorbs it, and mold grows in the dark.
The same thing happens in reverse during winter in older homes where interior poly was installed and the concrete behind it pushes moisture outward. Signs you already have this problem include a musty smell, baseboards that swell or stain, and drywall that feels soft at the bottom edge. If you find those, fix the moisture source before rebuilding.
Climate Zone and Code Guidance
The International Residential Code, which most US jurisdictions adopt in some form, assigns basement insulation requirements by climate zone. Warmer zones in the South need little or no basement wall insulation, while colder northern zones call for continuous insulation or a combination of foam and cavity insulation. Codes also address where vapor retarders go, and in colder zones they generally favor Class I or II retarders only in specific assemblies.
Because local amendments vary, check with your building department before you frame. Ask them three things: the required R-value for basement walls, whether a vapor retarder is required and which class, and whether exposed foam needs a thermal barrier such as drywall. Foam plastic insulation typically must be covered with 1/2-inch drywall or another approved thermal barrier in living spaces.
- Hot and humid regions: focus on dehumidification and avoid interior poly entirely.
- Mixed climates: rigid foam against concrete with an unfaced or kraft-faced cavity works well.
- Cold and very cold regions: thicker foam, often 2 inches or more, keeps the inner face warm enough to prevent condensation; follow local code on any added retarder.
Fix Moisture First
No basement moisture barrier will stop liquid water. Before you install any moisture barrier for basement walls, make sure gutters discharge several feet from the foundation, the soil slopes away from the house, and cracks are sealed. Tape a 2-foot square of plastic to the bare wall for 48 hours. Moisture under the plastic means the concrete is wicking from the soil; moisture on top means indoor humidity is condensing. Both tell you something useful.
Active leaks, efflorescence that keeps returning, or standing water after storms need drainage solutions such as exterior grading, an interior perimeter drain, or a sump system. A dehumidifier set to keep relative humidity between 40 and 50 percent helps every assembly perform better.
If you discover existing mold, correct the moisture source first. Small patches under about 10 square feet on hard surfaces can be cleaned with detergent and water while wearing an N95 respirator, gloves, and goggles. Anything larger, or mold inside wall cavities, should go to a professional remediation contractor.
Tools and Materials
- Rigid foam insulation board (XPS, EPS, or foil-faced polyiso), 1 to 2 inches thick depending on your zone
- Foam-compatible construction adhesive and masonry fasteners with washers
- Seam tape rated for your foam type, plus canned foam sealant for gaps
- Pressure-treated 2×4 bottom plates and standard studs
- Sill gasket or foam strip for under the bottom plate
- Utility knife with long blades, straightedge, and tape measure
- Hammer drill with masonry bit
- Unfaced mineral wool or fiberglass batts if adding cavity insulation
- Moisture-resistant drywall for the finish layer
Step-by-Step: Installing Rigid Foam on Basement Walls
- Clean and inspect the wall. Brush off loose efflorescence, dust, and old paint flakes. Seal cracks with hydraulic cement or polyurethane sealant.
- Cut the foam to height. Leave about 1/4 inch at the top and bottom. Score with a knife and snap, or use a fine saw for thicker boards.
- Adhere the boards. Apply foam-safe adhesive in vertical beads, press each board to the wall, and add a few masonry fasteners to hold it while the adhesive cures.
- Tape every seam. Continuous taped seams are what turn separate boards into a real vapor control layer. Fill gaps at the rim joist and floor with canned foam.
- Insulate the rim joist. Cut foam pieces to fit each bay and seal the edges with canned foam. The rim is often the leakiest part of the basement.
- Frame the stud wall. Set a pressure-treated bottom plate on a sill gasket so wood never touches bare concrete. Keep studs tight to the foam.
- Add cavity insulation if needed. Use unfaced batts so you do not create a second vapor barrier.
- Hang drywall without poly. Leave a 1/2-inch gap at the floor so the drywall does not wick any future water.
Troubleshooting and Common Mistakes
- Condensation behind foam: usually untaped seams or foam that is too thin for your climate. Add a second layer with staggered seams.
- Musty smell after finishing: check humidity with a hygrometer. Levels over 60 percent point to a dehumidifier or ventilation fix.
- Foam separating from the wall: the adhesive was not rated for foam, or the concrete was damp or dusty during installation.
- Double barriers: never add poly over foil-faced foam or closed-cell spray foam.
Cost Ranges
The cost of a moisture barrier for basement walls depends on wall area and foam type. Rigid foam board generally costs a modest amount per square foot, with foil-faced polyiso at the higher end and EPS at the lower end. For a typical 1,000-square-foot basement with around 900 square feet of exterior wall, DIY materials for foam, tape, and adhesive often land in the high hundreds to low thousands of dollars. Professional installation of foam plus framing adds labor that can double or triple that figure. Closed-cell spray foam applied by a contractor usually costs more per square foot than board foam but installs quickly and seals irregular surfaces well.
When to Call a Pro
A moisture barrier for basement walls is a manageable DIY project on a dry foundation. Bring in a foundation or waterproofing contractor if water enters through the wall or floor joint, if cracks are wider than about 1/4 inch or show movement, or if the basement floods seasonally. A remediation professional is the right call for mold covering more than 10 square feet. An insulation contractor makes sense if you prefer spray foam or need help meeting local energy code for a permitted finish.
Frequently Asked Questions
Should I put plastic on basement walls before drywall?
In most cases, no. Plastic sheeting behind drywall can trap moisture between the concrete and the stud wall. Taped rigid foam against the concrete provides vapor control and insulation without creating a double barrier.
What is the best basement wall vapor barrier?
For most homes, rigid foam insulation board with taped seams applied directly to the concrete works best. It keeps the wall warm, limits vapor movement, and does not trap moisture against wood framing.
Do basement walls need a vapor barrier by code?
It depends on your climate zone and local amendments. Many codes require insulation on basement walls in colder zones and specify where vapor retarders may go, so confirm with your building department before you frame.
Can I use fiberglass batts against a concrete basement wall?
Fiberglass placed directly against concrete tends to absorb condensation and grow mold. Install foam on the concrete first, then use unfaced batts in the stud cavity if you need more R-value.
Will a moisture barrier stop basement leaks?
No. Barriers control vapor, not liquid water. Leaks need grading, gutter, drainage, or crack repairs before any wall assembly goes up.