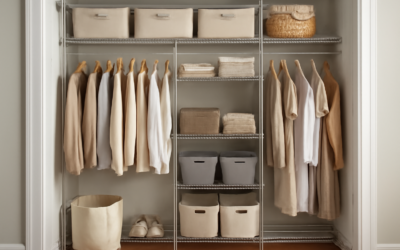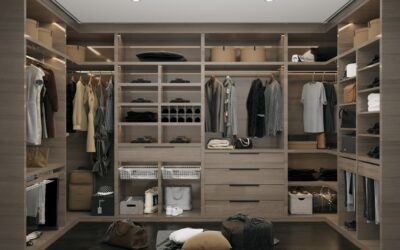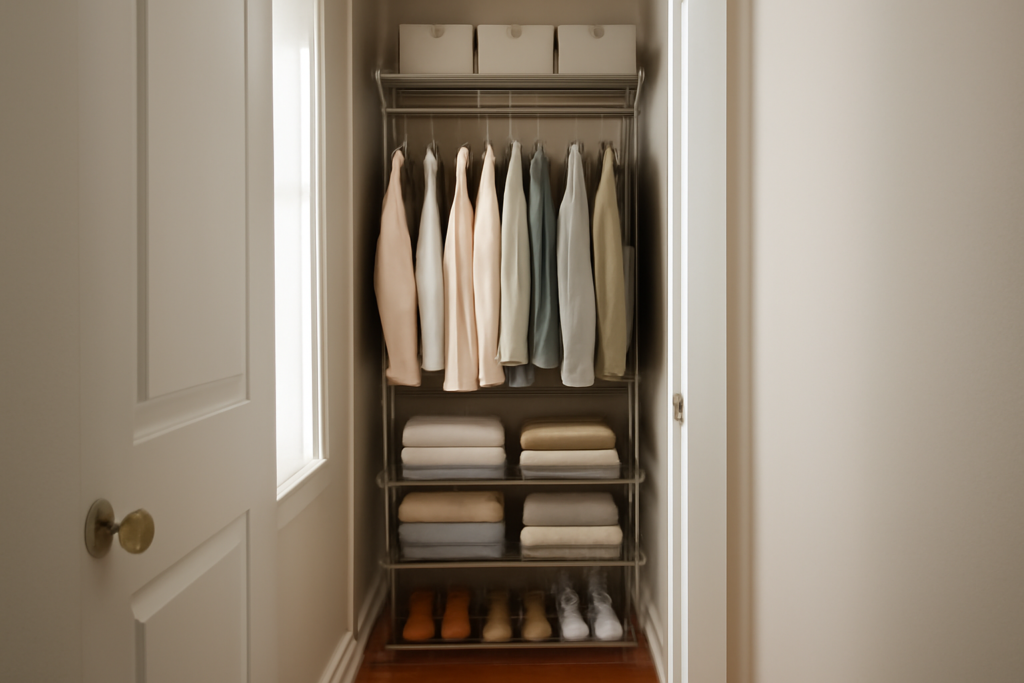
A closet just 24 to 48 inches wide can hold twice what it does now, and the fix rarely requires knocking out a wall. The right narrow closet organizer exploits the one dimension a cramped closet has in abundance, which is height, and turns dead vertical space into shelves, double-hang rods, and pull-out bins. I have reworked plenty of skinny hall and bedroom closets, and the same principles apply whether you buy a $60 kit or a custom system. This guide shows how to plan and choose a narrow closet organizer that actually fits, plus what each approach costs.
- Measuring Before You Buy a Narrow Closet Organizer
- Layout Strategies That Multiply Capacity
- Types of Narrow Closet Organizer Systems
- Space-Saving Accessories Worth the Money
- What a Narrow Closet Organizer Costs to Install
- Making the Most of Closet Depth
- Common Mistakes to Avoid
- Installation Tips for a Clean, Sturdy Result
- Lighting a Narrow Closet
Measuring Before You Buy a Narrow Closet Organizer
Every good closet project starts with a tape measure, not a shopping cart. Record the width wall to wall at the top, middle, and bottom, since older homes are rarely square. Note the depth from the back wall to the door opening, and the full height from floor to ceiling. Standard reach-in closets run 24 inches deep, and anything under 22 inches limits you to slim shelving and front-to-back hanging.
Mark the location of the door opening too, because a narrow closet often loses usable width to the door frame and the dead corners beside it. Those flanking zones are where shelves and shoe racks earn their keep. Photograph the space and sketch it with dimensions so you can lay out zones before committing to a system.
Layout Strategies That Multiply Capacity
The biggest gain in a narrow closet comes from double-hang rods. A single rod at 66 inches wastes three feet of air below your shirts. Split that section into two rods, one at about 40 inches and one at 80 inches, and you double your hanging capacity for shirts, folded pants, and jackets. Reserve one full-height section for dresses and coats.
- Double-hang zone: two rods stacked for short garments, roughly 40 inches and 80 inches off the floor
- Long-hang zone: a single high rod for dresses, robes, and coats
- Shelf tower: a vertical stack of shelves for folded items, bins, and shoes in one narrow bay
- Top shelf: a full-width shelf above the rods for seasonal and rarely used items
- Floor zone: pull-out baskets or a shoe rack, keeping the floor off-limits to clutter piles
The trick in a narrow closet is committing part of the width to a vertical shelf tower rather than hanging everything. Folded storage is denser than hanging, so a 12- to 16-inch-wide column of shelves holds a surprising amount without eating your rod space.
Types of Narrow Closet Organizer Systems
Systems range from cheap and simple to built-in and permanent. Wire shelving kits, like the classic ventilated systems from ClosetMaid, are the budget choice at $40 to $150 for a small closet. They install with wall anchors and clips, ventilate well, and go up in an afternoon, though they cannot hold heavy loads and folded clothes can slip through the wire.
Wood or laminate panel systems, whether the tower kits from Rubbermaid and Easy Track or a semi-custom melamine setup, cost $150 to $600 and give you solid shelves, drawers, and a finished look. Custom built-in systems from a closet company run $500 to $2,500 for a narrow reach-in, deliver the best fit and material quality, and can incorporate drawers, valet rods, and integrated lighting. For most narrow closets, a mid-range panel tower kit hits the sweet spot of cost, capacity, and looks.
Space-Saving Accessories Worth the Money
A few targeted add-ons do outsized work in a tight closet. Slim velvet hangers are the single best upgrade because they are about a third the thickness of plastic hangers, so you fit more garments per foot of rod and clothes stop sliding off. A pack of 50 costs $15 to $30 and instantly reclaims rod space.
Over-the-door organizers turn the back of the closet door into storage for shoes, accessories, or cleaning supplies. Stackable clear bins on the top shelf keep seasonal items visible and contained. Pull-out wire baskets mounted in the shelf tower give you drawer-like access without the cost of real drawers, and a small tension-mounted rod on a side wall adds a spot for belts or scarves. Skip anything that projects far into the closet, since depth is precious in a narrow space.
What a Narrow Closet Organizer Costs to Install
Total spend depends on the system and whether you do it yourself. A DIY wire kit runs $40 to $150 in materials plus a few hours of your time and a stud finder, drill, and level. A DIY laminate tower kit lands at $150 to $400 in materials. Add $150 to $400 in labor if you hire a handyman to install a kit for you.
Custom professional systems for a narrow reach-in typically fall between $500 and $2,500 installed, driven by material, drawer count, and finish. That is a wide range, but even the low end transforms daily usability. If budget is tight, start with a wire kit and slim hangers, then upgrade the shelf tower later; the modular nature of most systems lets you build up over time.
Making the Most of Closet Depth
Width gets all the attention in a narrow closet, but depth is where organizers quietly win or lose. A standard reach-in is about 24 inches deep, and a single rod mounted parallel to the back wall uses that depth well. In a closet shallower than 22 inches, standard hangers hit the door, so you either mount the rod front-to-back on a pull-out valet or switch to a shallower storage strategy built around shelves and hooks.
Use the back wall’s full depth by choosing 14- to 16-inch-deep shelves rather than the skimpy wire shelves that often come standard. On the door itself, an over-the-door rack reclaims two or three inches of otherwise dead space for shoes, belts, or small bins. And do not forget the sliver of wall beside the door opening inside the closet, which is perfect for a row of hooks or a slim shelf that holds items you grab daily. Every inch of depth you actually use is capacity you did not have to build outward to gain.
Common Mistakes to Avoid
The errors I see most often in narrow closets are predictable and easy to sidestep. The biggest is keeping a single long rod out of habit, which wastes three feet of vertical space that double-hanging would put to work. Another is piling shoes and bins on the floor, which turns the bottom of the closet into a black hole; a low shelf or a pull-out basket keeps that zone usable.
- Overstuffing the rod so clothes wrinkle and you cannot see what you own; slim hangers and a second rod fix this
- Ignoring the top shelf, which is prime real estate for seasonal storage in labeled bins
- Buying a system before measuring, then finding the tower is too deep for the door to close
- Using plastic drywall anchors on loaded rods instead of studs or toggle bolts, leading to a collapse
Plan the zones on paper first, commit part of the width to a shelf tower, and the same closet that felt hopeless will suddenly hold everything with room to spare.
Installation Tips for a Clean, Sturdy Result
Anchor everything into studs wherever possible, and where you cannot hit a stud, use toggle bolts rated for the load rather than plastic anchors, especially on the rods that carry your heaviest clothes. Use a 4-foot level for the top shelf and rods so garments do not slide to one end. Set double-hang rods far enough apart that the upper garments clear the lower rod, generally a minimum of 40 inches of clear space per zone.
Before you drill, dry-fit the layout with painter’s tape on the wall to visualize the zones and confirm nothing blocks the door swing. Leave at least 2 inches of clearance between the top shelf and the ceiling so you can slide bins in and out. A narrow closet done thoughtfully feels far larger than its footprint, and the difference between chaos and order often comes down to nothing more than a second rod and a column of shelves.
Lighting a Narrow Closet
A dim closet feels smaller and makes it harder to find what you own, so lighting is a small upgrade with a big payoff. Battery-powered LED puck lights or motion-activated strip lights stick to the underside of a shelf and switch on when you open the door, adding no wiring cost and taking minutes to install. A pack of motion-sensor LED bars runs $15 to $30 and transforms a dark reach-in.
If you want a permanent solution and have power nearby, a hardwired LED strip along the top of the closet washes the whole space in even light. Cool white in the 4000K to 5000K range renders clothing colors accurately, which helps you actually match an outfit rather than guessing in shadow. Good light also makes the closet feel larger and more organized, reinforcing all the work you put into the shelving and rods, and it costs a fraction of what any structural change would.