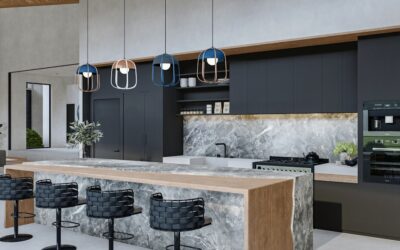
Open shelving can make a cramped galley feel twice as big, or turn into a dust-collecting display of mismatched mugs. A thoughtful open kitchen cabinet design walks that line by mixing openness with practicality, giving you the airy, custom look you see in magazines without sacrificing the storage a kitchen actually needs. Whether you’re planning a full remodel or just want to swap a few upper cabinets for shelves, the details decide whether the result feels curated or cluttered. Here’s how to plan it right.
Part of our Kitchen Remodeling guide — explore the full guide →
Why Homeowners Choose Open Cabinets
Open storage has surged in popularity for solid reasons. Removing bulky upper cabinet boxes opens up sight lines and makes walls breathe, which is a huge win in small kitchens. Everyday dishes and glasses sit within easy reach, so you’re not opening doors a hundred times a day. And open shelves are dramatically cheaper than full cabinetry, often a fraction of the cost, making them a budget-friendly way to refresh a kitchen.
There’s a design payoff too. Open shelving showcases attractive dishware, cookbooks, and plants, adding personality that closed doors hide. For many homeowners, that display quality is the whole appeal.
Where Open Cabinets Work Best
Open design isn’t all-or-nothing, and the smartest kitchens use it selectively. Consider these placements:
- Flanking a range or sink — a pair of open shelves frames a focal point and holds daily-use items.
- On a short accent wall — where full cabinets would feel heavy, shelves keep things light.
- Above a coffee or bar station — perfect for mugs, glasses, and a curated display.
- In a breakfast nook or peninsula — open shelving keeps the space feeling connected.
Meanwhile, keep closed storage for the items you’d rather not display: small appliances, plastic containers, pantry goods, and anything that reads as clutter. The best kitchens blend both.
Choosing Materials
The shelf material sets the tone and the durability. Your main options:
Solid Wood
Thick solid wood shelves, oak, walnut, or maple, are the classic choice. They bring warmth, handle weight, and can be stained or sealed to match your palette. A 1.5-inch to 2-inch chunky shelf reads substantial and modern.
Floating vs. Bracketed
Floating shelves hide their supports for a clean, seamless look but require sturdy concealed brackets anchored to studs. Bracketed shelves, on metal or wood supports, are easier to install and can add an industrial or farmhouse accent. For heavy stacks of dishes, hidden steel rod brackets rated for real weight are worth the extra cost.
Metal and Glass
Metal shelving suits modern and industrial kitchens and shrugs off moisture near a sink. Glass shelves feel light and airy but show every fingerprint and can’t take heavy loads.
Getting the Dimensions Right
Good proportions separate a professional look from a DIY afterthought. Use these targets:
- Shelf depth: 10 to 12 inches holds dinner plates without crowding the counter below.
- Spacing between shelves: 12 to 16 inches for dishes and glasses, more for tall items.
- First shelf height: 18 inches above the countertop keeps small appliances usable beneath.
- Shelf thickness: 1.5 to 2 inches for a substantial, load-bearing look.
Always anchor shelf supports into studs or use heavy-duty toggles rated well above the expected load. A shelf of stacked stoneware can top 40 pounds fast.
Styling Open Shelves Without the Clutter
This is where open design lives or dies. The goal is a look that’s lived-in but intentional. A few rules keep it from tipping into chaos:
- Limit the color palette. Coordinated white, wood-tone, and one accent color read calm; a rainbow of mismatched pieces reads messy.
- Mix heights and textures. Stack plates, stand a few bowls, add a plant or a cutting board leaned upright for variety.
- Leave negative space. Don’t fill every inch. Breathing room is what makes it look styled.
- Store daily items front and center. The pieces you use most should be the easiest to grab, which also keeps them from gathering dust.
- Repeat elements. A row of matching glasses or a set of identical bowls creates rhythm and order.
The Honest Downsides
Open cabinets aren’t for everyone, and it’s worth being clear-eyed. Dishware collects dust and airborne grease, especially near a cooktop, so items you rarely use need regular wiping. Everything is on display, which demands tidiness and a coordinated set of dishes, not the mismatched collection many of us actually own. And open shelves hold less than closed cabinets of the same footprint, so a kitchen that’s short on storage may not be the right candidate.
If those trade-offs give you pause, a middle path works well: glass-front cabinets. They deliver the open, display-friendly look while keeping dust out and hiding a little disorganization behind the glass.
Planning Your Own Layout
Start by deciding how much closed storage you truly need, then convert only the surplus wall space to open shelving. Sketch the wall to scale, mark stud locations, and plan shelf runs that align with your range or window for balance. Order shelves an inch or two longer than the final span if you’re cutting them yourself, and dry-fit before drilling.
Think about lighting too, since open shelves cast their own shadows. Under-shelf LED strips or a pair of small puck lights wash the counter below and make displayed items pop, turning functional storage into a design feature at night. Warm 2700K to 3000K light flatters wood shelves and dishware, while cooler light suits a crisp, modern white kitchen.
An open kitchen cabinet design rewards restraint. Blend it with closed storage, choose sturdy materials at the right dimensions, and style with a disciplined eye, and you’ll get a kitchen that feels bigger, brighter, and more personal, at a fraction of what full custom cabinetry would cost.