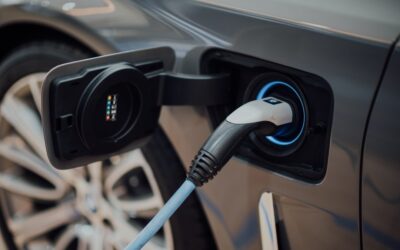
Plenty of homeowners assume a charger that works in a garage will work just as well on the side of the house. That assumption is where most problems start. An outdoor ev charger installation has to survive sideways rain, lawn sprinklers, road salt, UV exposure, freezing nights, and the occasional bumper, all while carrying a heavy continuous electrical load for hours at a time.
Part of our Windows & Doors guide — explore the full guide →
The short answer: choose a Level 2 unit with an enclosure rated for outdoor use (NEMA 3R at minimum, NEMA 4 or better where hose spray or driving rain hits it), mount it on a wall or a pedestal set in concrete, run the feed in weather-rated conduit, and protect the circuit the way the electrical code requires. A licensed electrician should size and connect the circuit, pull the permit, and schedule the inspection. Your part is planning the location, the mounting surface, and how the cable will live day to day.
- Planning Your Outdoor EV Charger Installation
- Understanding Enclosure Ratings for Wet Locations
- Wall Mount vs. Pedestal Mount
- Conduit, Wiring, and Weatherproof Connections
- GFCI Protection and Electrical Safety
- Step-by-Step: What an Outdoor Installation Looks Like
- Cable Management for Driveway Charging
- Costs and Business Installs
- When to Call a Licensed Professional
- Troubleshooting Common Outdoor Charger Problems
- Frequently Asked Questions
Charging outdoors also changes the everyday experience. You will be plugging in during snowstorms and in the dark, so lighting, cable reach, and where the connector hangs matter as much as the hardware itself.
Planning Your Outdoor EV Charger Installation
Start with where the car actually parks. Measure from the vehicle’s charge port, with the car in its normal spot, to the proposed mounting location. Most chargers ship with cables between 18 and 25 feet long, and you want a few feet of slack so the cable never pulls tight across the driveway. If you own two EVs, or expect to, place the unit so a single cable can reach either port.
Next, look at the distance from your main panel or a subpanel to that spot. Every foot of wire adds cost, and long runs may need a larger conductor to limit voltage drop. A charger mounted on the exterior wall directly behind the panel is usually the least expensive outdoor setup. A detached pedestal at the end of a long driveway requires trenching and is often the most expensive.
Finally, check your panel capacity. A typical 48-amp charger needs a 60-amp circuit, while a 32-amp unit uses a 40-amp circuit. Older 100-amp services may not have room without a load calculation, a load-management device, or a service upgrade. The electrician will run that calculation before anything is mounted.
Understanding Enclosure Ratings for Wet Locations
Enclosure ratings describe how well a housing keeps out water, dust, and ice. For driveway charging, these are the ones worth knowing:
- NEMA 3R: Protects against falling rain, sleet, and snow, and against damage from ice forming on the enclosure. It is the practical minimum for any exterior wall.
- NEMA 4: Adds protection against hose-directed water and splashing. A good pick if sprinklers, a pressure washer, or wind-driven rain reach the charger.
- NEMA 4X: Adds corrosion resistance. Worth considering near the coast or where road salt splashes up from the driveway.
- IP ratings: Some chargers list an IP code instead, such as IP55 or IP66. The second digit covers water; higher numbers resist heavier spray.
Also check the connector holster and the cable itself. A rated body with an unrated connector dock still lets water pool around the plug. Look for a unit with a covered or downward-facing holster and a cable jacket rated for cold flexibility, since stiff cable cracks in subfreezing weather. When you shop for an outdoor level 2 ev charger, confirm the listed operating temperature range covers your winter lows and summer highs.
Wall Mount vs. Pedestal Mount
Wall Mounting
A wall mount is simpler and cheaper when the parking spot sits beside the house. Mount the unit so the bottom of the enclosure sits roughly 36 to 48 inches above grade, following the manufacturer’s height range, to keep it clear of snow drifts and splashback. Fasten it into framing, masonry, or a mounting board anchored to the wall, never into siding alone. Vinyl siding needs a mounting block so the charger sits flat and the siding can still expand.
Pedestal Mounting
A pedestal makes sense when the car parks away from the house, at a detached pad, or between two spaces. The post needs a concrete footing deep enough to resist frost heave in your area, with conduit stubbed up through the base before the pour. Pedestals are also more exposed to vehicles, so add a bollard or wheel stop in front if the car pulls in nose-first toward the post.
Conduit, Wiring, and Weatherproof Connections
Exterior wiring must be protected from sunlight and physical damage. The common approaches are rigid or intermediate metal conduit for exposed runs where impact is likely, and schedule 80 PVC conduit for exposed runs elsewhere. Underground runs to a pedestal typically use PVC conduit at the burial depth your local code requires. Individual conductors pulled through conduit must be rated for wet locations.
Where conduit enters the charger or a junction box, use fittings listed for wet locations and seal wall penetrations with exterior-grade sealant so water cannot track back into the wall cavity. Bring conduit into the bottom of enclosures whenever possible; a top entry is an invitation for water to run inside. Many electricians also add a drip loop or a sealed fitting at the entry point.
A lockable disconnect near the charger may be required depending on its amperage and how far it sits from the panel. Even when optional, an outdoor-rated disconnect makes future service safer and easier.
GFCI Protection and Electrical Safety
Ground-fault protection is non-negotiable outdoors. Hardwired chargers include internal ground-fault monitoring, while plug-in chargers that use an outdoor receptacle need a GFCI-protected circuit plus a weatherproof “in-use” cover that stays closed with the cord plugged in. Some breakers and chargers can conflict, causing nuisance trips; if that happens, the electrician can confirm whether the charger’s built-in protection makes a separate device redundant under your local rules.
If you do any prep work near existing exterior wiring, such as removing an old light fixture or outdoor receptacle where the charger will go, turn off the breaker and confirm power is off with a non-contact voltage tester before touching anything. Never attempt to test or measure voltage on a live circuit yourself. Charging circuits are line-voltage, 240-volt loads, not low-voltage wiring like landscape lights or a doorbell, and a mistake can be fatal.
Step-by-Step: What an Outdoor Installation Looks Like
- Site survey: Mark the parking spot, charge-port location, cable reach, and panel location. Photograph the panel label for the electrician.
- Load calculation and permit: The electrician confirms service capacity and pulls the electrical permit. Some areas also require a site plan for pedestals.
- Call 811 before digging: For pedestal installs, have underground utilities marked before any trench or footing hole.
- Mounting prep: Install a mounting board or pour the pedestal footing. Let concrete cure per the mix instructions before loading it.
- Conduit run: Set conduit, fittings, and any disconnect. Seal every wall penetration.
- Wire pull and termination: The electrician pulls conductors, installs the breaker, and terminates at the charger with the power off.
- Configuration: The charger’s amperage setting is matched to the breaker size, and Wi-Fi or app setup is completed.
- Inspection and test charge: The inspector signs off, and you run a full charge session while checking for heat at connections or trips.
Cable Management for Driveway Charging
An outdoor cable gets run over, frozen into puddles, and chewed on by squirrels more often than you’d expect. A wall-mounted cable hook or retractor keeps it off the ground between sessions. Coil it loosely; tight coils kink cold cable and stress the jacket. Never leave the cable lying across a walkway where someone can trip on it, and never drive over the connector head.
Good lighting helps too. A motion-activated fixture near the charger makes nighttime plugging easier and discourages tampering. Many owners also choose a charger with a lockable holster or app-based access control, especially where the unit faces the street.
Costs and Business Installs
For a typical home, expect the charger itself to fall in the mid-hundreds of dollars and professional installation to range from several hundred dollars for a short wall-mounted run to a few thousand dollars when trenching, a pedestal, or a panel upgrade is involved. Permit fees vary widely by city. Utility rebates and tax incentives can offset part of the cost, so check with your power company before buying.
If you are looking to install an EV charger at a business, the process is similar but scaled up: commercial-rated pedestals, accessibility requirements for parking spaces, networked billing, and often three-phase power. That work always goes through a licensed commercial electrician and usually an engineer.
When to Call a Licensed Professional
Almost every outdoor ev charger installation should be completed by a licensed electrician. New 240-volt circuits, breaker installation, panel work, and underground feeders all require permits in most jurisdictions, and an inspection protects you if an insurance claim ever arises. Homeowners can handle site planning, choosing the unit, and building a mounting board or cable hook, but leave the wiring to the licensed pro. If your panel is full, crackles, feels warm, or uses an outdated design, have it evaluated before adding a charging load.
Troubleshooting Common Outdoor Charger Problems
- Frequent ground-fault trips after rain: Water is likely reaching a connection. Have the electrician inspect conduit fittings, the holster, and the connector for moisture.
- Charging slows in extreme heat: Many units throttle output when internal temperature rises. Shade the charger or relocate it off a south-facing wall.
- Cable feels stiff in winter: Store it on a hook rather than the ground, and choose a cold-rated cable at replacement time.
- Breaker trips during long sessions: The charger’s amperage setting may exceed the circuit rating. Stop using it and have the configuration checked.
Frequently Asked Questions
Can a Level 2 charger be installed outside?
Yes, as long as the unit is listed for outdoor use with a NEMA 3R or higher enclosure rating, is mounted securely, and is fed by properly sized, weather-protected wiring installed under a permit.
Is it safe to charge an EV outdoors in the rain?
Yes. Outdoor-rated chargers and vehicle connectors are designed for wet weather, and power does not flow until the connector locks and the car completes a safety handshake. Keep the connector holstered when not in use.
Do I need a permit for an outdoor EV charger?
In most areas, yes. A new 240-volt circuit requires an electrical permit and inspection, and pedestal installs may also need approval for trenching or site work.
How high should an outdoor EV charger be mounted?
Follow the manufacturer’s range, which usually places the unit about 36 to 48 inches above grade to stay clear of snow and splashing while keeping the connector easy to reach.
Should I choose a hardwired or plug-in outdoor charger?
Hardwired chargers are generally preferred outdoors because they eliminate an exposed receptacle and allow higher output. Plug-in units need a GFCI-protected outlet with a weatherproof in-use cover.