Most electric fences that “don’t work” have nothing wrong with the charger. The real problem is almost always a weak ground system, a wire touching a post, or vegetation draining the pulse. Good electric fence installation is really three jobs done carefully: choosing a properly sized energizer, building a ground field that completes the circuit, and running conductive wire on insulators so the pulse travels the full length of the line.
Part of our Decks & Outdoor guide — explore the full guide →
An electric fence is a psychological barrier. The energizer sends a short, high-voltage, low-energy pulse down the wire about once per second. When an animal touches the wire while standing on the ground, current flows through the animal, into the soil, and back to the ground rods. That brief, sharp shock teaches livestock to respect the line and keeps deer, raccoons, and rabbits out of a garden.
This guide covers setting up an electric fence for livestock or a garden: energizer sizing, grounding, insulators, polywire versus high-tensile wire, and testing. It assumes your posts are already set or that you’ll use step-in posts for temporary lines.
Planning Your Electric Fence Installation
Start with the animal. Horses need highly visible tape or rope because they run into fences they can’t see. Cattle respect a single or double strand of polywire or high-tensile wire. Goats and sheep need more strands set closer together, often five or more, with the lowest wire near the ground. For a garden, two or three strands at roughly 6, 12, and 18 inches stop rabbits and raccoons, while deer require a taller or double-offset design.
Next, check the rules. Many towns, counties, and HOAs regulate electric fences, especially along roads, sidewalks, or shared property lines. Some prohibit them in residential zones entirely; others require warning signs at set intervals. Check local ordinances before you buy anything, and post yellow warning signs wherever local rules require them, typically along any stretch of fence the public could touch.
Finally, sketch the layout. Measure the total length of every wire, not just the perimeter. A 1,000-foot perimeter with three strands is 3,000 feet of conductor, and that total guides energizer choice.
Choosing and Sizing the Energizer
Buy a listed energizer from a reputable maker (look for a safety certification mark from a recognized testing lab) and install it exactly per the maker’s instructions. Energizers are rated in miles of fence and in joules of output energy. Mile ratings are optimistic and assume a single clean wire with no weeds. A more reliable rule is to size by joules and pick a unit with plenty of headroom for vegetation load.
- Plug-in (AC) energizers: the most power per dollar and the best choice near a barn or outbuilding with an existing outdoor outlet. The outlet should be GFCI-protected and weatherproof.
- Battery energizers: good for remote pastures; they need regular battery checks and charging.
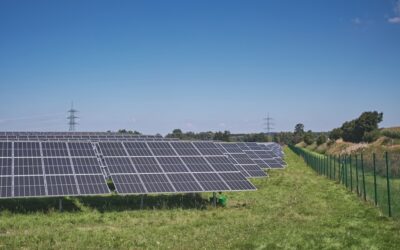
- Solar fence chargers: a battery energizer with a panel attached. They suit remote gardens and rotational grazing, provided the panel faces south with no shade and the battery can carry several cloudy days.
Never connect a fence wire to household current directly, and never build a homemade charger from transformers, ignition coils, or other improvised parts. A listed energizer limits pulse length and energy so the shock is startling but not dangerous. Continuous household current does not let go and can kill people and animals. There are no safe wiring shortcuts here. If you need a new outlet near the energizer location, hire a licensed electrician to install it; before any work on an existing outlet, turn off the breaker and confirm power is off with a non-contact voltage tester.
Grounding: The Most Important Step
The ground system is half of the circuit. A small energizer on a poor ground delivers a weak shock no matter how much you paid for it. Follow the maker’s ground-rod recommendation; a common guideline is at least three galvanized ground rods, 6 to 8 feet long, spaced about 10 feet apart and connected with a continuous run of galvanized wire and proper ground clamps.
- Call 811 before driving rods. Utility lines, gas pipes, and irrigation may run where you plan to dig or drive rods.
- Pick moist soil. Shady, damp spots ground better than dry sand. Keep the ground field well away from buried utility lines, building electrical grounds, and metal water pipes; most makers specify a minimum separation.
- Drive the rods nearly flush, leaving a few inches exposed for the clamp.
- Connect with galvanized wire and clamps. Avoid mixing copper and galvanized steel, which corrodes at the joint.
- Run insulated lead-out cable from the energizer’s fence and ground terminals. Use double-insulated cable rated for electric fencing, never household wire.
In very dry or frozen soils, many installers add a ground-return wire on the fence itself, alternating hot and ground strands so an animal touching both completes the circuit.
Wire, Tape and Insulators
Polywire and polytape
Plastic strands woven with thin metal filaments. Lightweight, easy to handle, and ideal for temporary paddocks and gardens. Tape is more visible for horses. The trade-off is higher resistance, so it carries a pulse shorter distances than steel.
High-tensile steel wire
Smooth 12.5-gauge galvanized wire, tensioned with in-line strainers. It conducts very well, lasts decades, and suits permanent perimeters. It requires solid braced corner and end posts because it is under significant tension.
Insulators
Every hot wire must sit on an insulator matched to the post type: nail-on or screw-in for wood, clip-on for T-posts, and corner or end insulators where the wire changes direction or terminates. A single missing or cracked insulator can short the whole fence. Never electrify barbed wire; animals and people can become entangled while the fence keeps pulsing.
Step-by-Step: Hooking Up an Electric Fence
- Set braced corner and end posts, then line posts (commonly 12 to 20 feet for polywire, farther for high-tensile).
- Install insulators at the heights you planned for each strand.
- Run the wire, tie off at end insulators with the recommended knots or connectors, and tension it. Polywire should be snug, not banjo-tight.
- Join strands with proper split-bolt or line connectors, not twisted knots, which add resistance.
- Install gate handles with insulated anchors so you can open gates without touching a live wire.
- Connect the fence lead-out to the top strand and jumper the strands together.
- Mount the energizer indoors or in a sheltered spot, per the maker. Connect the ground terminal first, then the fence terminal, then power it up.
- Hang warning signs where required.
Testing and Troubleshooting
Use a purpose-built electric fence tester, following its instructions, and never test with your hand or a household multimeter. Check at the energizer first, then at the far end of the line. Many makers suggest aiming for several thousand volts on the fence; the manual lists the target for your model.
With the energizer switched off, check the ground system by comparing readings as the maker describes. If far-end readings drop sharply, walk the line looking for:
- Weeds or branches touching the wire
- Broken or missing insulators
- Wire touching a steel post or gate
- Corroded or loose connections and splices
- Dry soil around the ground rods
Electric fence repair usually means replacing a cracked insulator, re-splicing a broken strand, or trimming vegetation. Electric fence charger repair is a different story: a charger that is dead or clicks without output should go back to the maker or an authorized service center. Do not open the case; internal capacitors can hold a dangerous charge even when unplugged.
Electric Fence Installation Cost
Electric fence installation cost varies widely with length, wire type, and energizer. A temporary garden setup with step-in posts, polywire, and a small solar charger is typically a budget project. Permanent high-tensile livestock fencing costs more per foot because of braced corners, tensioners, and heavier posts, and a large low-impedance energizer is a significant line item on its own. Professionally installed perimeter fences are usually priced per linear foot and cost several times the DIY material price, reflecting post driving and bracing labor.
When to Call a Professional
Hire a fencing contractor for long high-tensile perimeters, braced corners in rocky soil, or fences along roads where failure could put livestock in traffic. Bring in a licensed electrician for any new outlet or circuit feeding an AC energizer. If local ordinances require permits or inspections, a pro who works in your area will know the process and the signage rules.
Frequently Asked Questions
How many ground rods does an electric fence need?
Follow the energizer maker’s recommendation. A common guideline is at least three 6- to 8-foot galvanized rods spaced about 10 feet apart, with more for large energizers or dry soil.
Can I plug an electric fence into a regular outlet?
Only through a listed AC energizer designed for fencing, plugged into a GFCI-protected outdoor outlet as its maker directs. Never connect fence wire to household current directly.
Is polywire or high-tensile wire better?
Polywire suits temporary paddocks and gardens because it’s light and easy to move. High-tensile steel is better for permanent perimeters since it conducts farther and lasts for decades.
Do I need warning signs on an electric fence?
Many local rules require them, especially where the fence borders public areas. Check your ordinances and post signs wherever they are required.
Why is my electric fence weak at the far end?
Vegetation, broken insulators, poor splices, or a weak ground system drain the pulse. Walk the line, clear contact points, and verify your grounding.