An outdoor shower is only as good as the surface under your feet, and that is where most backyard builds go wrong. Choosing the right outdoor shower pan decides whether water drains cleanly away or pools, freezes, stains the siding, and softens the soil next to your foundation. The walls and fixtures get the attention in photos, but the base does the real work. This guide covers the materials, slopes, drainage choices, and installation details that make a shower floor last for years outdoors.
Part of our Bathroom Remodeling & Flooring guide — explore the full guide →
- What an Outdoor Shower Pan Does
- Outdoor Shower Pan Materials Compared
- Drainage: Where Does the Water Go?
- Sizing and Slope Guidelines
- How to Install an Outdoor Shower Pan
- Slip Resistance and Comfort Underfoot
- When to Call a Licensed Professional
- Keeping Your Outdoor Shower Pan in Good Shape
- Frequently Asked Questions
What an Outdoor Shower Pan Does
An outdoor shower pan is the floor of the shower enclosure: a sloped, water-resistant surface that collects rinse water and directs it to a drain, a gravel bed, or an approved discharge point. Indoors, a pan sits on a framed subfloor protected by a waterproof membrane. Outside, the pan also has to handle sun, freeze-thaw cycles, leaves, sand, and in many cases constant contact with the ground.
A good pan does three things well. It gives a slip-resistant surface for wet bare feet. It sheds water fast enough that nothing puddles between uses. And it keeps that water from soaking the ground right against your house, where it can reach a crawlspace, basement wall, or slab edge. Those three goals shape every decision below.
Outdoor Shower Pan Materials Compared
There is no single best material; the right choice depends on climate, budget, and how the shower is built. Here is how the common options stack up.
| Material | Typical Cost | Best For |
|---|---|---|
| Acrylic or fiberglass pan | $150-$500 | Framed platforms with plumbed drains |
| Poured concrete slab | $300-$1,200 | Permanent builds, drain to dry well |
| Stone or pavers on gravel | $200-$900 | Natural looks, gravel-bed drainage |
| Wood slat deck over gravel | $150-$700 | Beach houses, pools, casual use |
| Tiled mortar bed with membrane | $800-$2,500 | Mild climates, high-end finishes |
Prefabricated pans
Acrylic, fiberglass, and composite pans are molded with a built-in slope and drain hole. They are fast to install, easy to clean, and come in standard sizes like 32 x 32, 36 x 36, and 48 x 36 inches. Look for UV-stabilized models, because standard indoor acrylic can yellow and turn brittle after a few summers of direct sun. Textured floors are essential; smooth gloss finishes get slick with soap.
Concrete slabs
A 4-inch concrete slab with a broom finish is durable and inexpensive per square foot. Pour it with a slope of about 1/4 inch per foot toward a center drain or one edge, and add air-entrained concrete in freeze-thaw regions to resist scaling. Sealing the surface every couple of years reduces staining from minerals and body products.
Stone, pavers, and wood slats
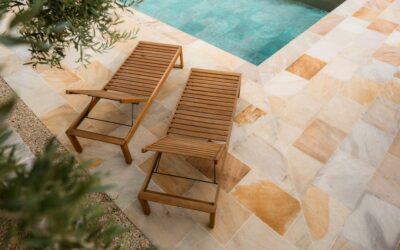
Flagstone, textured pavers, or a removable wood slat platform over a deep gravel bed is the simplest outdoor setup. Water falls straight through the joints into the gravel and soaks into the soil. Cedar, redwood, teak, and ipe resist rot well for slat decks; leave gaps of about 1/4 to 3/8 inch between boards so water and sand fall through.
Drainage: Where Does the Water Go?
This is the question to answer before buying anything. Outdoor shower drainage generally falls into three approaches.
- Gravel bed or dry well: Water drains into a pit filled with clean crushed stone, often 12 to 24 inches deep, lined with landscape fabric to keep soil out. A dry well is a larger version, sometimes a perforated plastic tank buried in stone. This suits rinse-off showers with light soap use and well-draining soil.
- Tie-in to the home’s drain system: A trapped drain connects to the sanitary line like an indoor shower. This is the most controlled approach and may be required where soaps and frequent use are expected, but it involves permits, frost protection, and a licensed plumber.
- Surface discharge to landscaping: Some jurisdictions allow shower water to flow to a planted area. Rules vary widely.
Local codes differ on whether outdoor shower water counts as graywater, how far a dry well must sit from the foundation and property lines, and whether a connection to a septic system is allowed. Check with your building department before digging. As a practical rule, keep any soakaway well away from your foundation, and slope the pan away from the house, never toward it.
Sizing and Slope Guidelines
Comfort starts at around 36 x 36 inches of standing space, though 42 x 42 or larger feels much more generous for rinsing off kids, dogs, or beach gear. If you want a changing area inside the enclosure, add a separate dry zone with its own raised floor so clothes stay out of the spray.
- Slope: Aim for 1/4 inch per foot toward the drain. Less than 1/8 inch leaves puddles; much more feels uneven underfoot.
- Drain size: A 2-inch drain is standard for showers. Linear drains along one edge let you use a single-direction slope, which simplifies concrete and tile work.
- Height: Raising the pan 2 to 4 inches above surrounding grade keeps runoff and mulch from flowing in during storms.
- Clearance from siding: Keep the pan a few inches off the siding or use a water-resistant wall panel on the house side to prevent staining and rot.
How to Install an Outdoor Shower Pan
The steps below describe a typical prefabricated pan on a framed platform draining to a gravel dry well, one of the most common DIY builds.
- Pick the location: Choose a spot near an existing hose bib or supply line, with some privacy and reasonable sun so the area dries between uses.
- Excavate: Dig out the pan footprint plus 6 inches on each side, about 18 to 24 inches deep for the drainage pit. Line the sides with landscape fabric.
- Fill with stone: Add clean 3/4-inch crushed stone in lifts, compacting lightly, leaving room for the base platform.
- Build the support: Set a framed platform of ground-contact rated lumber or a compacted base on pavers, leveled front to back and side to side.
- Set the pan: Most prefabricated pans need full, even support. Bed the underside in mortar or a manufacturer-approved foam so the floor does not flex.
- Connect the drain: Attach the drain body, then run a short length of PVC pipe from the drain into the stone pit.
- Test before enclosing: Run water for 10 minutes and confirm it drains fully without pooling or backing up.
Winterizing
In freezing climates, drain the supply lines each fall and install frost-proof valves or a shutoff inside the house. Water trapped in a drain trap or in low spots of the pan can freeze and crack acrylic or split fittings. A removable wood slat floor can be stored indoors over winter to extend its life.
Slip Resistance and Comfort Underfoot
Outdoor shower floors see sand, sunscreen, and soap, which is a slippery combination. Choose textured surfaces over polished ones. For tile, pick porcelain with an outdoor wet slip rating; many manufacturers list a DCOF value of 0.42 or higher for wet level areas, which is the common minimum. Small mosaics set in a sloped mortar bed provide more grout lines and grip. Wood slats naturally offer good traction but should be cleaned periodically to prevent algae.
Dark concrete and stone can get uncomfortably hot in direct afternoon sun. Lighter colors or wood decks stay cooler on bare feet, which is worth considering in southern states.
When to Call a Licensed Professional
Many gravel-bed setups are DIY friendly, but some parts of an outdoor shower are not. Bring in a licensed plumber if you plan to connect to a sewer or septic line, add hot water, install frost-proof supply lines, or run lines through an exterior wall. If the shower attaches to your house, a contractor should confirm flashing and water-resistant sheathing so water does not get behind the siding. Where soils drain poorly or the site is close to the foundation, ask about grading and drainage before you pour concrete. And always call 811 before digging to locate buried utilities.
Keeping Your Outdoor Shower Pan in Good Shape
Routine care is simple. Rinse sand and leaves off the pan after beach days, clean the drain strainer monthly during the season, and scrub with a mild cleaner and soft brush to prevent mildew. Reseal concrete or stone every one to three years. Check wood slats for loose fasteners and treat them with a penetrating oil once a year. Look at the gravel pit each spring too; if water drains more slowly than before, the stone may be clogged with silt and need refreshing. A well-maintained outdoor shower pan can easily last a decade or more.
Frequently Asked Questions
Can I use an indoor shower pan outside?
You can, but choose a UV-resistant model and give it full support. Standard indoor acrylic may discolor or crack from sun exposure and freezing water.
How deep should a gravel drainage pit be?
Many builds use 12 to 24 inches of clean crushed stone, adjusted for soil type and use. Clay soils may need a larger dry well or a connection to a drain.
Do outdoor showers need a permit?
It depends on your area. Simple cold-water rinse stations often need none, but plumbing connections, hot water, and drain tie-ins usually require a permit.
What slope does an outdoor shower floor need?
About 1/4 inch per foot toward the drain or open edge is the standard target for fast drainage without feeling uneven underfoot.