The wall directly behind your range takes more abuse than any other surface in the kitchen. It catches grease splatter at 400°F, steam from boiling pots, and the occasional sauce explosion. The best oven backsplash ideas balance two things that often pull in opposite directions: a finish that wipes clean in seconds and a look that anchors the whole room. Choose well and this becomes the focal point guests notice first.
Before you fall in love with a Pinterest image, remember that the area behind a range needs materials rated for heat and moisture. Wallpaper and untreated wood do not belong here. Here are the styles that actually perform alongside the costs you can expect.
Classic Subway Tile
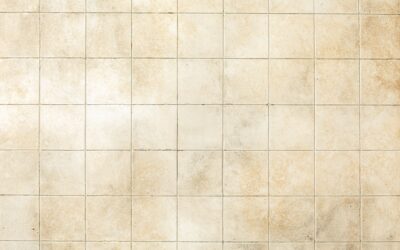
The 3×6-inch ceramic subway tile remains the default for good reason. It runs $0.15 to $0.50 per tile at home centers, resists heat completely, and wipes clean with a damp cloth. A standard 30-inch range area needs only about 15 square feet, so material cost often lands under $100.
To keep it from looking generic, change the grout or the layout. A dark charcoal grout against white tile reads modern and hides splatter between cleanings. Stacked vertical or herringbone patterns elevate the same cheap tile into something custom without raising material cost.
Full-Height Slab Backsplash
Running a single slab of quartz, granite, or porcelain from countertop to the underside of the hood eliminates grout lines entirely, which means nothing for grease to settle into. This is the cleanest option to maintain, period. Quartz slab backsplash typically costs $50 to $100 per square foot installed.
For a seamless look, match the slab to your countertop so the two flow together visually. Porcelain slab in a marble-look pattern gives you the veining of natural stone without the etching problem that real marble has near acidic cooking. Plan on a fabricator measuring with a template, since slab cuts must be exact.
Stainless Steel Behind the Range
If you cook hard and want a commercial-kitchen aesthetic, a stainless steel panel behind just the range is nearly indestructible. It shrugs off heat, never stains, and pairs naturally with a pro-style range. A custom panel from a metal shop runs $200 to $500 depending on size and gauge; aim for 16-gauge so it does not oil-can or dent.
One honest drawback: brushed stainless shows fingerprints and water spots, so keep a microfiber cloth nearby. A vertical brush direction hides streaks better than horizontal and is easier to wipe down.
Patterned and Mosaic Accents
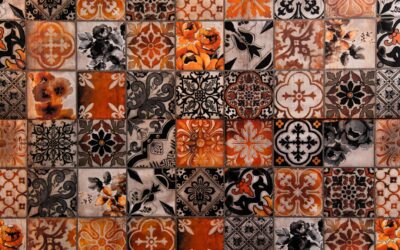
Many homeowners keep the rest of the kitchen simple and treat the space behind the oven as an accent zone with a decorative tile mosaic, often called a backsplash medallion. Encaustic-look cement tile, hand-painted Spanish tile, or a glass mosaic blend in this niche adds personality without overwhelming the room.
Glass mosaic sheets run $8 to $25 per square foot and reflect light beautifully, making a small galley kitchen feel brighter. Seal cement tile with a penetrating sealer before grouting, because raw cement absorbs grease and stains permanently otherwise.
Budget-Friendly Peel-and-Stick Options
Renters and budget remodelers gravitate toward peel-and-stick tile, but proximity to heat matters. Vinyl peel-and-stick can warp directly above a gas burner. Instead, choose real metal or gel-based peel-and-stick tiles rated for kitchen use, which hold up to roughly 140°F.
These run $8 to $15 per square foot and install in an afternoon with no grout or thinset. They are a reasonable temporary fix, but for the high-heat zone directly behind the burners, a few rows of genuine ceramic tile will always be the safer call.
Natural Stone and Tile-Look Porcelain
Natural stone such as travertine, marble, or slate brings organic texture that manufactured tile cannot fully replicate. The catch behind a range is maintenance: marble etches when acidic splatter from tomato sauce or lemon sits on it, and porous stone absorbs grease unless sealed. Plan to seal natural stone every six to twelve months and wipe spills promptly.
Tile-look porcelain solves this beautifully. Modern porcelain planks and large-format tiles convincingly mimic marble veining, weathered wood, and concrete while being completely non-porous and heatproof. At $3 to $10 per square foot, porcelain gives you the high-end look behind the range with none of the sealing hassle. For a busy cooking zone, it is often the smartest balance of beauty and durability.
Color, Grout, and Maintenance Considerations
Whatever material you choose, the color and grout you pair with it determine how much cleaning the backsplash demands. Glossy finishes wipe down faster than matte or textured surfaces, where grease can lodge in the texture. Behind a range that sees heavy frying, a smooth glazed tile or a solid slab saves you scrubbing time every week.
Grout is the weak point in any tiled backsplash. Use an epoxy grout or a high-quality sealed cement grout in a mid-tone color near the cooking zone, because white grout shows grease and discolors fast. A quick wipe with a degreasing kitchen cleaner after heavy cooking keeps any backsplash looking new, but choosing forgiving materials up front means you spend far less time maintaining it down the road.
Matching the Backsplash to Your Range Hood
The most polished kitchens treat the backsplash, range, and hood as one composition. A bold tile pattern looks intentional when it is framed by a clean hood; a busy hood paired with busy tile fights for attention. When weighing different oven backsplash ideas, pull a sample tile and hold it against your cabinet and hood finishes in actual kitchen lighting before committing.
One pro tip that saves money: extend whatever material you choose at least a few inches past the width of the range on each side. A backsplash that stops exactly at the range edge looks unfinished, while a small overhang frames the cooking zone and makes the install feel deliberate.
Finally, think about height. Behind a range, splatter routinely travels higher than the standard 18-inch backsplash height that sits behind countertops. Running tile or slab all the way up to the underside of the hood, or to the bottom of the upper cabinets where there is no hood, protects the full splash zone and looks far more finished than a short strip. Plan your material quantity around that full height so you are not piecing in extra rows later, and order roughly 10 percent more tile than the square footage to cover cuts, breakage, and future repairs.