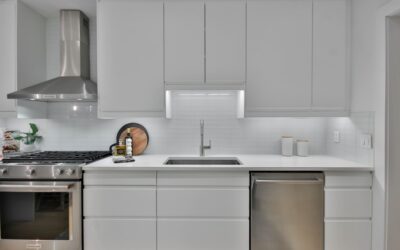
One of the most common kitchen design mistakes is stopping the backsplash at the bottom of the upper cabinets, leaving a strange truncated rectangle behind the range hood that screams “afterthought.” Deciding where to stop backsplash behind stove deserves the same planning as any other kitchen detail because the eye lands on this area constantly while cooking. The right termination point depends on your hood type, cabinet layout, and the look you want, but a few proven approaches almost always read as intentional rather than accidental.
- Why the Range Area Is Special
- Common Termination Options
- Full Height to Ceiling
- Stop at the Bottom of the Hood
- Match the Surrounding Backsplash Height
- Custom Niche or Window
- Matching the Hood Type
- Edge Treatments That Work
- Working With Inset and Decorative Tile
- Tile Patterns That Need Care
- Budget Considerations
- Common Mistakes to Avoid
- Coordinating With the Rest of the Kitchen
- Working With Open Shelving
Why the Range Area Is Special
The wall behind the stove takes more abuse than any other backsplash zone. Grease splatter from sauteing, steam from boiling pots, and oil mist from frying all coat the surface. A continuous, sealed tile or stone surface here protects the wall and cleans easily. The challenge is that the range hood or vent fan interrupts the flat plane, creating a natural question about where to end the tile.
Get this right and the cooking zone becomes a focal point of the kitchen. Get it wrong and the kitchen reads as unfinished even if every other surface is perfect.
Common Termination Options
Full Height to Ceiling
Running tile all the way from countertop to ceiling behind the range, including behind the hood, creates the most dramatic and resale-friendly look. It works particularly well with custom range hoods that have a chimney extension. The full slab of tile reads as a feature wall.
This approach costs more (extra tile and labor) and requires careful planning around any electrical or vent ducting in the wall, but the visual payoff is significant.
Stop at the Bottom of the Hood
If your range hood mounts directly to the wall (a wall-mount chimney hood or undercabinet vent), terminating the tile at the bottom edge of the hood is the cleanest stopping point. The hood becomes the visual frame. Make sure the tile extends at least 1 inch under the hood so future hood replacements do not expose drywall.
Match the Surrounding Backsplash Height
For kitchens with a continuous 18-inch backsplash height around the perimeter, simply continuing that same height behind the stove keeps things consistent. The hood mounts above the tile zone entirely. This is the most affordable approach and looks tidy when executed carefully, particularly with a clean edge profile like a Schluter trim.
Custom Niche or Window
Some designs feature a recessed pot-filler niche, a window over the range, or a decorative shelf at a specific height. The backsplash terminates at the niche or window frame, which provides a natural visual stopping point.
Matching the Hood Type
The hood style largely dictates the right termination strategy:
- Under-cabinet hood: tile to the bottom of the cabinet, including behind the hood vent area
- Wall-mount chimney hood: tile to the ceiling, or stop cleanly at the bottom of the hood
- Insert hood with custom surround: tile fully behind the surround, terminating where the surround ends
- Microwave-over-range: tile to the bottom of the microwave; the microwave itself functions as the visual cap
- Downdraft vent: tile to the underside of upper cabinets or to ceiling if no upper cabinets exist
Edge Treatments That Work
However you terminate, the cut edge of tile needs a finished treatment. Raw cut tile looks rough and collects grease in the porous edge.
Bullnose Tile
A bullnose piece has a rounded factory-finished edge. Most tile lines offer matching bullnose pieces. The rounded edge transitions softly from tile to drywall.
Schluter Edge Trim
Schluter offers metal profiles (Jolly, Quadec, Rondec) that cap the cut edge with anodized aluminum or stainless steel. Available in colors that match common counter and faucet finishes. Pricing is $8 to $14 per 8-foot piece.
Mitered Corners
For stone backsplashes, a 45-degree miter at the termination creates a clean, professional edge. Requires skilled tile work and good materials but produces a high-end result.
Pencil Liner
A narrow decorative liner tile (pencil, dot, or bead profile) caps the field tile and creates a tidy transition. Often used in transitional and traditional kitchens.
Working With Inset and Decorative Tile
Some kitchens feature a decorative inset behind the range, set into a field of subway or other simple tile. The inset itself defines where any contrasting tile stops, but the surrounding field continues to a logical termination based on the hood.
For decorative insets, plan the dimensions to align with the cooktop centerline and the visual width of the hood. A 36-inch wide inset behind a 30-inch cooktop and a 36-inch hood creates clean visual alignment.
Tile Patterns That Need Care
Subway tile, square tile, and other small-format patterns work easily because the grout lines hide cuts. Large-format tile (12-by-24 or larger) needs careful layout planning to avoid awkward slivers at edges. Mosaic tiles like penny rounds and hex shapes need particular attention to maintaining the pattern visually as it terminates.
For slab backsplashes (a single piece of stone or sintered surface like Dekton), the termination is whatever the slab boundary is. Plan slab cuts so the visible edge is polished, with the cut edge hidden against cabinets or under the hood.
Budget Considerations
Backsplash costs scale roughly with square footage. A standard 18-inch perimeter backsplash for a 12-by-12-foot kitchen costs $800 to $1,800 in materials and labor. Extending to ceiling behind the range adds another $300 to $700 depending on the tile choice.
Slab backsplashes cost $80 to $200 per square foot installed and add real cost when extended floor-to-ceiling, but the visual impact often justifies the upgrade in higher-end kitchens.
Common Mistakes to Avoid
- Stopping tile at random heights without aligning to a visual reference
- Leaving raw cut edges exposed
- Using contrasting tile behind the range without continuing the visual treatment vertically
- Forgetting that backsplash tile must extend under the hood mount points
- Not coordinating with electrical outlet placement (outlets within the tile field need their faceplates flush with the tile surface)
Coordinating With the Rest of the Kitchen
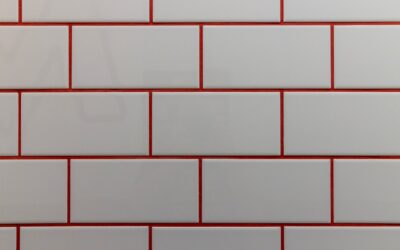
The backsplash behind the stove should relate visually to the rest of the kitchen. If the perimeter backsplash is white subway tile with grey grout, the area behind the stove can match exactly, feature the same tile in a different pattern (like herringbone), or introduce a complementary accent. Drastic departures (a bright mosaic behind the stove when everything else is plain) need very strong design justification.
Working With Open Shelving
Open shelving instead of upper cabinets changes the calculus entirely. With no cabinets to define the backsplash top, you typically want tile to the ceiling on all walls or to a consistent height matched to the open shelves. Inconsistent heights between the range zone and the surrounding shelves looks awkward.
Figuring out where to stop backsplash behind stove comes down to coordinating with the hood, choosing a clean termination point, finishing the edge professionally, and aligning with the broader kitchen design language. Plan it during the kitchen design rather than at tile installation and the result will look as intentional as every other detail in the space.