I get this question on almost every kitchen consult where budget is tight or the client loves an expensive tile: can we do a tile backsplash behind stove only and skip the rest of the perimeter? The short answer is yes — it can work, and in some kitchens it’s genuinely the better design. The longer answer is that a stove-only backsplash succeeds or fails on about four decisions: how the panel is framed, how far it extends, what happens to the rest of the wall, and whether the kitchen’s style supports a focal-point approach. Done thoughtfully it reads like a European range niche; done lazily it reads like the tile budget ran out mid-job. Here’s how to land on the right side.
Part of our Kitchen Remodeling guide — explore the full guide →
The Case For Stove-Only
There are honest reasons this approach exists beyond saving money — though the savings are real:
- It protects where protection is needed most. The range wall takes 90 percent of a kitchen’s grease, steam, and splatter. Sauce doesn’t splash behind the toaster; it splashes behind the sauté pan. Functionally, tiling the cooking zone covers the majority of the actual mess with a fraction of the area.
- It lets you afford the good tile. A full perimeter backsplash might be 30 to 45 square feet; a range panel is 8 to 15. At that size, $30-per-square-foot handmade zellige, marble mosaic, or hand-painted tile becomes a $300 to $500 material decision instead of a $1,500 one.
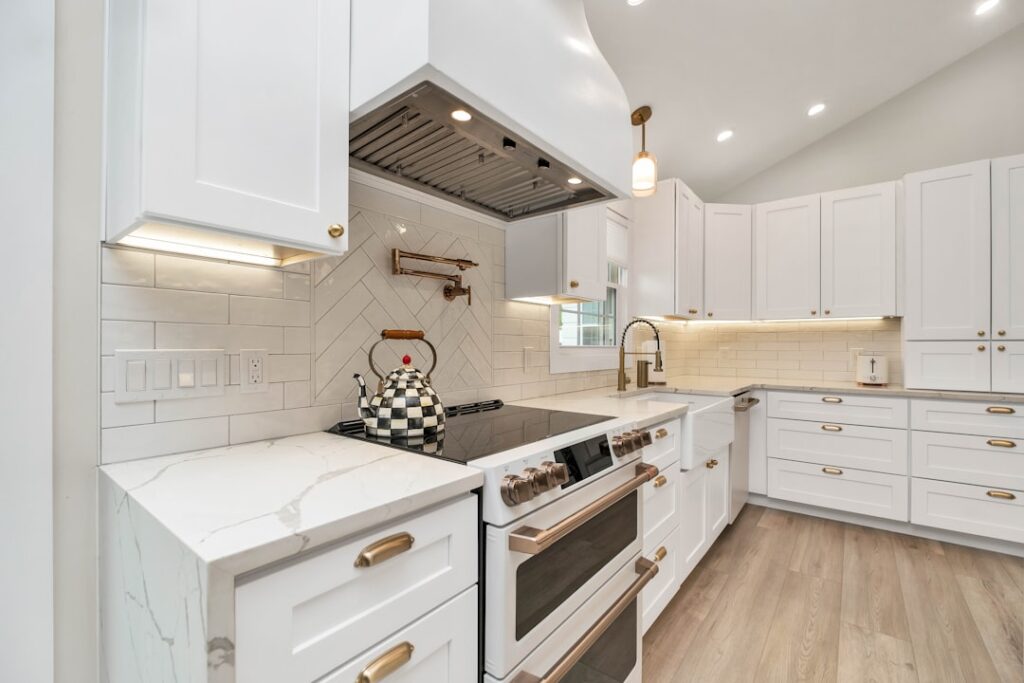
- It creates a focal point. Kitchens with a statement hood already treat the range wall as the room’s centerpiece. A defined tile panel behind the range — especially framed or run to the ceiling — reinforces that architecture the way a fireplace surround anchors a living room.
- It suits certain styles natively. European farmhouse, Mediterranean, and unfitted-kitchen looks historically tiled the cooking alcove only, with painted plaster elsewhere. In those design languages, stove-only isn’t a compromise — it’s the reference.
The Case Against — and When It Fails
Now the failure modes, because I’ve been called to extend or redo plenty of these:
- The floating postage stamp. A small rectangle of tile stopping arbitrarily an inch past the range on each side, with raw edges and painted drywall everywhere else, reads unfinished — like a sample board glued to the wall. Scale and edges are everything.
- Unprotected sink and counter zones. Behind a sink and along prep counters, painted drywall takes water spots, splatter, and scrubbing. Semi-gloss paint handles it for a while, but in hard-use kitchens the paint line above the counter gets shabby in 3 to 5 years. Stove-only means accepting maintenance elsewhere or adding a counter-material ledge later.
- Style mismatch. In a sleek contemporary kitchen with full-height glass or slab backsplash expectations, an isolated tile panel looks like a missing budget line. Focal-point backsplashes suit kitchens with focal-point architecture — a hood, an alcove, a mantel-style surround.
- Resale reads. Buyers walk kitchens closely. A well-framed feature panel photographs as intentional; a cheap unbounded patch photographs as a corner cut. Same square footage, different execution, opposite conclusions.
The Four Decisions That Make It Work
1. Size the Panel to the Architecture, Not the Appliance
The panel should be meaningfully wider than the range and rise to a purposeful stopping line. My defaults: extend 3 to 6 inches beyond each side of the range minimum — better yet, run cabinet-edge to cabinet-edge of the flanking uppers so the panel fills the natural architectural bay. Vertically, go to the bottom of the hood at minimum; to the ceiling behind an exposed hood stack for the full feature-wall effect. A 30-inch range typically yields a 36 to 48-inch-wide panel, 30 to 60 inches tall — 10 to 18 square feet.
2. Frame the Edges Like You Meant It
Exposed tile edges are what separate “feature” from “leftover.” Options, in ascending formality: color-matched caulk line against a metal edge profile (clean, modern, $3 to $6 per linear foot); bullnose or glazed-edge tile border; a pencil-liner or chair-rail tile frame (my favorite for traditional kitchens — it turns the panel into a framed picture); or a wood or stone surround for full mantel treatment. Budget $50 to $250 for edge treatment. It’s the highest-leverage money in the whole project.
3. Decide What the Rest of the Wall Gets
The remaining counter runs need a deliberate answer, not an absence: scrubbable enamel or semi-gloss paint in a color that converses with the tile; a 4-inch counter-material upstand (quartz or stone splash, $15 to $35 per linear foot) which handles the wipe-down zone and makes the painted wall above read intentional; or wood paneling/beadboard in cottage kitchens. The upstand-plus-feature-panel combination is my most recommended package — it solves function everywhere while concentrating the design dollars behind the range.
4. Pick Tile That Justifies the Spotlight
A stove-only panel of plain builder tile raises the question of why you stopped. The format thrives on tile with presence: herringbone or vertical-stack layouts, handmade glazes, patterned cement-look, marble mosaic, or a hand-painted mural set. You’re buying 12 square feet — spend like it.
Real Costs: Stove-Only vs. Full Backsplash
| Scope | Material (mid-to-premium tile) | Labor | Total |
|---|---|---|---|
| Stove panel, 12 sq ft, framed | $150–$500 | $300–$700 | $450–$1,200 |
| Stove panel + quartz upstand perimeter | $400–$900 | $500–$1,100 | $900–$2,000 |
| Full perimeter backsplash, 35 sq ft | $350–$1,200 | $800–$1,800 | $1,150–$3,000 |
Note the honest math: because installers carry minimum job charges and setup costs, a small panel doesn’t scale down linearly — you save maybe 40 to 60 percent versus full perimeter, not 70 percent. If the full backsplash in a modest tile already fits your budget, the savings argument weakens and the choice becomes purely aesthetic.
Heat, Code, and Practical Notes
Tile is an ideal material behind a range — noncombustible, scrubbable, heat-proof at any residential cooking temperature. A few field notes: check your range and hood manuals for required clearances to combustibles, which the tile panel helps satisfy behind pro-style ranges; use grease-resistant grout (epoxy, or sealed cement grout) because this panel is the greasiest wall in the house; and if a pot-filler or outlet lands in the panel, center it in the layout — a crooked escutcheon in a spotlight panel is forever. Setting details are standard backsplash practice: flat wall, polymer-modified thinset, tight consistent joints.
So — Does It Work?
My verdict after building both versions for years: a tile backsplash behind stove only works beautifully when it’s designed as a feature and fails when it’s executed as a fragment. The test is simple — could you describe the result as “a framed tile panel anchoring the range wall,” or only as “we tiled behind the stove”? If the panel fills its architectural bay, wears a real edge treatment, rises to the hood or ceiling, and the surrounding walls got a deliberate finish, nobody will ever read it as savings. If it’s an unframed rectangle floating on drywall, they’ll read nothing else.
Retrofitting: Adding the Rest Later
One more scenario deserves coverage, because it’s how half of these projects actually unfold: install the stove panel now, extend the backsplash later when budget allows. It’s workable if you plan the seam from day one. Keep a written record — and ideally a physical box — of the exact field tile, since tile lines get discontinued within 2 to 4 years and dye lots shift even when they don’t. Design the panel’s edge treatment so it can either remain as a permanent frame or be removed cleanly: a pencil-liner frame can stay forever (the extended backsplash simply meets it), while a metal edge profile is easy to pull and re-tile against. Set the panel’s bottom course off the same level line the future backsplash will use, so the courses align across the eventual seam rather than stepping half a joint. And if the future plan is a different tile entirely, make the stove panel decisively different — same-but-not-quite tiles installed years apart always look like a failed match, while an intentional contrast panel inside a frame looks designed. The retrofit labor for the perimeter later runs slightly more per square foot than doing it all at once (separate setup, protection, and minimums), typically a 10 to 20 percent premium — a fair price for spreading the cost across two budget years.
Final advice from the trenches: spend the savings on beauty, not just keep them. The whole magic of this format is concentration — twelve square feet of tile you couldn’t justify at forty. Frame it like a picture, run it tall, put a quartz upstand around the rest of the kitchen, and you’ll have a range wall that outshines most full backsplashes at two-thirds the price. That’s not a compromise; that’s editing.
Prefer to explore on your own?
See how new flooring looks in your actual room in seconds — free, no signup.
Try the free Floor Studio →