The wall behind your range takes more abuse than any other surface in the kitchen: grease splatter, steam, heat, and the occasional splash of tomato sauce at a rolling boil. A dedicated stove backsplash panel protects that wall, wipes clean in seconds, and gives the cooking zone a finished, intentional look. Whether you want the restaurant feel of brushed stainless or the easy update of a peel-and-stick panel, this guide covers the materials, heat concerns, sizing, and installation so you can pick the right one and put it up yourself.
What a Stove Backsplash Panel Actually Does
A backsplash panel is a single continuous piece, or a small set of pieces, that mounts on the wall directly behind and above the range. Unlike a tiled backsplash made of dozens of small pieces and grout lines, a panel gives you a seamless surface with nothing for grease to hide in. That is the whole appeal behind a stove: you wipe it down and it is clean, no scrubbing grout with a toothbrush.
Panels come in standard heights that fill the gap between the countertop or range top and the underside of the vent hood or the upper cabinets, typically 18 to 30 inches. Widths run from 30 inches to match a standard range up to 36 or 48 inches to cover the full wall section. You can buy them pre-cut or trim them to fit.
Stainless Steel Panels
Stainless steel is the workhorse of stove backsplashes and the material you see in every professional kitchen. It is essentially heatproof, shrugs off splatter, and wipes clean with a damp cloth. A brushed finish hides fingerprints and minor scratches better than a mirror polish. Stainless pairs naturally with a stainless range and hood for a cohesive look.
A pre-cut stainless panel in a common 30-by-30-inch size runs roughly $80 to $200 depending on gauge and finish. Thicker 20-gauge steel feels more solid and dents less than thin 24-gauge budget panels. The main downsides are that it shows water spots and can look industrial in a cottage-style kitchen, but for durability behind a hot range, nothing beats it.
Tempered Glass Panels
Tempered glass backsplash panels have a clean, modern, seamless look and come in painted colors or clear glass mounted over a colored wall. Tempered glass is heat-resistant and easy to clean, and because it is one smooth sheet there are zero grout lines. Back-painted glass in bold colors has become a popular high-end look behind ranges.
Glass panels are the priciest common option, often $150 to $400 or more for a custom-cut piece, and cutting glass yourself is not realistic, so you order it to size. Make sure any glass behind a stove is tempered, not standard annealed glass, because tempered glass handles heat and resists cracking. Installed correctly with a small air gap or heat-rated adhesive, it holds up well.
Acrylic and PVC Peel-and-Stick Panels
For renters and budget updates, acrylic and PVC panels are the easy answer. They come as lightweight sheets or peel-and-stick tiles that mimic subway tile, marble, or metal, and you cut them with a utility knife or scissors. Installation is genuinely a one-hour job with no special tools. A pack covering a stove area runs $20 to $60.
The big caveat is heat. Acrylic and thin vinyl peel-and-stick products are not rated for the direct high heat of a gas burner and can warp, discolor, or in extreme cases melt if placed too close to open flame. Keep them at least a few inches above the burner grate, follow the manufacturer’s clearance, and consider them best for electric or induction cooktops or the upper portion of the wall rather than right at the flame.
Tile Panels and Backsplash Sheets
If you love the look of tile but not the labor, mosaic tile mesh sheets and modern faux-tile panels split the difference. Real tile on mesh backing gives you genuine ceramic durability and full heat resistance, while composite tile-look panels give you the appearance with a fraction of the work. Ceramic and porcelain are the most heat-tolerant materials you can put behind a stove.
Real tile sheets run $5 to $25 per square foot installed as a DIY job, plus thinset and grout. They take longer and require grout sealing, but the payoff is a permanent, heatproof surface that adds resale value. For a middle ground, gel or 3D tile panels offer a raised tile texture with peel-and-stick ease at $8 to $15 per panel.
Heat Resistance and Clearances
Heat is the one factor you cannot ignore behind a range. Stainless steel, tempered glass, ceramic, and porcelain all handle direct heat without complaint. Acrylic, PVC, and vinyl peel-and-stick products do not, so they belong away from the direct flame zone. Always check the clearance your range manufacturer specifies between the burners and any combustible surface.
Gas ranges throw the most heat upward, so they demand the most caution with plastic-based panels. Electric coil and smooth-top ranges are gentler, and induction cooktops barely heat the surrounding air at all, which opens up more material choices. When in doubt, put a heat-safe material like stainless or tile in the direct splatter and heat zone and save decorative panels for above it.
DIY Installation and Cleaning
Most panels install with construction adhesive rated for the material, a bead of silicone at the seams, and sometimes a few screws or J-channel trim for metal panels. Turn off and pull the range out for room to work, clean the wall so the adhesive bonds, dry-fit and mark your cuts, then set the panel and press it firm. A level and a caulk gun cover most jobs. Peel-and-stick options need only a clean, dry wall and steady hands.
Cleaning is where a good stove backsplash panel earns its keep. Stainless and glass wipe down with dish soap and water or a glass cleaner; avoid abrasive pads on stainless to prevent scratches on the grain. Tile needs occasional grout sealing. Whatever you choose, a smooth continuous stove backsplash panel turns the messiest wall in the house into a thirty-second wipe-down, which is exactly what you want behind a busy range.
Matching the Panel to Your Kitchen
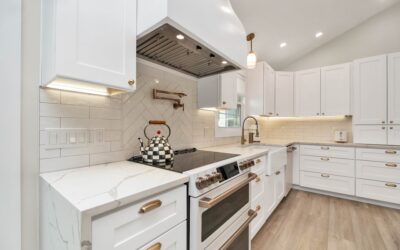
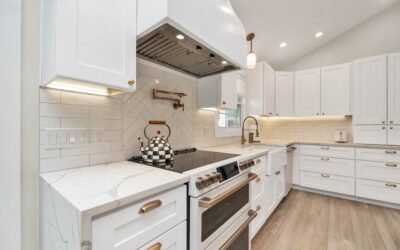
Beyond durability, the panel you choose sets the tone for the whole cooking zone, so match it to the style you already have. A brushed stainless panel looks right at home in a modern or professional-style kitchen with stainless appliances, while back-painted glass in a deep color reads sleek and contemporary. If your kitchen leans traditional or farmhouse, a ceramic subway-tile sheet or a marble-look composite panel will feel far more at home than industrial metal.
Think about how the panel interacts with your countertop and cabinets too. A busy granite counter usually pairs best with a quiet, solid-colored panel so the two surfaces do not compete, whereas a plain quartz counter can carry a patterned tile or textured panel behind the range. Bringing home a sample and taping it to the wall for a day, watching how it looks under both daylight and your evening kitchen lights, saves you from an expensive color mismatch.