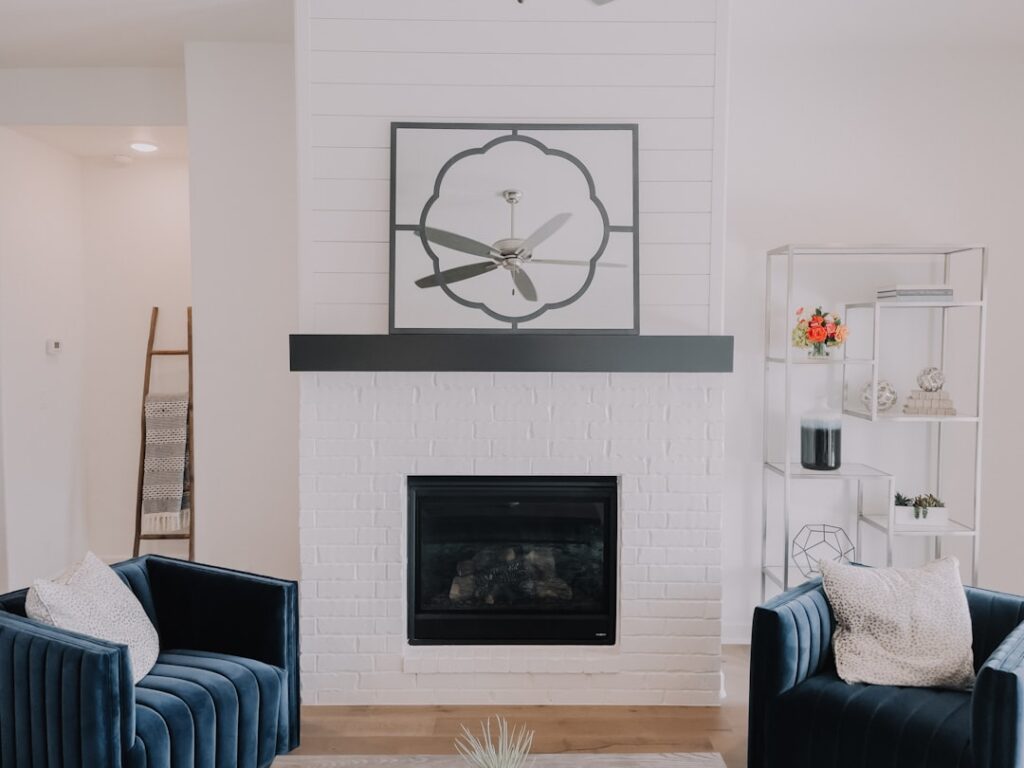
Few weekend projects change a room as fast as a coat of paint on a tired brick surround. When homeowners share painted brick fireplaces before and after photos, the difference is almost always dramatic: an orange-red 1970s wall of brick becomes a crisp white or moody charcoal focal point that makes the whole living room feel newer. I have painted dozens of these over the years, and the transformation is reliable when you prep correctly and pick the right products.
Part of our Paint & Walls guide — explore the full guide →
This guide walks through what actually happens between the “before” and the “after” so you can plan the job, budget realistically, and avoid the mistakes that leave brick blotchy or peeling within a year.
- Why the Before-and-After Effect Is So Strong
- Painted vs. Whitewash vs. Limewash
- What You Need Before You Start
- Step-by-Step: How the Transformation Happens
- How Much It Costs
- Common Mistakes That Ruin the "After"
- Choosing a Color That Ages Well
- Timing and Weekend Planning
- Maintaining the Finish Over Time
- Frequently Asked Questions
Why the Before-and-After Effect Is So Strong
Old brick reads as heavy and dark. It absorbs light, dates the room to whatever decade it was installed, and visually pulls a fireplace forward so it dominates every sightline. Paint reverses all of that. A light color reflects daylight, flattens the busy mortar-and-brick pattern into a single clean surface, and lets the mantel, hearth, and any built-ins read as intentional design rather than leftover masonry.
The most common transformations fall into a few buckets:
- Orange brick to bright white: the classic, highest-contrast makeover that instantly reads modern farmhouse or transitional.
- Red brick to soft greige or “limewash” white: a subtler, still-textured look for people who do not want a solid painted finish.
- Dated brick to deep charcoal or black: a dramatic choice that grounds a room and pairs beautifully with a light wood mantel.
Painted vs. Whitewash vs. Limewash
Not every “painted” fireplace is fully painted, and the finish you choose changes both the look and the reversibility.
Solid paint
Full-coverage latex or masonry paint gives a uniform, opaque color. It hides the brick’s tone completely and is the most durable, but it is essentially permanent unless you want to strip it.
Whitewash
Whitewash is watered-down latex paint (typically a 1:1 or 1:2 paint-to-water mix) wiped on so some brick shows through. It keeps texture and variation, costs almost nothing, and is forgiving for first-timers.
Limewash
Limewash is a slaked-lime product that soaks into the masonry and creates a soft, cloudy, Old-World finish. It is breathable, can be partially rubbed back while wet, and is my favorite for people who want character rather than a flat modern wall.
What You Need Before You Start
Gather everything first so you are not running to the store mid-coat. A typical materials list:
- Masonry or high-quality acrylic-latex paint (1 gallon covers roughly 150-200 sq ft on porous brick)
- Masonry bonding primer if using solid paint
- A stiff nylon brush and a wire brush for cleaning
- Trisodium phosphate (TSP) or a TSP substitute for degreasing
- A 3/4-inch or 1-inch nap roller for texture, plus a 2-3 inch brush for mortar lines
- Painter’s tape, drop cloths, and a spray bottle (for whitewash/limewash blending)
Step-by-Step: How the Transformation Happens
- Clean thoroughly. Vacuum soot and dust, then scrub the brick with a TSP solution and let it dry fully for 24 hours. Paint will not bond to greasy, sooty brick. This single step is why so many before-and-after jobs fail later.
- Repair mortar. Fill any cracks or crumbling joints with mortar repair caulk and let it cure. Painting over loose mortar just seals in a future problem.
- Tape and drape. Protect the mantel, hearth, walls, and flooring. Brick paint spatters more than drywall paint because of the texture.
- Prime (solid paint only). One coat of masonry bonding primer. Work it into the mortar joints with a brush, then roll the faces.
- Apply the first coat. Roll the brick faces and cut in the mortar lines. Expect the porous brick to drink the first coat unevenly. Do not panic; this is normal.
- Apply the second coat. Coverage evens out here. For whitewash, work in 3×3-foot sections, wiping with a rag and misting with water to blend.
- Cure and inspect. Let it cure 24-48 hours before returning furniture or lighting a fire.
How Much It Costs
One of the reasons this project is so popular is the price-to-impact ratio. A DIY whitewash can cost as little as $30-$60 in materials since you are diluting a single gallon. A full solid-paint job with primer and quality masonry paint typically runs $80-$200 in materials for an average surround. Limewash products cost more per gallon, so budget $100-$250.
Hiring a painter changes the math. Expect roughly $400-$1,000 for a professional fireplace paint job depending on height, condition, and your region, with two-story or floor-to-ceiling brick walls landing at the top of that range. Even so, it is one of the cheapest high-visibility upgrades in a house.
Common Mistakes That Ruin the “After”
Learn from the jobs that go wrong:
- Skipping the cleaning. Soot and cooking grease near a kitchen fireplace cause peeling. Degrease every time.
- Using regular wall paint on a firebox. The interior firebox and any brick that gets genuinely hot needs high-heat paint rated to 1,000-1,200°F. Standard latex is fine for the surround, not the firebox.
- Rolling too fast. Thin, patient coats beat one thick coat that drips into the mortar lines.
- Ignoring texture blending. On whitewash, walk back 10 feet often to check for hard stop lines between sections.
Choosing a Color That Ages Well
White remains the safest, most timeless choice, but pick a white with a hint of warmth (a soft off-white or “swiss coffee” tone) so it does not look sterile against warm wood floors. Greige and mushroom tones hide soot better than pure white, which is worth considering for a heavily used wood-burning fireplace. If you want drama, a deep charcoal or near-black surround with a natural oak mantel is a look that has stayed in style for years and photographs beautifully in before-and-after shots.
Timing and Weekend Planning
A single-story brick surround is a realistic one-weekend project for a confident DIYer. Budget Saturday morning for cleaning and repairs, let everything dry, then prime and paint over the rest of the weekend. The waiting between coats is the part people underestimate: masonry primer needs a few hours to set, and rushing the topcoat onto a still-tacky primer is how you get lap marks and uneven sheen. If you are limewashing, plan for slower work because you will be blending and rubbing back sections by hand, which is more forgiving of mistakes but harder to rush.
One pro habit worth adopting: photograph the “before” from the exact spot you plan to shoot the “after.” Same angle, same lighting, same time of day. The comparison not only documents your work, it helps you spot thin coverage or missed mortar lines while the paint is still workable.
Maintaining the Finish Over Time
A painted surround holds up well with minimal care. Dust it a few times a year and wipe smudges with a damp cloth. Near a wood-burning firebox, expect some soot to creep onto the lower brick over the seasons; a mild soap solution lifts it without dulling the paint. Keep a small labeled container of your leftover paint for touch-ups, because a quick dab on a chipped mortar edge keeps the whole surround looking freshly done for years.
Frequently Asked Questions
Is painting a brick fireplace permanent?
Solid paint is effectively permanent; stripping masonry is messy and expensive. Whitewash and limewash are more forgiving and can be partially removed or reworked, especially while still wet.
Can I paint the inside firebox?
Only with high-heat paint rated for at least 1,000°F. Never use standard latex or primer inside the firebox where direct heat and flames occur.
How long before I can use the fireplace again?
Wait at least 24-48 hours for surround paint to cure. For any high-heat paint applied inside the firebox, follow the manufacturer’s cure schedule, which often involves a low initial burn.
Will paint trap moisture in the brick?
Solid latex can reduce breathability. If your brick is on an exterior chimney or shows any moisture issues, limewash is the better choice because it lets the masonry breathe.
How do I clean a painted brick fireplace?
Wipe it with a damp microfiber cloth and mild soap. Avoid abrasive scrubbers that can burnish or scratch the paint film.
The before-and-after payoff is real, and it is one of the few upgrades where a careful weekend of work genuinely modernizes an entire room. Prep well, pick a finish that matches how much texture you want to keep, and your fireplace will look intentional for years.