Nothing dates a living room faster than a dark, mortar-heavy brick fireplace from the 1970s. If you have been scrolling through pictures of tile over brick fireplaces, you already know how dramatically the right tile transforms a room, turning a dated focal point into a clean, modern centerpiece. The good news for DIYers is that you can often tile directly over sound brick without tearing anything out. This guide walks through the looks people love, the tile types that work best, real costs, and the exact process to get a lasting result.
Part of our Tile & Grout guide — explore the full guide →
What Tiled Brick Fireplaces Look Like: Popular Styles
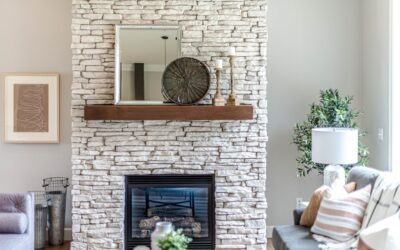
The photos that get saved most tend to fall into a handful of recognizable styles. Picture a floor-to-ceiling stack of matte white 4-by-16 subway tile that makes an eight-foot wall feel taller. Or a moody surround in large-format porcelain slabs that mimic Carrara marble, veining and all, wrapping the firebox in one seamless sweep.
- Modern farmhouse — white or greige subway tile, thin grout lines, often paired with a reclaimed wood mantel.
- Contemporary marble-look — large-format porcelain panels in white with gray veining for a high-end, low-maintenance surround.
- Slate and stacked stone — dark charcoal or multi-tone stone-look tile for a cozy, rustic feel.
- Zellige and handmade look — glossy, slightly irregular square tiles in emerald, terracotta, or cream for texture and character.
- Geometric and picket — elongated hexagon or arabesque shapes for a statement wall around the firebox.
When you browse pictures of tile over brick fireplaces, notice how the tile color plays against the mantel and wall paint. A white surround against a dark accent wall reads crisp and modern, while warm terracotta against off-white plaster feels Mediterranean and inviting.
Can You Really Tile Directly Over Brick?
Yes, in most cases. If the brick is structurally sound, clean, and reasonably flat, you can tile over it. The two obstacles are the uneven surface and the recessed mortar joints. Brick faces are rarely dead flat, and every mortar line is a valley the tile has to bridge. You solve that by skim-coating the brick first or by using a thick-bed mortar to fill the joints as you set tile.
Do not tile over brick that is crumbling, spalling, or damp. Efflorescence, that white powdery residue, signals moisture moving through the masonry, and any tile you set over active moisture will eventually fail. Fix the moisture source first.
Choosing the Right Tile
Porcelain and ceramic are the workhorses for fireplace surrounds because they handle heat well and clean easily. Natural stone like marble or slate looks stunning but needs sealing and is more porous. For the firebox opening itself, check the tile’s heat rating and keep any combustible material, including a wood mantel, the code-required distance from the opening, typically at least 6 inches, and more for deeper mantels.
Large-format tiles cover a brick surround with fewer grout lines and a more upscale look, but they are heavier and less forgiving on uneven brick. Smaller mosaics and subway tiles are more DIY-friendly because they flex around minor surface irregularities.
What It Costs
Tiling a standard fireplace surround is one of the more affordable upgrades in a home. Materials for a typical surround run $150 to $600 depending on tile choice, with budget ceramic near the low end and marble-look porcelain slabs at the top. If you hire a tile setter, expect $500 to $1,500 in labor for a surround, more for a full floor-to-ceiling installation. Compare that to $3,000-plus for a full stone-veneer rebuild and the value is obvious.
Step-by-Step: How to Tile Over Brick
1. Clean and Prep the Brick
Scrub the brick with a wire brush and a TSP solution to strip soot, dust, and grease. Rinse and let it dry completely. Any loose mortar should be scraped out and repointed.
2. Level the Surface
This is the step that makes or breaks the job. Trowel a skim coat of thinset mortar over the brick to fill the mortar joints and knock down high spots, creating a flat plane. Let it cure overnight. For very rough brick, screwing cement backer board over the brick gives you a perfectly flat substrate, though it adds thickness.
3. Plan Your Layout
Dry-lay tiles or snap chalk lines to center the pattern on the firebox. You want cut tiles balanced on both ends, not a sliver on one side. Start from a center line and work outward.
4. Set the Tile
Use a polymer-modified thinset rated for the tile size. Comb it on with the correct notched trowel, back-butter large tiles, and press each tile with a slight twist. Keep spacers consistent and check level as you go. Work from the bottom up, supporting the first row with a ledger board if needed.
5. Grout and Seal
After the thinset cures 24 hours, remove spacers and grout. Use unsanded grout for joints under 1/8 inch and sanded grout for wider joints. Wipe with a damp sponge, buff off the haze, and once cured, seal both the grout and any natural stone tile.
Design Tips From the Field
A few details separate a professional-looking fireplace from an amateur one. Run the tile all the way to the floor or hearth rather than stopping short, which looks unfinished. Choose a grout color that either blends with the tile for a seamless look or contrasts intentionally for a graphic effect, but never leave it to chance. If you are keeping a wood mantel, tile up to and around it cleanly, and add a bullnose or metal edge trim on exposed tile edges so there are no raw, sharp borders.
Grout and Trim Choices That Change the Whole Look
Two small decisions have an outsized effect on the finished fireplace: grout color and edge treatment. For a seamless, high-end appearance with white or marble-look tile, choose a grout that closely matches the tile so the surround reads as one continuous surface. For a crisp, graphic look, especially with white subway tile in a modern farmhouse, a light gray grout defines each tile without being harsh. Avoid stark white grout on a fireplace, since soot and heat will discolor it faster than you expect. A charcoal grout with dark stone-look tile hides ash beautifully and needs less upkeep.
Edges matter just as much. Wherever tile ends at an exposed outside corner, you need a clean finish rather than a raw, sharp tile edge. Your three options are a bullnose tile with a rounded finished edge, a metal profile trim such as a Schluter strip in brushed nickel or matte black, or a mitered edge where two tiles meet at 45 degrees. Metal trim is the easiest for DIYers and adds a subtle modern accent line, while mitered edges look the most custom but demand precise cuts.
Heat, Clearance, and Safety
Because a fireplace generates heat, a few code and safety points are non-negotiable. Confirm your tile and thinset are rated for the temperatures near a firebox, and keep any combustible mantel the code-required clearance from the opening, generally at least 6 inches and more for mantels that project outward. For a wood-burning firebox, the immediate opening surround is best finished in non-combustible materials only. If you have any doubt about clearances on a wood-burning unit, check your local code or ask an installer before you tile, since getting it wrong is both a safety and an insurance issue.
The Bottom Line
The pictures of tile over brick fireplaces that catch your eye are almost all achievable in a single weekend with basic tiling tools and a careful prep phase. The secret is not the tile itself but the flat, clean surface underneath it. Skim-coat those mortar joints, plan your layout so cuts are balanced, and seal your grout, and you will turn a tired brick hearth into the kind of focal point that makes the whole room feel renovated for a few hundred dollars.
Prefer to explore on your own?
See how new flooring looks in your actual room in seconds — free, no signup.
Try the free Floor Studio →