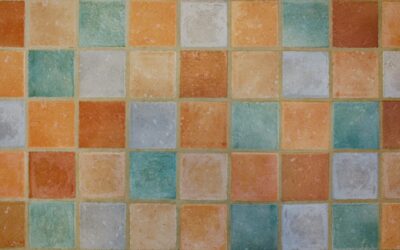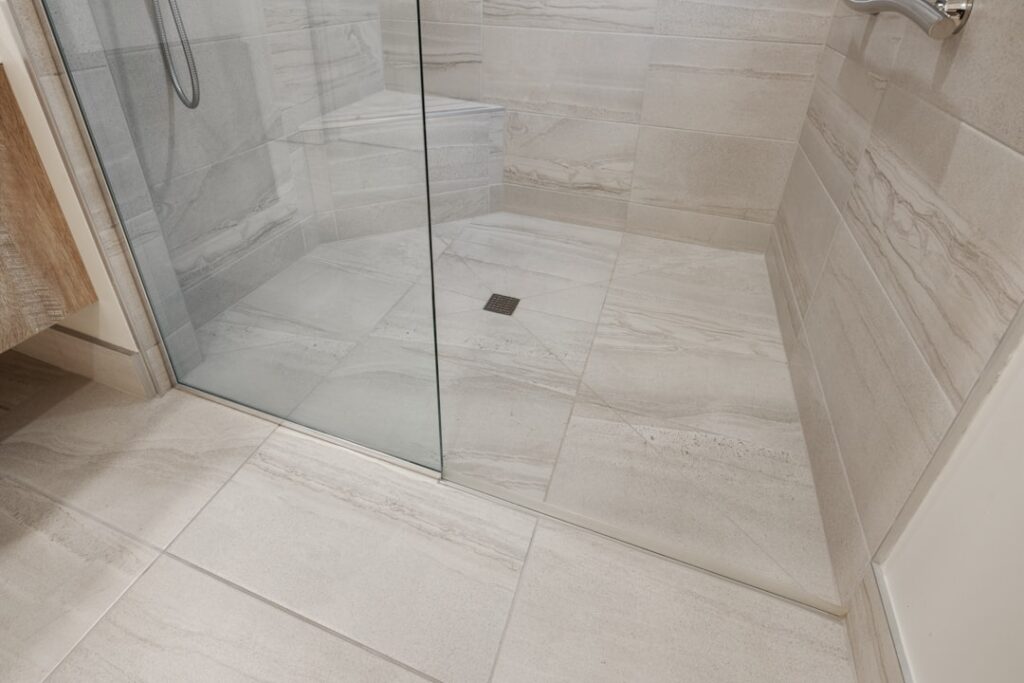
Planning a bathroom remodel usually starts with a folder of inspiration, and browsing pictures of tiled walk in showers is where most homeowners fall in love with an idea before they ever pick up a trowel. The challenge is translating those glossy images into choices that work in your space and budget. Having designed and built dozens of custom showers, I want to walk you through the design elements those photos are really showing you, from tile size and color to niches, benches, and layout, so you can plan a space that looks as good as the inspiration and performs for decades.
Part of our Bathroom Remodeling & Flooring guide — explore the full guide →
- The Appeal of the Open Walk-In Shower
- Choosing Tile Size, Material, and Finish
- Color Palettes That Photograph Beautifully
- Layouts and Tile Patterns That Add Interest
- Built-In Niches and Shelving
- Benches, Curbs, and Practical Finishing Touches
- Budgeting and Getting the Look for Less
- What a Walk In Shower Remodel Actually Involves
The Appeal of the Open Walk-In Shower
What draws people to walk-in showers is the sense of openness. Removing the tub and swapping a bulky curtain for a frameless glass panel, or no door at all, makes even a modest 5-by-8-foot bathroom feel larger and more spa-like. The tile becomes the star because there is nothing to hide it, which is exactly why these showers photograph so beautifully.
Picture a fully tiled enclosure where the same large-format porcelain runs across the floor, up the walls, and into the shower without interruption. That continuity tricks the eye into reading the room as one uninterrupted space. It is a look that reads as high-end, yet it is achievable in a standard alcove if you plan the tile layout carefully.
Doorless or curbless designs push the effect further. When the shower floor sits flush with the bathroom floor and shares the same tile, the boundary disappears entirely. That barrier-free approach is also genuinely practical for aging in place, making it one of the most future-proof choices you can make.
Choosing Tile Size, Material, and Finish
The pictures you admire are often carried by a single decision: tile size. Large-format tiles, say 12-by-24 inches or bigger, create fewer grout lines and a calm, modern surface that reads as luxurious. Smaller subway tiles at 3-by-6 inches give a classic, textured look, while mosaic tiles under 2 inches shine on shower floors because their many grout lines add crucial slip resistance underfoot.
Porcelain is the workhorse material for most walk-in showers, offering low water absorption, hardness, and a huge range of looks, including convincing marble and wood-plank imitations. Natural stone like marble and travertine delivers unmatched depth and veining but demands regular sealing and gentle, pH-neutral cleaning. Glass and ceramic accent tiles bring color and sparkle where you want a focal point without tiling an entire wall in a pricier material.
Finish matters as much as material. A polished wall tile bounces light and looks glamorous, while a matte or honed floor tile provides the traction you need where water pools. Many of the most striking shower photos pair a glossy wall with a matte floor in a coordinating tone, marrying beauty and safety in one scheme.
Color Palettes That Photograph Beautifully
Neutral palettes dominate the most timeless shower images for good reason. Soft whites, warm greiges, and gentle grays create a serene backdrop that will not feel dated in ten years and lets fixtures and greenery pop. A white subway tile with light gray grout remains one of the most requested and versatile combinations I install.
For homeowners who want drama, darker schemes have surged in popularity. Charcoal, deep navy, and matte black tiles paired with brushed brass or black fixtures produce the moody, sophisticated look filling design feeds right now. These deeper tones work best in bathrooms with good natural light or generous LED lighting so the space does not feel closed in.
Grout color is a quiet but powerful lever. Matching grout to the tile creates a seamless, monolithic surface, while contrasting grout highlights the tile pattern and turns a simple subway layout into a graphic feature. When you study a photo you love, look closely at the grout, because it often explains why the whole wall works.
Layouts and Tile Patterns That Add Interest
The same tile can feel completely different depending on how it is laid. A straight stack of rectangular tiles gives a clean, contemporary grid, while the traditional running-bond offset softens the look and hides minor wall imperfections. Vertical stacking makes a low ceiling feel taller, a trick worth remembering in older homes with 7-foot ceilings.
Patterned layouts create the wow moments in shower photography. Herringbone and chevron arrangements add movement and craftsmanship, especially on a single accent wall behind the fixtures. A vertical band of mosaic or a stripe of contrasting tile at eye level draws the gaze and breaks up an otherwise plain expanse.
Consider mixing scales for depth. Pairing large-format tile on the main walls with a small hexagon or penny-round mosaic on the floor is a classic combination that balances easy maintenance up high with grippy safety down low. That interplay of sizes is one of the most reliable ways to make a modest shower look custom.
Built-In Niches and Shelving
Almost every polished shower photo hides a well-planned niche. A recessed shelf built into the wall studs gives you a place for shampoo and soap without a dangling caddy, and it becomes a design feature when you line it with an accent tile or the same mosaic used on the floor. I typically frame a niche around 12 to 14 inches wide and set it at roughly chest height, between 48 and 60 inches off the floor.
Positioning matters for both looks and function. Place the niche on a side wall away from the direct spray so shelved items dry between uses, and align its top or bottom edge with a horizontal grout line for a clean, intentional finish. A single generous niche usually looks better than several small ones scattered across the wall.
Some designs favor a slim horizontal ledge running the width of the shower instead of a boxed niche. That continuous shelf offers ample storage and a strong architectural line, though it requires a slight slope so water drains rather than pools. Either approach beats a suction-cup basket that inevitably falls in the middle of the night.
Benches, Curbs, and Practical Finishing Touches
A built-in bench transforms a shower from purely functional to genuinely comfortable, offering a spot to sit, shave, or rest. Full-width benches around 17 to 19 inches high mirror standard seat height and can be clad in the floor tile to tie the space together. Where floor area is tight, a floating corner bench or a fold-down teak seat preserves openness while still giving you a perch.
The curb, or its absence, defines the shower’s character. A low tiled curb contains water simply and reliably, while a curbless design demands precise floor sloping and a linear drain but delivers that coveted seamless, barrier-free look. Linear drains also allow large-format floor tile in the shower because the floor pitches in a single direction rather than toward a central point.
Finishing details separate a good shower from a great one. Coordinate your fixtures, glass hardware, and any metal tile trim in a single metal tone, use quality trim or a bullnose edge where tile meets drywall, and light the space well so the tile you agonized over actually shows. Study your favorite pictures with these elements in mind, and you will start seeing the deliberate choices behind every beautiful walk-in shower, ready to recreate them in your own home.
Budgeting and Getting the Look for Less
A fully tiled walk-in shower is one of the more involved bathroom projects, and the pictures rarely tell you what the finished space cost. As a rough guide, a professionally tiled shower runs anywhere from $2,500 to $6,000 or more depending on tile selection, square footage, and labor rates in your area. Natural stone and intricate patterns sit at the top of that range because they demand more material, more time, and a more skilled installer.
The good news is that you can capture the high-end look without spending at the high-end level. Use an affordable large-format porcelain, which often costs $3 to $8 per square foot, across the main walls and reserve a pricier marble mosaic or handmade accent tile for a single feature strip or the niche interior. That strategic splurge draws the eye to a small area and lets the budget tile do the heavy lifting everywhere else.
Where you spend your labor budget matters too. Waterproofing behind the tile is not the place to cut corners, because a failed pan or wall membrane means tearing the whole thing out. Save instead by choosing a simpler running-bond layout over a fussy herringbone, keeping the shape rectangular rather than adding curves, and doing your own demolition and prep if you have the skills. Those choices trim thousands without touching the finished appearance.
What a Walk In Shower Remodel Actually Involves
The pictures show the finished result, but a walk in shower remodel is a sequence of hidden steps that determine whether that tile stays beautiful. Knowing the process helps you plan the budget, set a realistic timeline, and ask contractors the right questions.
The Remodel Step by Step
- Demolition. The old tub or shower, wall tile, and backer board come out, usually down to the studs and subfloor.
- Rough plumbing. The drain is relocated or converted, often to a linear drain, and the valve is set at the new height.
- Framing and floor prep. Niches and benches are framed, blocking is added for grab bars and glass, and the shower floor is sloped.
- Waterproofing. A sheet or liquid membrane covers the pan, walls, and niches, followed by a flood test.
- Tile, grout, and sealant. Tile goes on, grout cures, and flexible sealant goes in the corners and change of plane.
- Fixtures and glass. Trim, shower heads, and the glass panel are installed last, since glass is measured after tile.
Typical Timeline
Expect roughly one to three weeks of active work for a standard tub-to-shower conversion. Demolition and rough-in often take two to four days, waterproofing and a 24-hour flood test add another two, and tiling runs three to seven days depending on size and pattern. Custom glass frequently takes one to two weeks to fabricate after the tile is done, so many homeowners live with a temporary curtain for a short stretch.
Budget Tiers
Beyond the tile work itself, a full remodel includes demolition, plumbing, waterproofing, and glass. These are typical ranges and vary widely by region.
| Tier | Typical total | What it usually includes |
|---|---|---|
| Basic | $5,000 to $9,000 | Existing drain location, porcelain tile, standard glass panel |
| Mid-range | $9,000 to $16,000 | Linear drain, niche and bench, upgraded valve, frameless glass |
| High-end | $16,000 and up | Curbless floor, natural stone, multiple heads, steam or custom glass |
Curb vs Curbless: The Construction Difference
A curbed shower builds the slope on top of the existing subfloor, so it is simpler and cheaper. A curbless shower needs the floor dropped so the pan can slope while the entry stays flush. On wood framing that often means recessing or notching joists or installing a pre-sloped recessed tray, which adds cost and requires care to keep the structure sound. On a concrete slab, the slab may need to be cut and lowered.
Whichever you choose, waterproofing is the step you cannot see and cannot skip. Ask how the pan will be sloped, which membrane system will be used, and whether a flood test is included. Any work that moves drains or supply lines, alters joists, or adds lighting or a steam generator should be handled by a licensed plumber, electrician, or contractor, with permits pulled where your local code requires them.